


The process of writing your course looks like this:
- Getting ready to write your course
- Planning your course sections and lessons
- Writing the content of your lessons
- Refining your course content
- Getting everything ready for filming
1. Getting ready to write your course
Let’s explore tips to write efficiently, and create a solid outline which will make your writing process easier later on.
Set up the right environment for writing
To write effectively, you first need the right environment around you.
When creating your course, you will have to juggle between using 3 spaces:
- Your physical space
- Your digital space
- Your mental space
Taking a few minutes to clean up each of them is well worth it.
Improving your physical space
Try to clean up your environment, and reduce friction.
A good first step is to store / hide / throw away anything that is sitting on your desk but is not directly useful for your current project of writing the course. Writing is hard! If you have a bunch of distractions lying around, you might find yourself suddenly itching to pay that bill (that could easily have been left for tomorrow).

Improving your digital space
You are about to spend a lot of time sitting at your computer, sweating to turn your idea into an actual course. But let’s be honest: most people’s computers are even messier than their desks.
It’s probably a good idea to channel your inner Marie Kondo and spend a few minutes decluttering.
Start with getting rid of all notifications. Just do it. At least for the time you’ll be writing.
Then hide away all files and apps that you don’t need for the course - just like you did with your desk.

Finally, pick a writing app. It’s best to start with something where you won’t be distracted by the formatting, so avoid writing straight into PowerPoints. You’d spend hours fiddling with margins and font size.
We recommend starting with an outlining app like Dynalist. The formatting is dead simple and the infinitely nested collapsible bullets make it easy to have your whole course in a single document.
When you are done, you can just paste the bullets into PowerPoint, Keynote or Google Slides. Some people even present straight from the Dynalist, and it comes out pretty well!
Improving your mental environment
You can clean your desk and computer all you want — but sometimes it doesn’t even matter. The worst distractions are in your own brain!
We’re not saying you need to become a monk and go meditate under a freezing waterfall before you start your course — but you might want to think about cutting back on some of your usual entertainment while you tackle this important writing project.
We've found that getting rid of social media and Netflix for a few weeks does give us a clearer head. And let’s not kid ourselves: we are not missing that much.

Remaining disciplined and motivated while writing
It’s common to face writer’s block when writing a book, making videos, or creating a course.
The counterintuitive solution is to stop caring so much about quality and get a first draft done. As they say in Hollywood “we’ll fix it in post”. Here’s Steven Pressfield, author of historical fiction, non-fiction, and screenplays:
“How many pages have I produced? I don’t care. Are they any good? I don’t even think about it. All that matters is I’ve put in my time and hit it with all I’ve got. All that counts is that, for this day, for this session, I have overcome Resistance.”
Steven Pressfield / The War of Art
Pressfield refers here to his famous enemy “Resistance”, a universal force that acts against human creativity.
For example, you might want to write a book, start your own business, or completely change careers but… you're worried you don't have enough talent. Or enough time. Or people will think it's stupid.
This is Resistance in action.
The thing about Resistance is that it can’t actually stop you. It’s a voice that whispers in your ear — but if you ignore the voice and get to work, the work will get done.
When creating and planning your course material, we recommend scheduling 2 hours every day to build a solid writing habit. Commit to it now. Later on, you might start doubting everything about the project, but that’s just Resistance talking. Keep moving forward until you get it done, even when it seems dumb and pointless.
2. The structure of a useful course
Effective online courses are action-oriented.
This means setting clear objectives while avoiding to fall into traps like:
- Too much theory and concepts without concrete examples
- Sections or lessons with no specific objective for the student
If we zoom out of an online course, we see that it is divided into several parts:
Your course contains → course sections, which contain → lessons which contain → action steps

How to structure your course sections
Ideally, each section should not only have a unity of topics covered (that’s easy!) but also a unity of action, so each lesson builds further on the same skills. At the end of each section, your student should feel that they are one big step closer to their ultimate goal.
In terms of structure, this is pretty simple:
Introduction of a section
- What the section will cover
Give a quick overview of the section’s contents. - Why is learning this important?
Instead of just telling your students why something is important, you can use storytelling to make it more engaging and relatable. - Why are they learning it right now, and what are the goals of this section?
Think of where they are in their learning journey, and where you want them to be by the end of the section. - What should they know before getting started, and which tools do they need?
Help your students set up the right environment for learning and getting results. - Manage expectations
Clarify what your students should expect out of this section by remaining realistic and encouraging. You can also give them warnings and important notes about the topics you will cover.
The lessons of the section
- Each lesson is about a single concept or big idea
If you have several related ideas, you can just break them into a sequence of lessons. Those perform much better than gigantic mega-lessons. - We recommend having 5 to 10 lessons per section
In the same way as above, if your section has 25 lessons, could it possibly be split in two?
At the end of a section
- Let your students celebrate their wins
By encouraging them to share their results in a community, by congratulating them on their progress or by simply helping them realize the progress they made in a satisfying way.
For example, you could ask your students to practice the skill you are teaching, and compare their current performance with the one they had at the beginning of the course.
You can add additional resources to each section. Here are a few examples:
- Detailed checklists
- Tables to complete
- Documentation and templates
Now that you understand how to create great course sections, let’s get to writing them:
<p class="tip">💡 Quick tip
We generally aim to keep each lesson below 20 minutes, and each section below two hours (3 to 10 lessons). The course can contain as many sections as necessary, but might get unwieldy over 10 sections. You could then think about breaking your topic into different courses if you think that you are building a course that is too ambitious (and sell them in a bundle or separately).</p>
<div class="warning">⚠️ What about the introduction to my course?
You do not need to write the introduction of your whole course yet. This is something that will be covered after you finish writing your first section as it’s easier to do once you have already put at least one section together.</p>
How to create engaging lessons
Let’s zoom in on your course and look at what makes a lesson that brings results.
Each lesson generally covers one concept or big idea. If you are thinking of breaking a topic into two lessons, do it! It’s generally easier to work with (and follow along) lessons that are below 20 minutes.
During each lesson, your students will go through 2 phases:
- The learning phase, during which your student will acquire new knowledge; This phase is generally composed of passive learning material.
- The doing phase, during which your student will apply what they’ve just learned; This phase is composed of active learning methods.
Reminder: the passive & active teaching methods

If you encourage students to take action immediately at the end of each lesson, your course will be more engaging and bring better results.
Let’s look at how to prepare for the learning and doing phase more in detail.
Teaching effectively during the learning phase
For the learning phase, we recommend making videos of you talking over slides. Film yourself if you are comfortable doing that. You can then alternate between yourself and the slides in your video editing software — or just stick your facecam into a corner and leave the slides front and center the whole time.
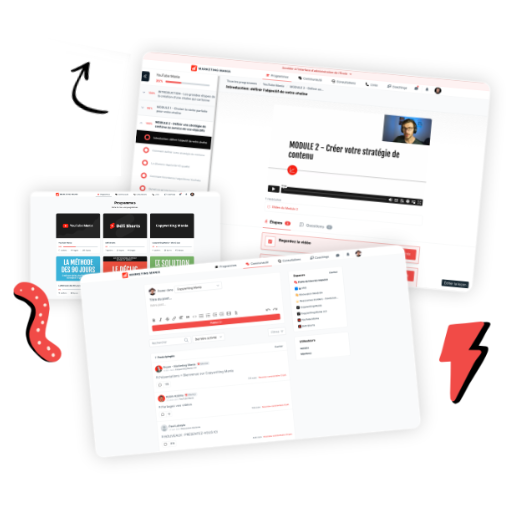
With a tool like SchoolMaker, you have other options: you can also add long-form text, PDFs, audios, or embed other tools in your lessons.

Let’s look at the optimal structure when preparing the learning phase of your lessons:
- Today’s lesson will cover
Quickly present the lesson and its contents - Managing expectations
Clarify what your students should expect out of this lesson by remaining realistic and encouraging. You can also give them warnings and important notes about the topics you are about to cover. This can be the moment to use parts of your story that mirror your student’s journey. - The What
Present the concept or big idea of this lesson. - The Why
Explain why it's important, and why they’re learning it now. - The How
How to do it (you can use a tutorial, demonstration, procedure, provide an action plan, etc.). - Examples
Illustrate with different examples (corresponding to the different situations they might encounter) - What if
What are the common mistakes to avoid, and what are their consequences? - Conclusion & Summary
Provide a recap of what they just learned, and summarize the key points of the lesson.
You can of course play around with this structure as you wish!
After the learning phase comes the most important part (which, sadly, most course creators completely forget about): getting your student to take action.
Getting your student to take action
Each lesson should end with some kind of action step for your student.

Here are a few examples:
- Check out a resource
Additional resources can help your students progress faster. - Apply what they just learned through assignments or tasks
This is the best way to help your students make progress, they learn by doing! - Complete a quiz
Quizzes allow you to see if your students understood the lesson correctly, and help them remember what you taught them. - Answer a question in a text prompt, which allows them to better internalize new knowledge and show that they understand what they just learned.
- Share their progress, ask feedback, or help someone in the community
Interacting with other students in the community will help your students feel part of a supportive group, and it will encourage peer to peer learning.
With SchoolMaker, the action and learning phases are seamlessly integrated because you can add different kinds of “steps” to complete before moving on to the next lesson.

3. Writing the content of your lessons
When you are writing your course's contents, you don’t need to write down every single word you will say. This takes A LOT longer than just writing bullet points, and it’s hard to not be boring when reading a script word-for-word.
It shouldn’t take too much time to write. If you are spending around 2 hours a day on writing a section's contents, it shouldn’t take you more than 5 days. If you think that it will take you more than 5 days, maybe you can split this section to make it easier for you.
The sweet spot of length for each lesson is between 10 and 20 slides, which will get you a lesson that lasts between 5 and 20 minutes. Keep that in mind while writing your lessons to ensure that following them will be an enjoyable experience.
(can change CTA here to "start free trial")


