


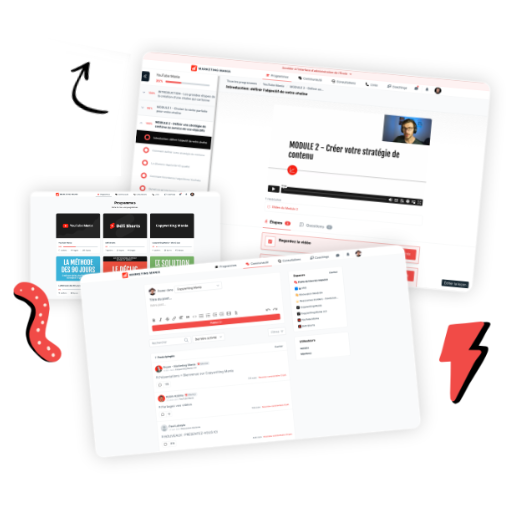


1. Creating an optimal environment for recording
There are 5 things you need to create your videos:
- Sound
- Lighting
- Camera
- Recording software
- Editing Software
We prepared a list of gear and tools that we usually use when recording videos for courses. If you are on a budget, no worries, we also looked up cheap but solid options!
Sound
Good sound is the most important element of your video — it’s even more critical than image quality. So if you’re hesitating between buying a microphone and a camera, you should go with the microphone.
Here is a quick example if you’re not convinced:
If your video is mainly going to be you talking over slides and showing examples on the computer, we recommend using a USB microphone, so you can connect it to recording tools like OBS and make your editing process easier.

A very solid camera microphone
Type: Camera Microphone
Price: $299

Bang for you buck camera mic
Type: Camera Microphone
Price: $70

A solid USB microphone
Type: Camera Microphone
Price: $169

Bang for you buck USB mic
Type: USB Microphone
Price: $79
Lighting
Having a well-lit face is also more important than the camera quality. If you already have a well lit environment (sitting close to a big window helps a lot), you may not need fancy lighting, especially if your course will mostly be you reading slides and will look like this:
But if you already are experienced with creating videos, and want to have a lot of talking heads in your course, then it can make sense to spend a bit of time making your video lighting better, this video can help:

Options for all budgets

Quality options
Camera
If you are mostly going to be reading slides in your course, then you probably don’t need a fancy camera, a good HD webcam will do. It will actually be more convenient to record with a webcam than a camera because you won’t have to import additional footage from an SD card into your editing software.
Also, keep in mind that buying a camera is going to be more expensive, as you may have to buy lenses, tripods, or additional accessories to make it work.
Here are a few webcam and camera recommendations:

Great option if it films in 1080p+
Type: Smartphone
Price: Free

A solid facecam for your course
Type: Facecam
Price: ≈ $170

Great value facecam
Type: Facecam
Price: ≈ $70

Great professional camera
Type: Camera
Price: ≈ $1 200

Great value camera
Type: Camera
Price: ≈ $700
Tripods
If you are buying a camera or using your phone, you will probably need a tripod to hold them in place.

Budget tripod for small spaces
Type: Smartphone tripod
Price: $20

Simple budget tripod
Type: Smartphone / Camera
Price: ≈ $23

Solid option from Amazon
Type: Smartphone / Camera
Price: $90

A fancy option (a bit overkill)
Type: Smartphone / Camera
Price: ≈ $150
Recording Software
All of these tools allow you to record your screen and your webcam at the same time, which will make your editing process easier if you are using a webcam, or if you manage to use your camera as a video source in a tool like OBS by using the OBS virtual cam plugin.
Great free option
Compatibility: Win, Mac, Linux
Price: Free

A bit old, but works well
Compatibility: Win, Mac
Price: ≈ $65

My personal favourite!
Compatibility: Mac OS only
Price: $29
A great and affordable option
Compatibility: Win, Mac
Price: $8 per month
If you are using OBS, we recommend following the following tutorial to add your face at the top right hand corner of your screen.
2. Recording your videos
We recommend first trying out the recording and editing processes on a short video such as the introduction.
This will help you get comfortable with the recording and editing processes — and you’ll avoid losing too much time in case you mess something up. Like forgetting to select the correct microphone in the recording software (which happened to us more times than we can count).
Here are some tips to be the best presenter you can be:
- Avoid reading your text or slides
The slides are here to give you structure, and help your students follow along. No need to read them word for word. - Be energetic
It’s obviously much more exciting to follow a course from someone who has great energy. If it helps, you can film after drinking a cup of coffee! - Avoid saying “Um” and “Ah”
Saying these too much can make you sound unsure of yourself, and it can make your editing more tedious. It is actually better to just leave a silent pause: you can edit it out later, whereas “ums” and “ahs” can be tough to remove from the middle of a sentence. - It doesn’t need to be perfect
You can always change your course material or a video that you don’t like if you’re really not happy with it. Don’t fall into the trap of perfectionism or try to record the same lesson over and over, especially if that’s your first course.
Once you finish your introduction video, you should have the audio and video files that you need for editing your lesson.
<p class="tip">💡 What do I have to record exactly?
You usually will have to record 3 different things:
1. Your screen, using a screen recording tool
2. Your sound, using your microphone
3. Your facecam, using your smartphone, camera, or webcam
Depending on the tools you got, your recording process will be more or less complex. For example, if you are not using a webcam + microphone or a camera microphone to record high quality audio as you film your screen capture, you will need to sync your microphone sound with the video in your editing software.</p>
3. The editing process for your videos
You can use any editing tool you are comfortable with to edit your course, but this process was created for DaVinci Resolve as it is a solid option available on Windows, Mac, and Linux.
Why this process?
This process ensures a standard of quality and efficiency in the editing of your videos and meets the expectations of your audience and your most loyal fans.
You can apply it yourself, or ask an employee to apply it.
Step 0 - Setup
Each editing step will have a small checklist that will reset as you refresh the page so you can use it again easily. You will only need to apply step 0 once.
<p>{{cb-form}}</p>
<p class="cb-p">Download and install DaVinci Resolve from the BlackMagic Design website (latest version recommended)</p>
<p>{{cb-form}}</p>
<p class="cb-p">Download the “Cam Top Right.settings” file that I prepared for you by clicking here and move it inside of the following folder:</p>


<p class="warning"> ⚠️ What to do if I don’t have a “Templates” file?
If your "Templates" folder is empty, you will have to create an "Edit" folder in the "Templates" folder and an "Effects" folder in the "Edit" folder. You will then have to drag the "Cam Top Right.settings" file into the "Effects" folder</p>
Organizational tips
<p>{{cb-form}}</p>
<p class="cb-p">Structure and organize your video files and screenshots on your computer:</p>
<p>{{cb-form}}</p>
<p class="cb-p">And do the same on DaVinci Resolve:</p>
Keyboard shortcuts to configure:
<p>{{cb-form}}</p>
<p class="cb-p">Download the "Course Keyboard Settings.txt" file here.</p>
<p>{{cb-form}}</p>
<p class="cb-p">To configure your keyboard shortcuts, create a project on DaVinci, and go to [DaVinci Resolve > Keyboard Customization > … > Import Preset > Select "Course Keyboard Settings.txt" ] like in the following GIF:</p>
Settings for better performance
<p>{{cb-form}}</p>
<p class="cb-p">Timeline Proxy Resolution → Quarter</p>
<p>{{cb-form}}</p>
<p class="cb-p">Render Cache → User</p>
Quick intro to DaVinci Resolve
DaVinci Resolve has several tabs:
In our case, we will only use the Edit and Deliver tabs to go faster.
<p>{{cb-form}}</p>
<p class="cb-p">Click on your Edit tab, activate the single viewer mode and activate the inspector as in the GIF below:</p>

Step 1 - Video Preparation
<p>{{cb-form}}</p>
<p class="cb-p">Create a project or open the DaVinci Project of the video you are currently creating. Go in the Edit tab, open the Media Pool, and drag your files into it.</p>
<p>{{cb-form}}</p>
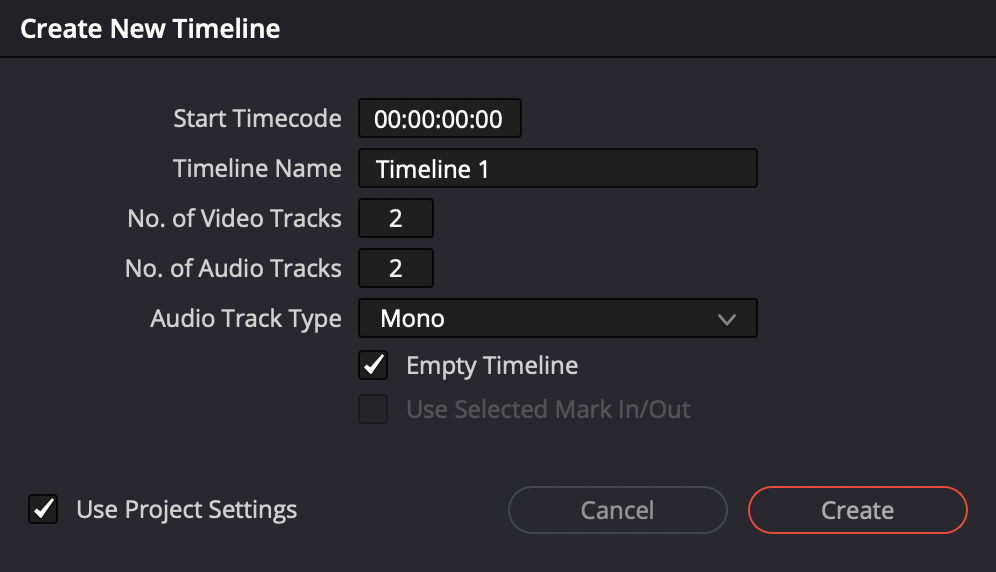
<p class="cb-p">Create a new timeline with [Cmd + N] and choose the following parameters:</p>
Step 2 - Synchronization
Depending on what tools you used to film your course, you will be able to skip some tasks in the synchronization process.
The following tasks are created as an example of what someone with the following files:
- A screen recording with sound from my microphone (most screen recorders allow you to connect your microphone in their settings).
- A Facecam, coming from a camera, but with poor quality sound.
Let's get started.
<p>{{cb-form}}</p>
<p class="cb-p">Drag and drop your content on your timeline (facecam on outside tracks).</p>
<p>{{cb-form}}</p>
<p class="cb-p">Increase the size of your sound tracks to see the waveforms so you can synchronize them better.</p>
<p>{{cb-form}}</p>
<p class="cb-p">Use the template I made for you to move your facecam in the top right hand corner like on the following GIF:</p>
- Open the effects library
- Select [Toolbox > Effects]
- Drag and drop the “Cam top Right” effect on your facecam
<p>{{cb-form}}</p>
<p class="cb-p">Synchronize the sound and video of the facecam and the screen capture:</p>
- By listening to both at the same time (you can use the space bar to play / pause
- By aligning the waveforms of the audio tracks
<p>{{cb-form}}</p>
<p class="cb-p">Cut out the part at the beginning of your content that is unnecessary by using [Backspace].</p>

<p>{{cb-form}}</p>
<p class="cb-p">Check if the sound is still synchronized on the 2nd half of each clip. If needed, make a cut in the middle and readjust the audio and video sync.</p>
Finishing touches for the synchronization
<p>{{cb-form}}</p>
<p class="cb-p">Select all tracks and press [Cmd + Alt + L] twice to unlink them all.</p>
<p>{{cb-form}}</p>
<p class="cb-p">Select the synchronization audio track of lower quality (normally the one coming from your camera), and deactivate it with the [D] key.</p>
<p>{{cb-form}}</p>
<p class="cb-p">Select all active tracks, and press [Cmd + Alt + L] once to link them together.</p>
Step 3 - Sound
Time to improve your video's sound.
<p>{{cb-form}}</p>
<p class="cb-p">Open the Effects Library, go to [Audio Effect > Fairlight FX], and add the following audio effects to your entire audio track:</p>
- De Esser (default settings)
- Vocal Channel (with High Pass enabled or not, according to your preference)
- Multiband Compressor (default settings)
<p>{{cb-form}}</p>
<p class="cb-p">Increase or decrease the sound in the Mixer for it to be in the yellow when you talk.</p>
Step 4 - Cutting
Using your mouse and the shortcuts [Z, X, C] that I prepared for you:
<p>{{cb-form}}</p>
<p class="cb-p">Remove obvious gaps in your video.</p>
<p>{{cb-form}}</p>
<p class="cb-p">Remove mistakes, stutters and screw-ups (it doesn't need to be as polished as a YouTube video, especially if you are starting out).</p>
Tip: You can also use the speed-up mode by pressing the [L] button to navigate faster in your video
<p>{{cb-form}}</p>
<p class="cb-p">Replay your video in speed-up mode once you've finished the cut to listen to your finished video again and correct things you may have forgotten to cut.</p>
[Z, X, C] Shortcut information:

Step 5 - Exporting
Time to export the video.
<p>{{cb-form}}</p>
<p class="cb-p">In the Deliver tab, do the following things:</p>
- Choose the YouTube or Vimeo 1080p export setting
- Enter the Number of your lesson and its title as Name
- Choose the MP4 Format
- Click on Add to export list
- Choose where you want to put this edited video, we advise you to put all edited videos in the same place
- Then click on Render All on the right
This is the end of the editing process 🎬
4. Batch filming your course sections
By now you should be more comfortable recording and editing, so it’s time to record your first course section.
The same advice as in part 2 applies here, but we recommend recording all your section’s lessons in a row. You’ll save a lot of time over starting and stopping (and setting up your equipment every time!).
After pre-launching your course with your first section only, you can come back to this chapter to create your other sections.
For now, you are ready to create your online school and upload your completed first section.
(can change CTA here to "start free trial")


