


To get started, start your free trial by clicking here.
How to setup your online school
Part 1: Configure general settings
Once you started your free trial, you are ready to configure your school.
Go on the cog icon at the top right hand corner of your school. ⚙️

You can now start configuring your online school by completing the following elements:

After completing these fields, click on the "Save" button and scroll down.
You will see the following toggles, I recommend activating the 3 of them to make the community experience richer for your members:
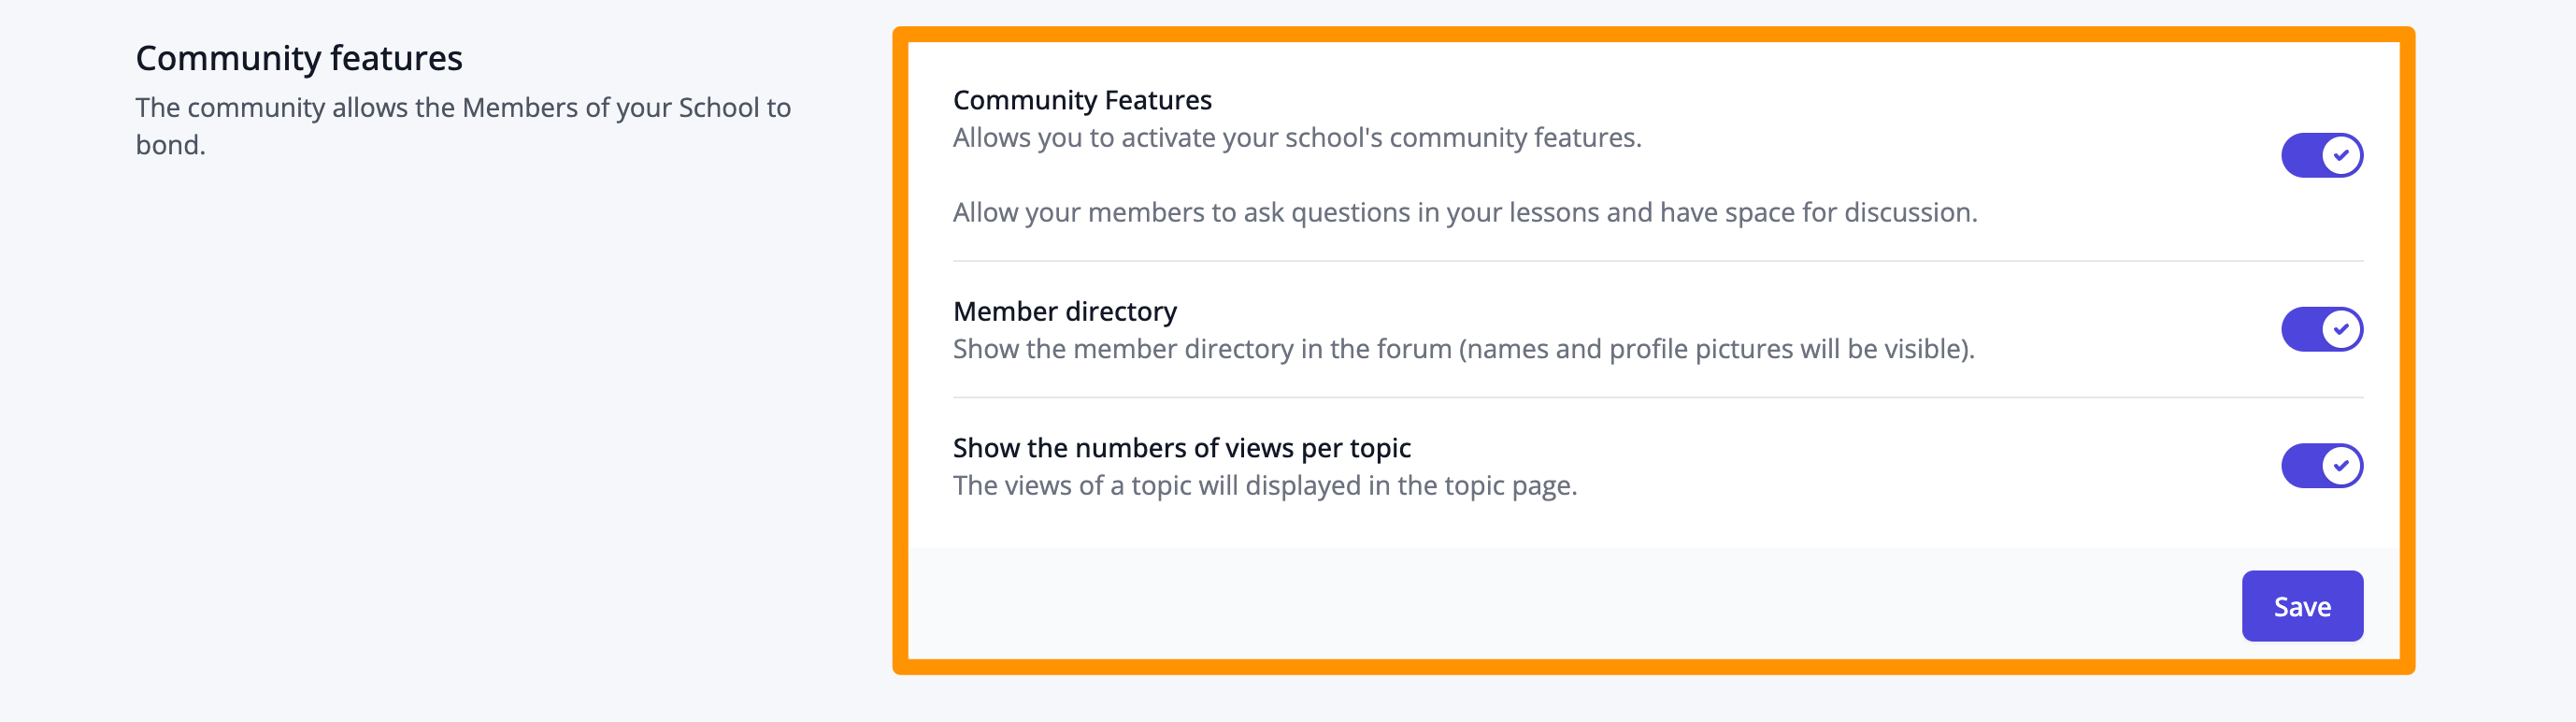
After completing these fields, click on the "Save" button.
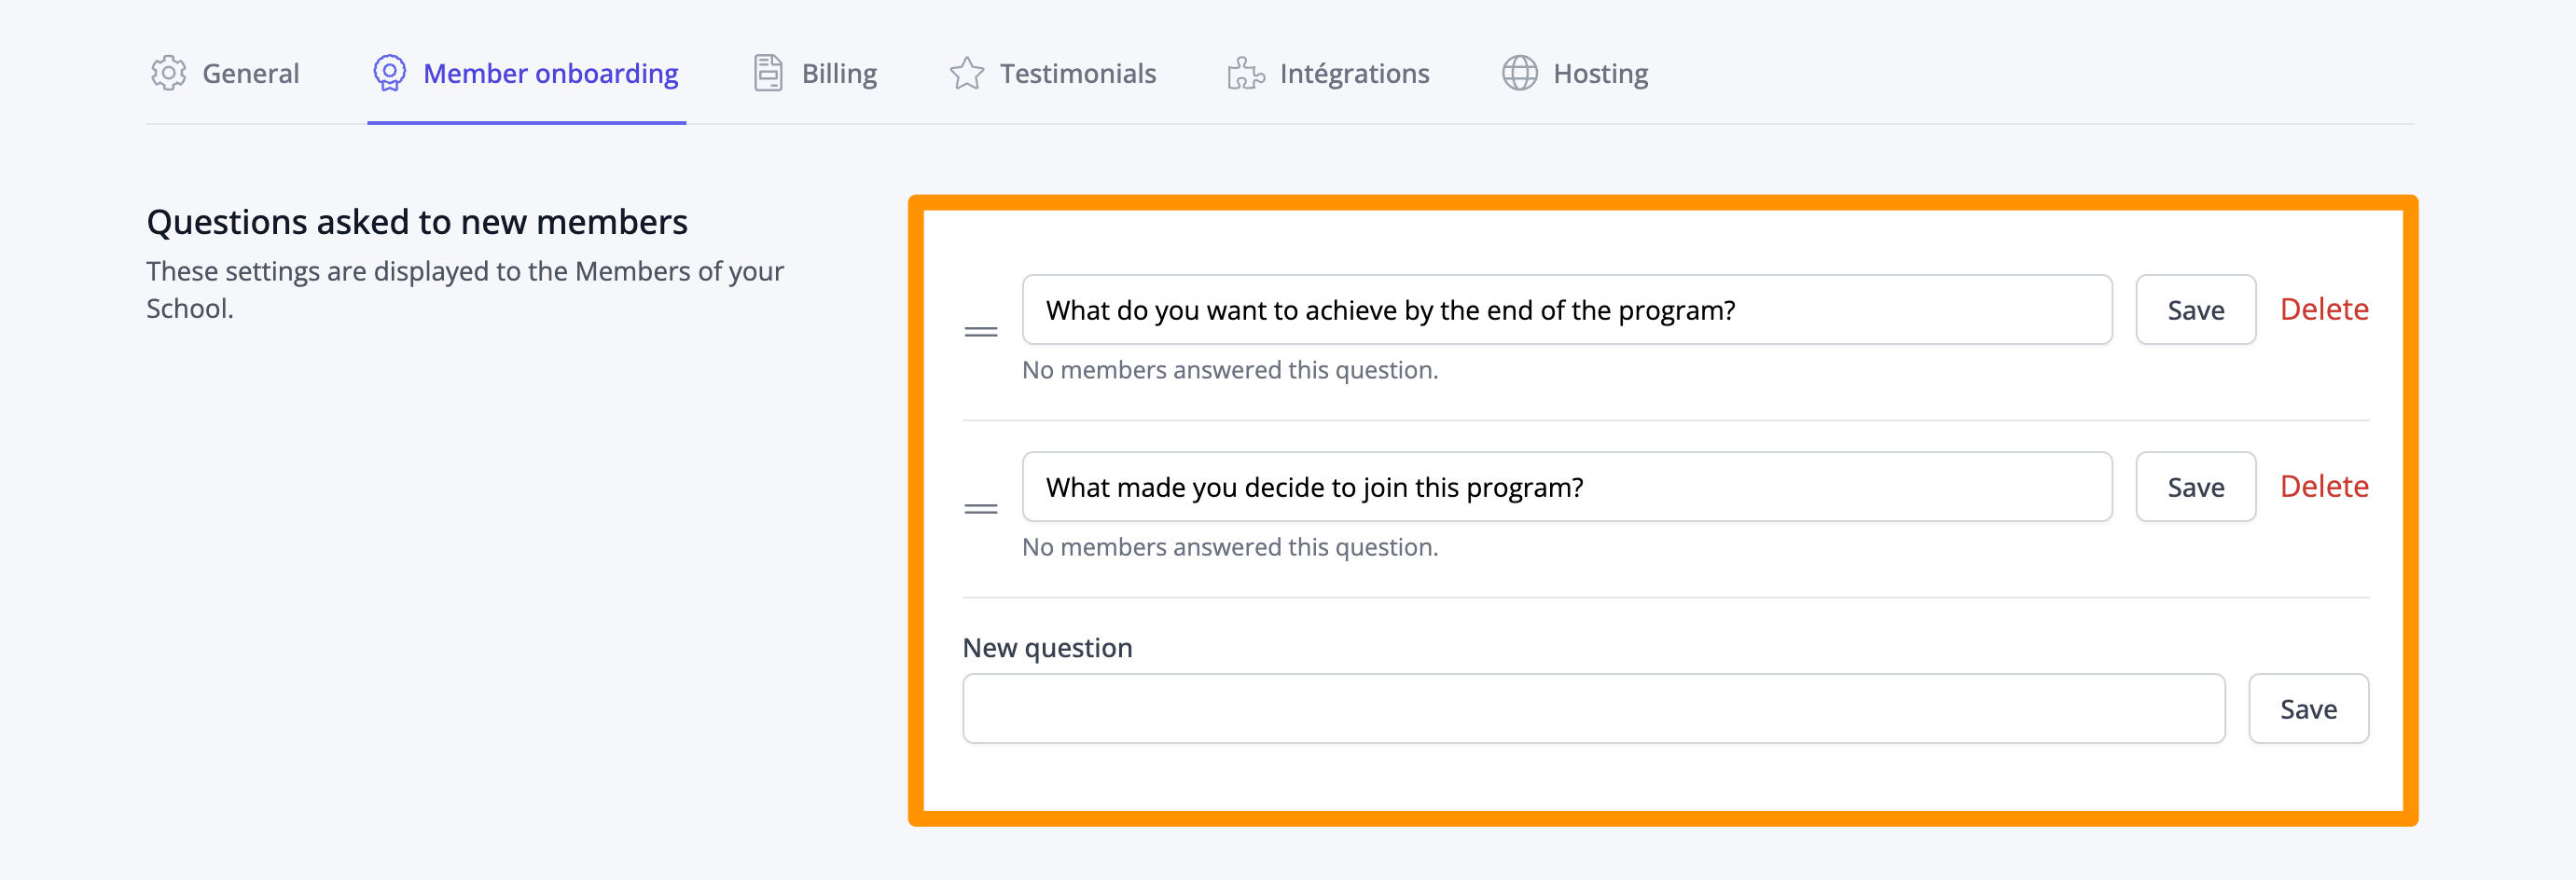
Part 2: Configure member onboarding
Go to the "Member onboarding" tab and complete the questions you want to ask people who join your online school for the first time:
Scroll down, and complete the welcome message you want to show people who join your online school for the first time:
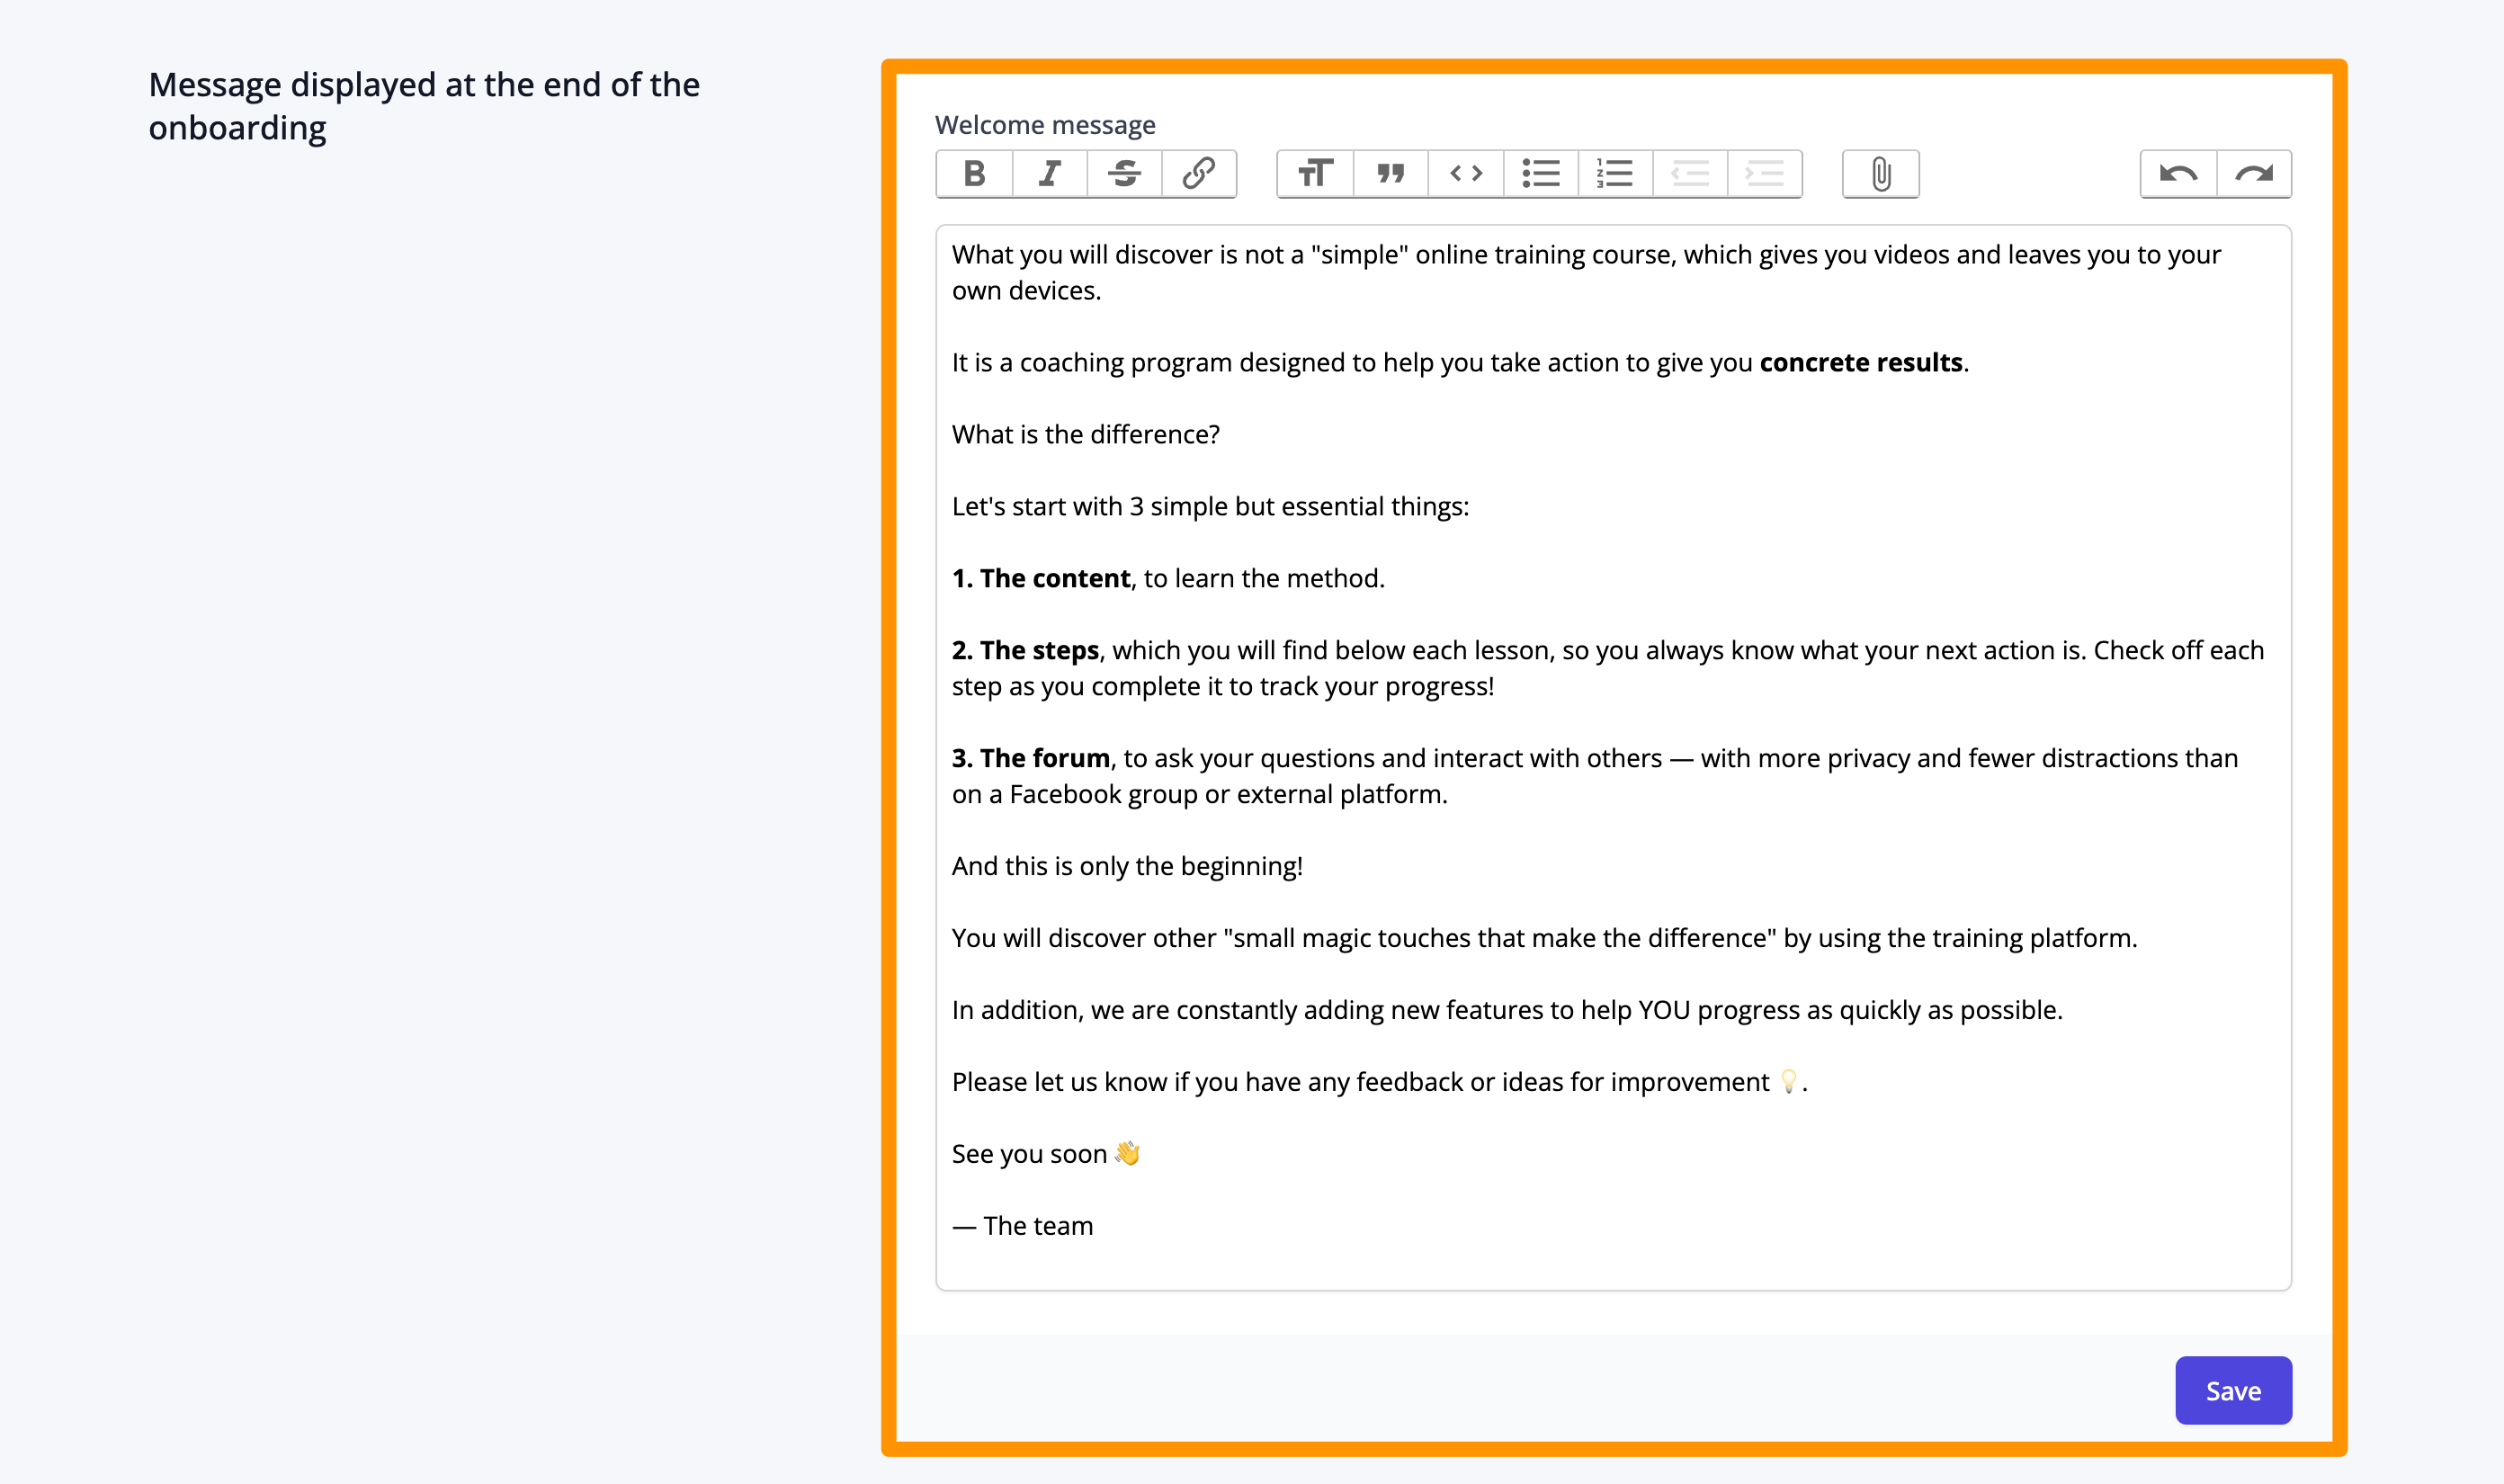
Don't forget to click on the "Save" button.
Part 3: Configure auto testimonials
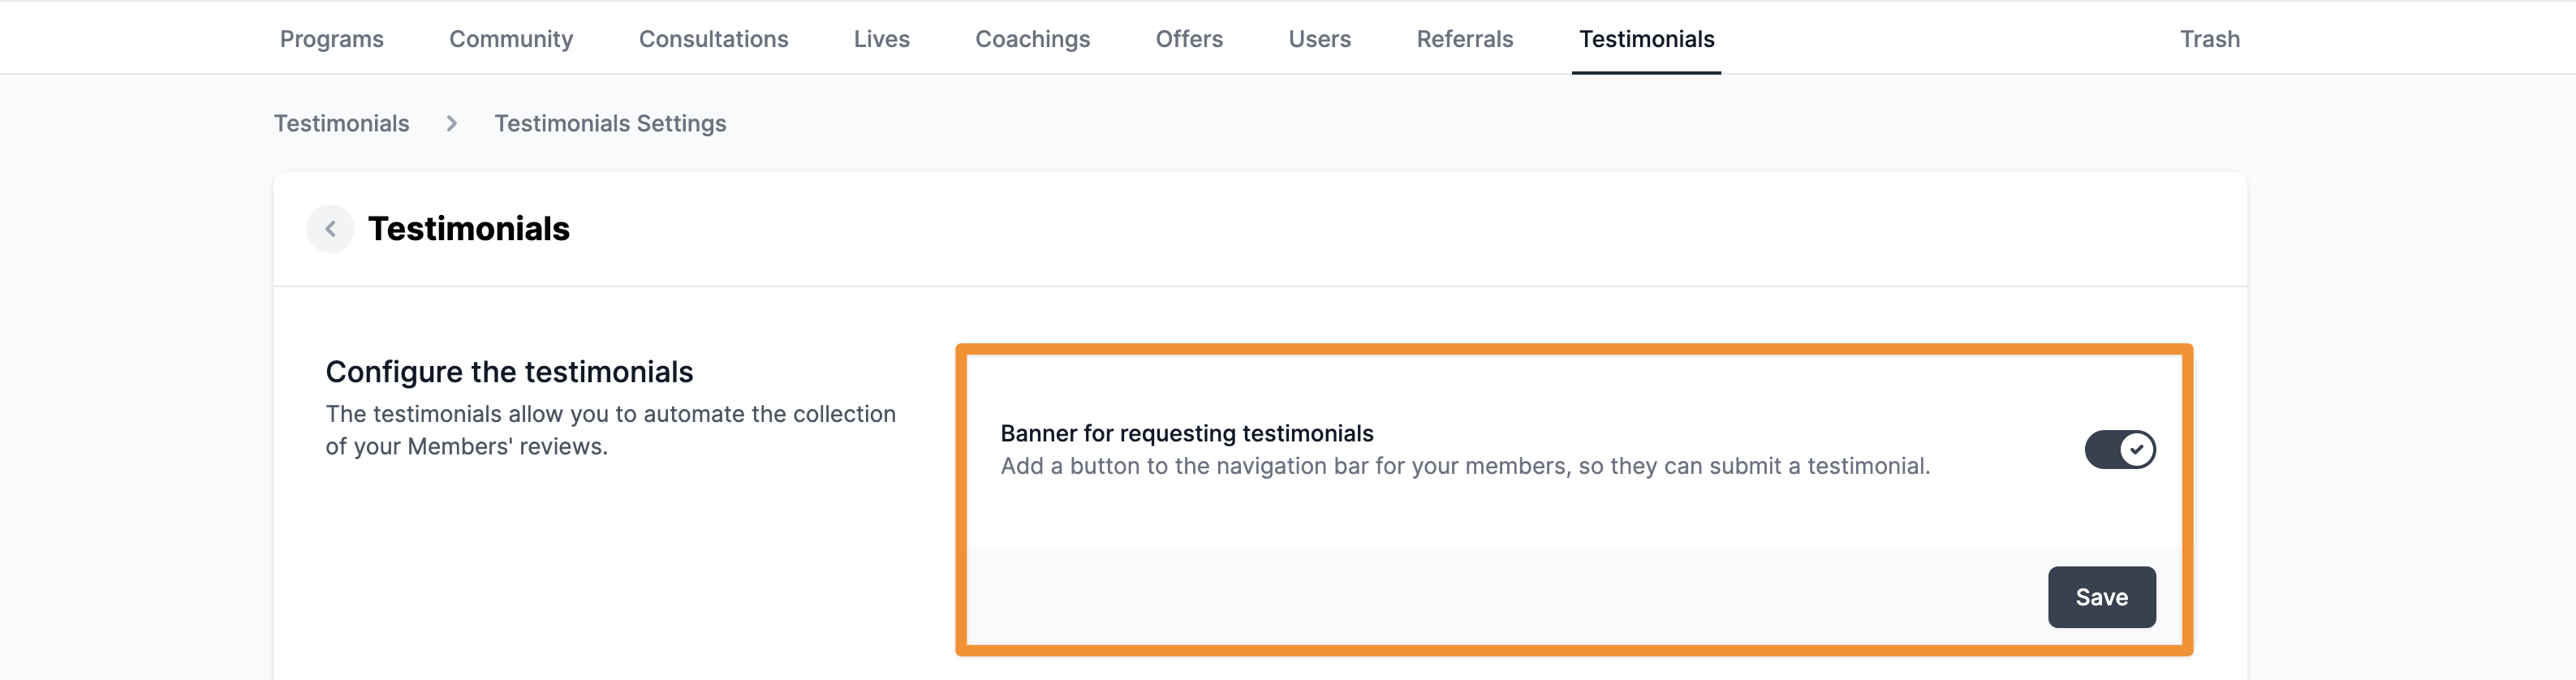
Go to the "Testimonials" tab, then to "Settings" and activate the banner if you want your students to see a banner requesting testimonials. You will also be able to request testimonials automatically when your students reach a milestone, which I will show you later.
Also, you can add a button at the top of your student's screen so they can add a testimonial at any time.
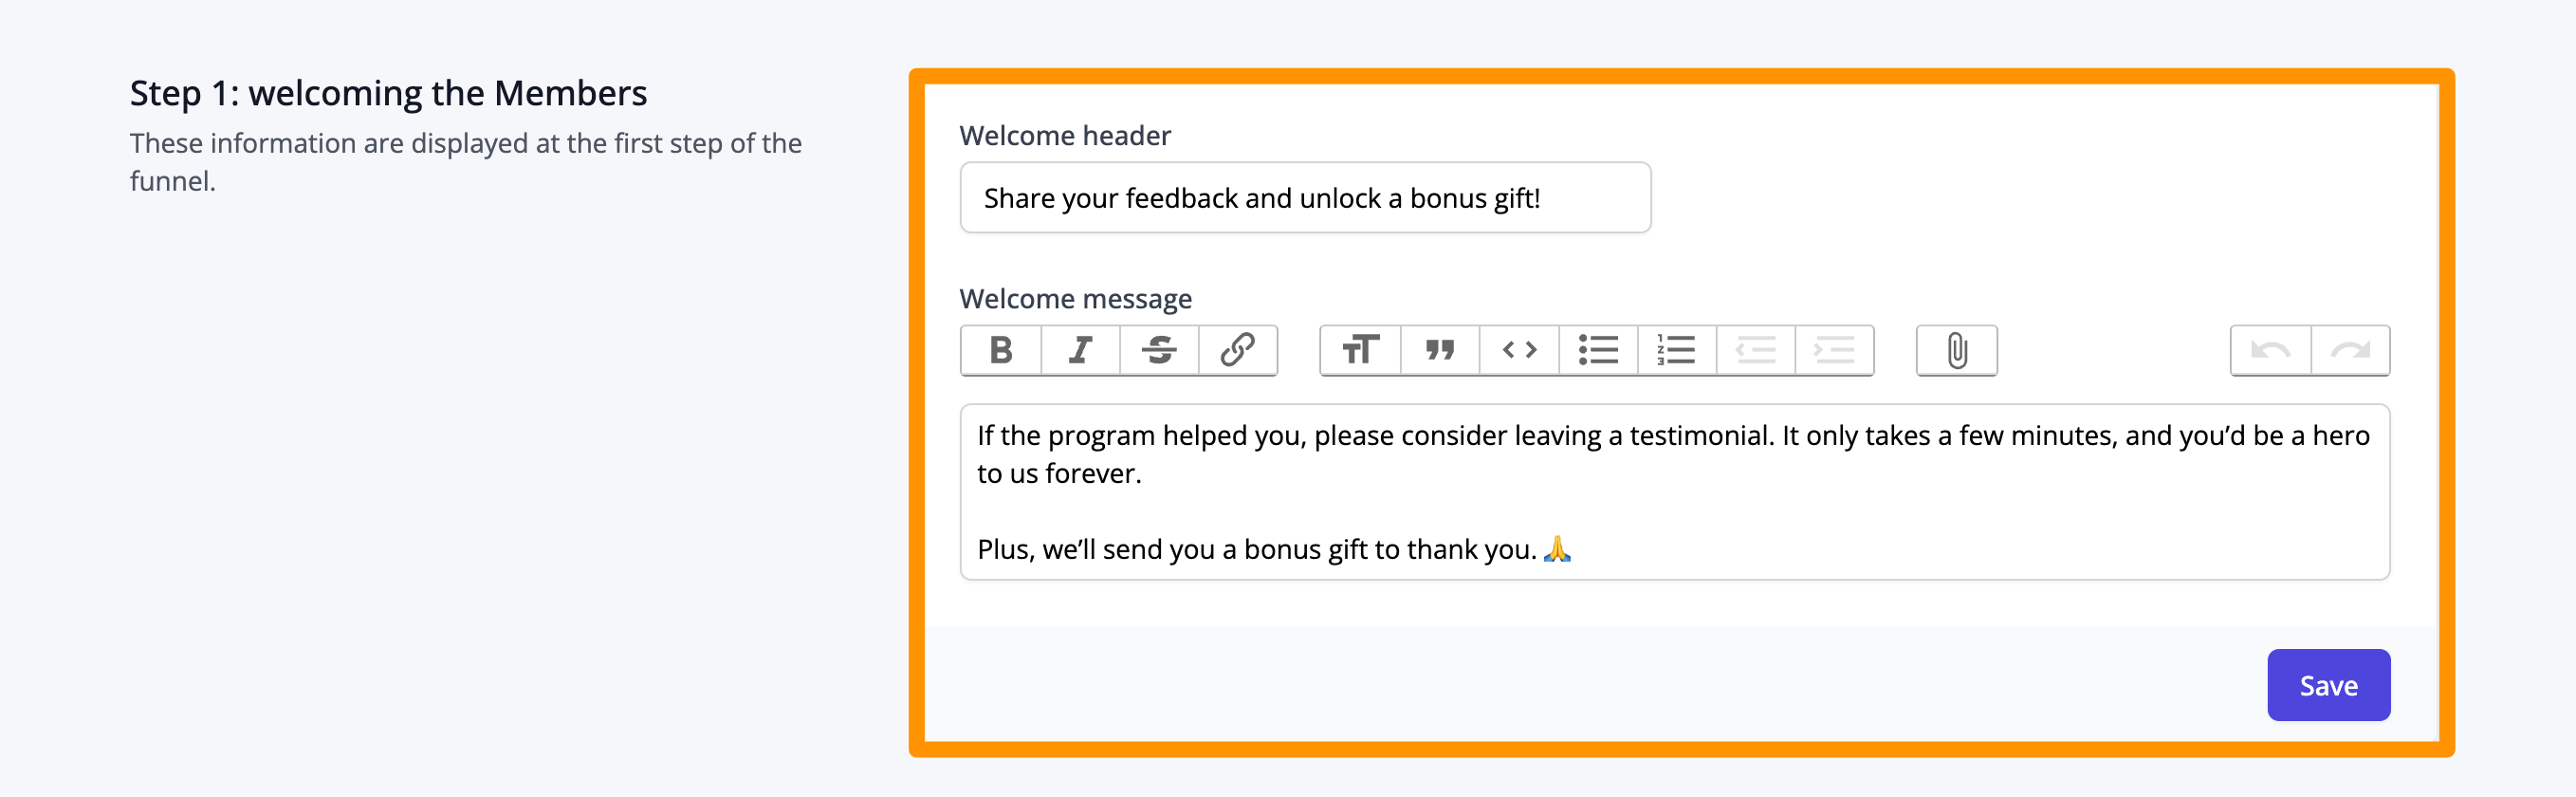
Scroll down, and complete the welcome message, I recommend talking about the bonus you are going to provide your students if they give you a testimonial, as well as thanking them.
(If you don't have any resource to share for now, just thank your students)
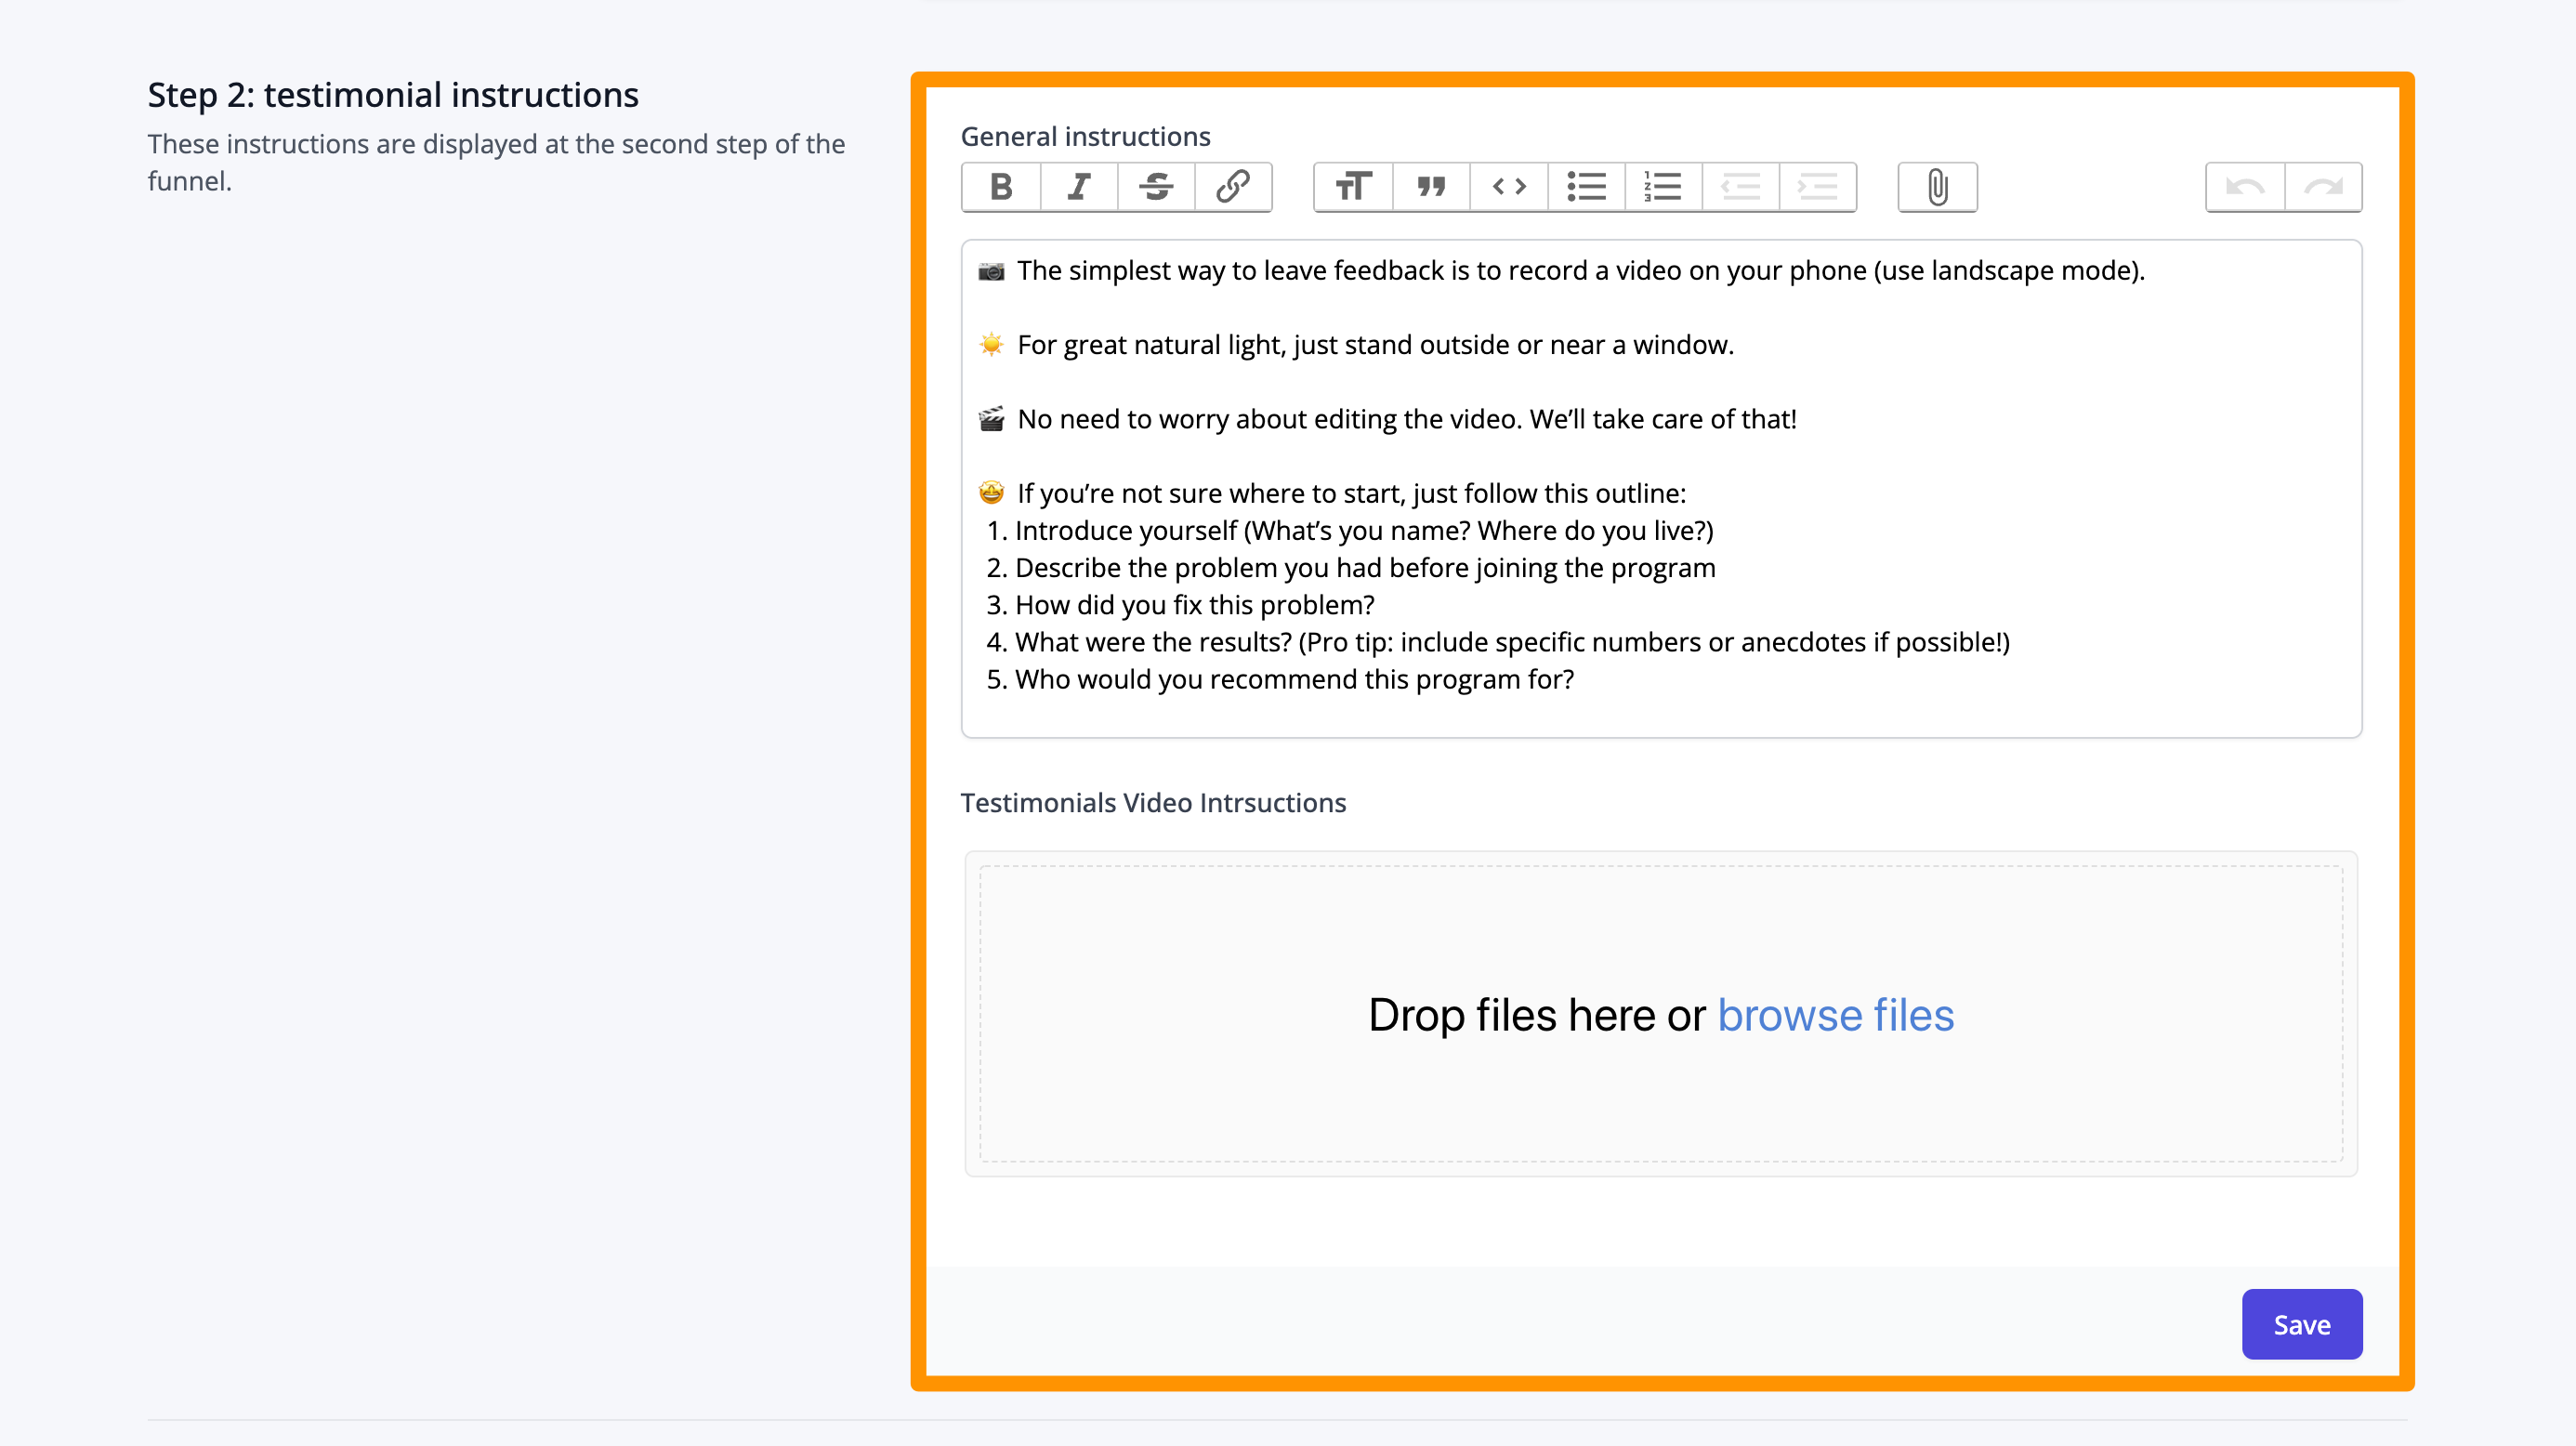
Next up, give your students instructions to make it easier for them to make a video or text testimonial for you.
You can also upload a video giving them instructions with an example.
The next step is to choose what kind of testimonials your students will be able to send you:

Next up, you can choose the Offer you want to send as a gift (we recommend providing a bonus video or a bonus resource, but if you don't have any just leave the dropdown blank and remove "Click below to unlock your gift").
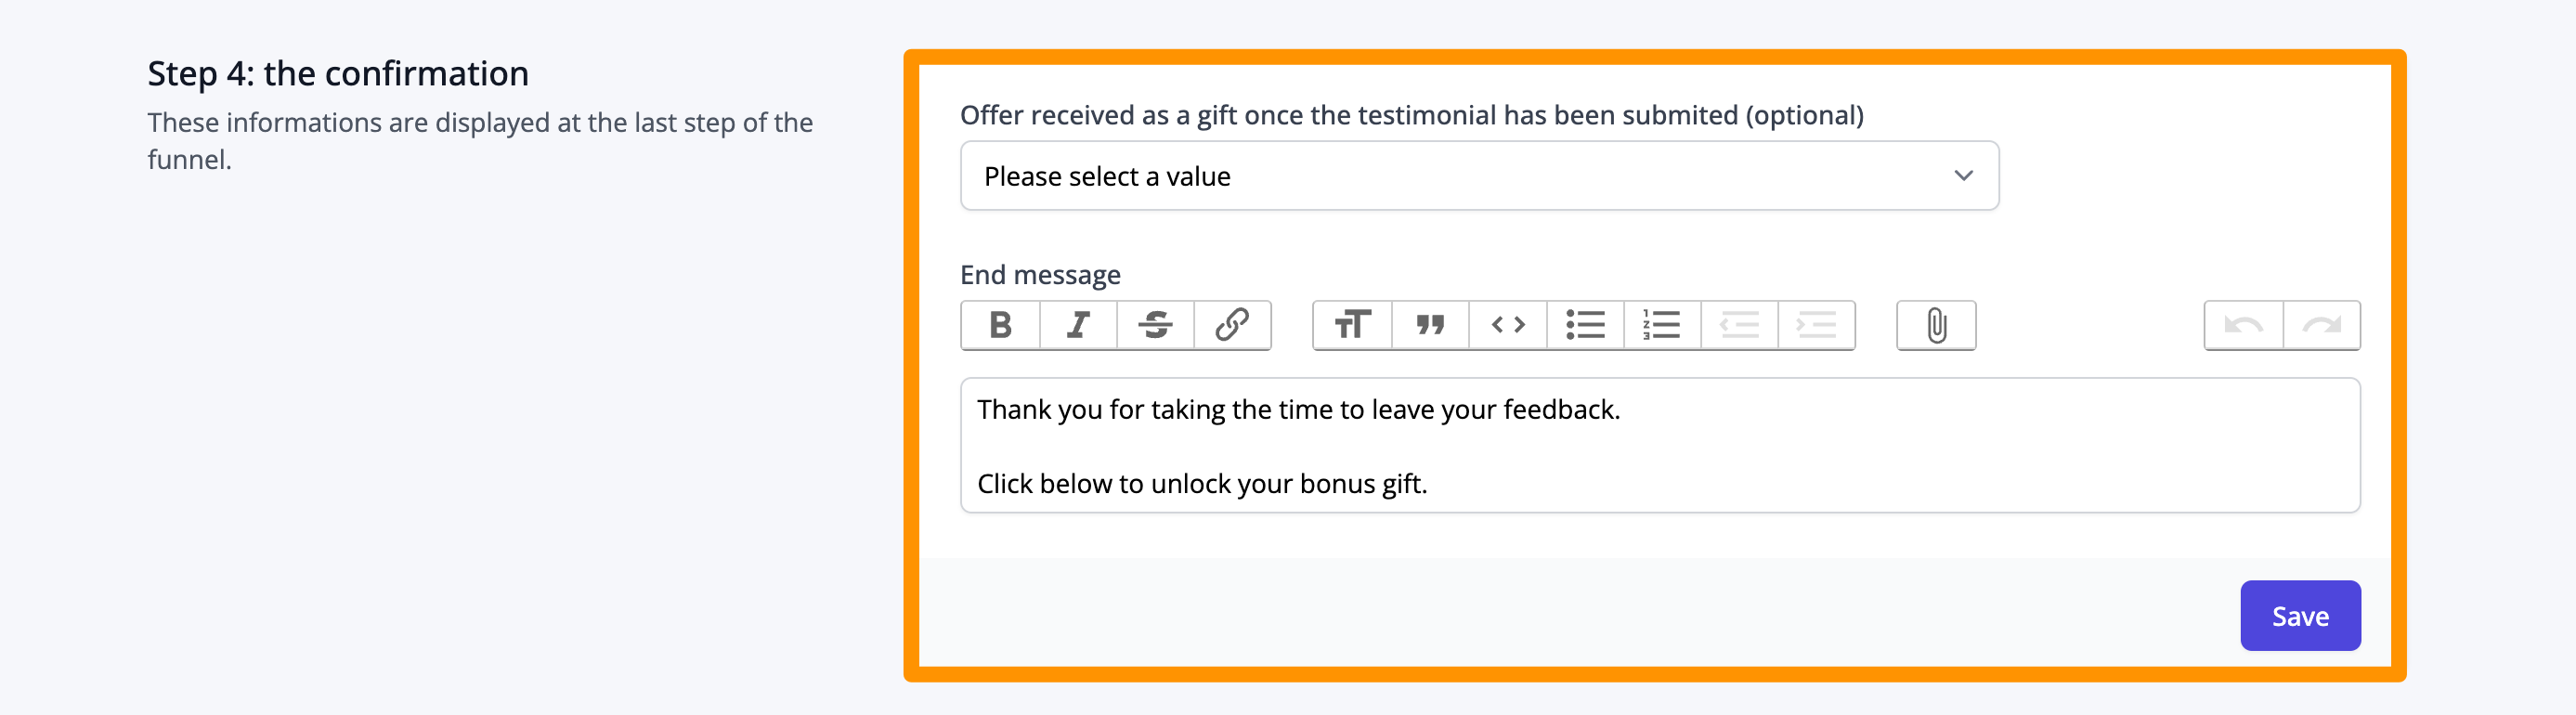
Don't forget to save each of these elements after completing them.
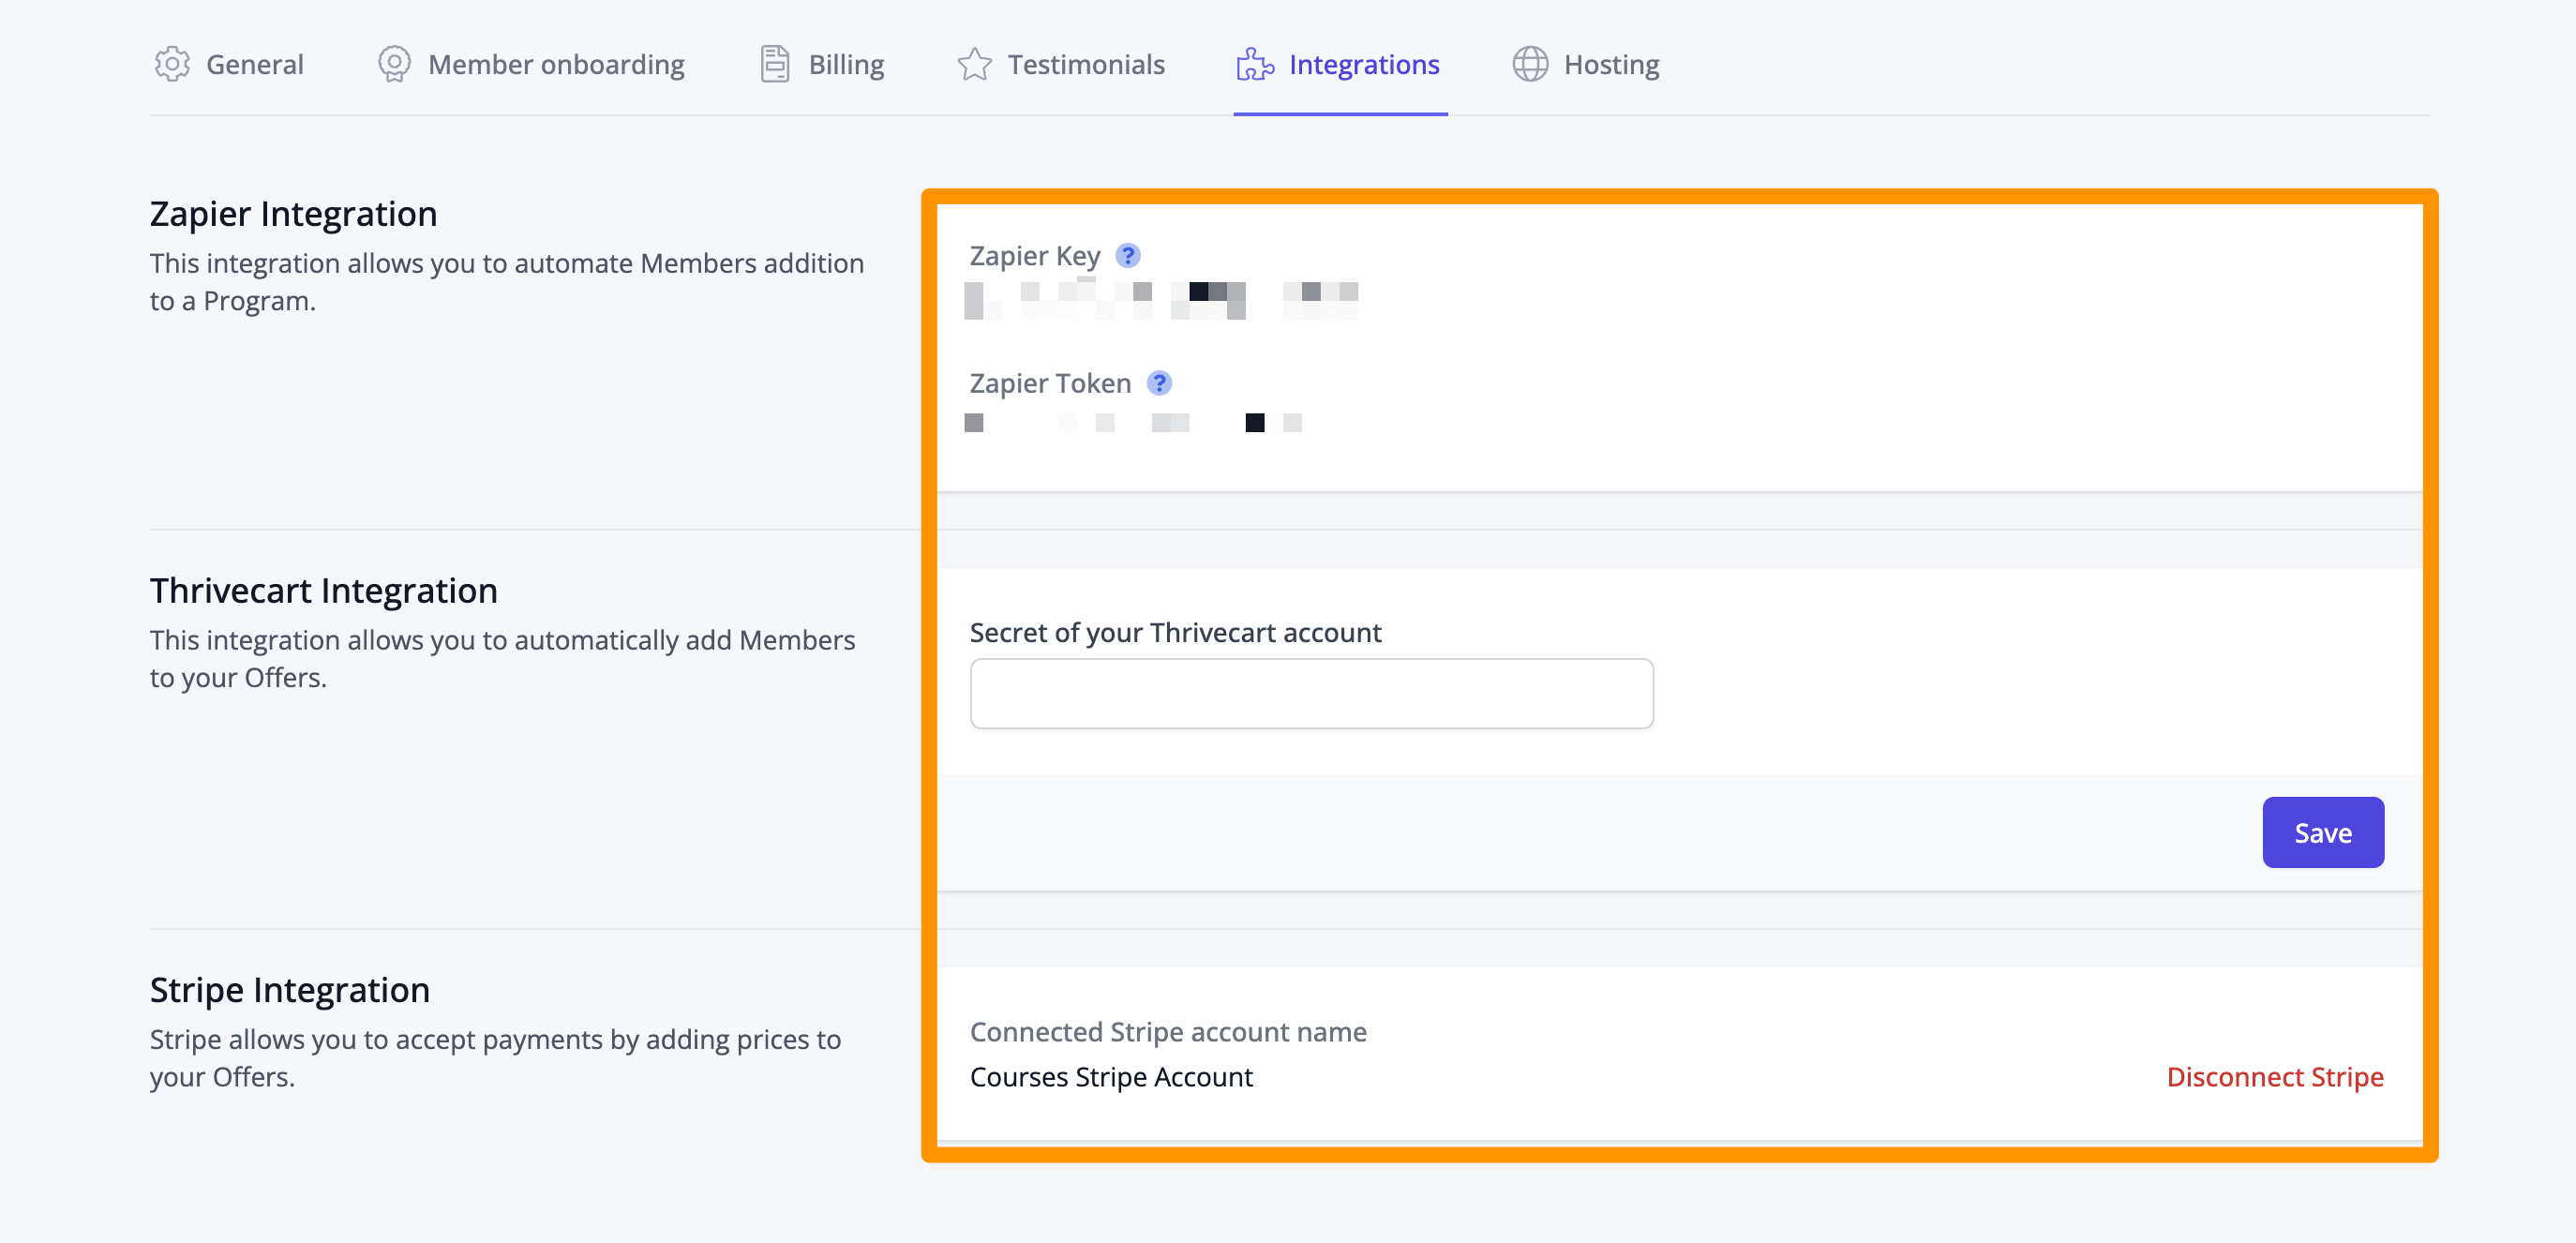
Part 4: Configure integrations
Go to the "Integrations" tab and connect the apps you want to use with SchoolMaker. (you let your students pay with Paypal with the Zapier integration)
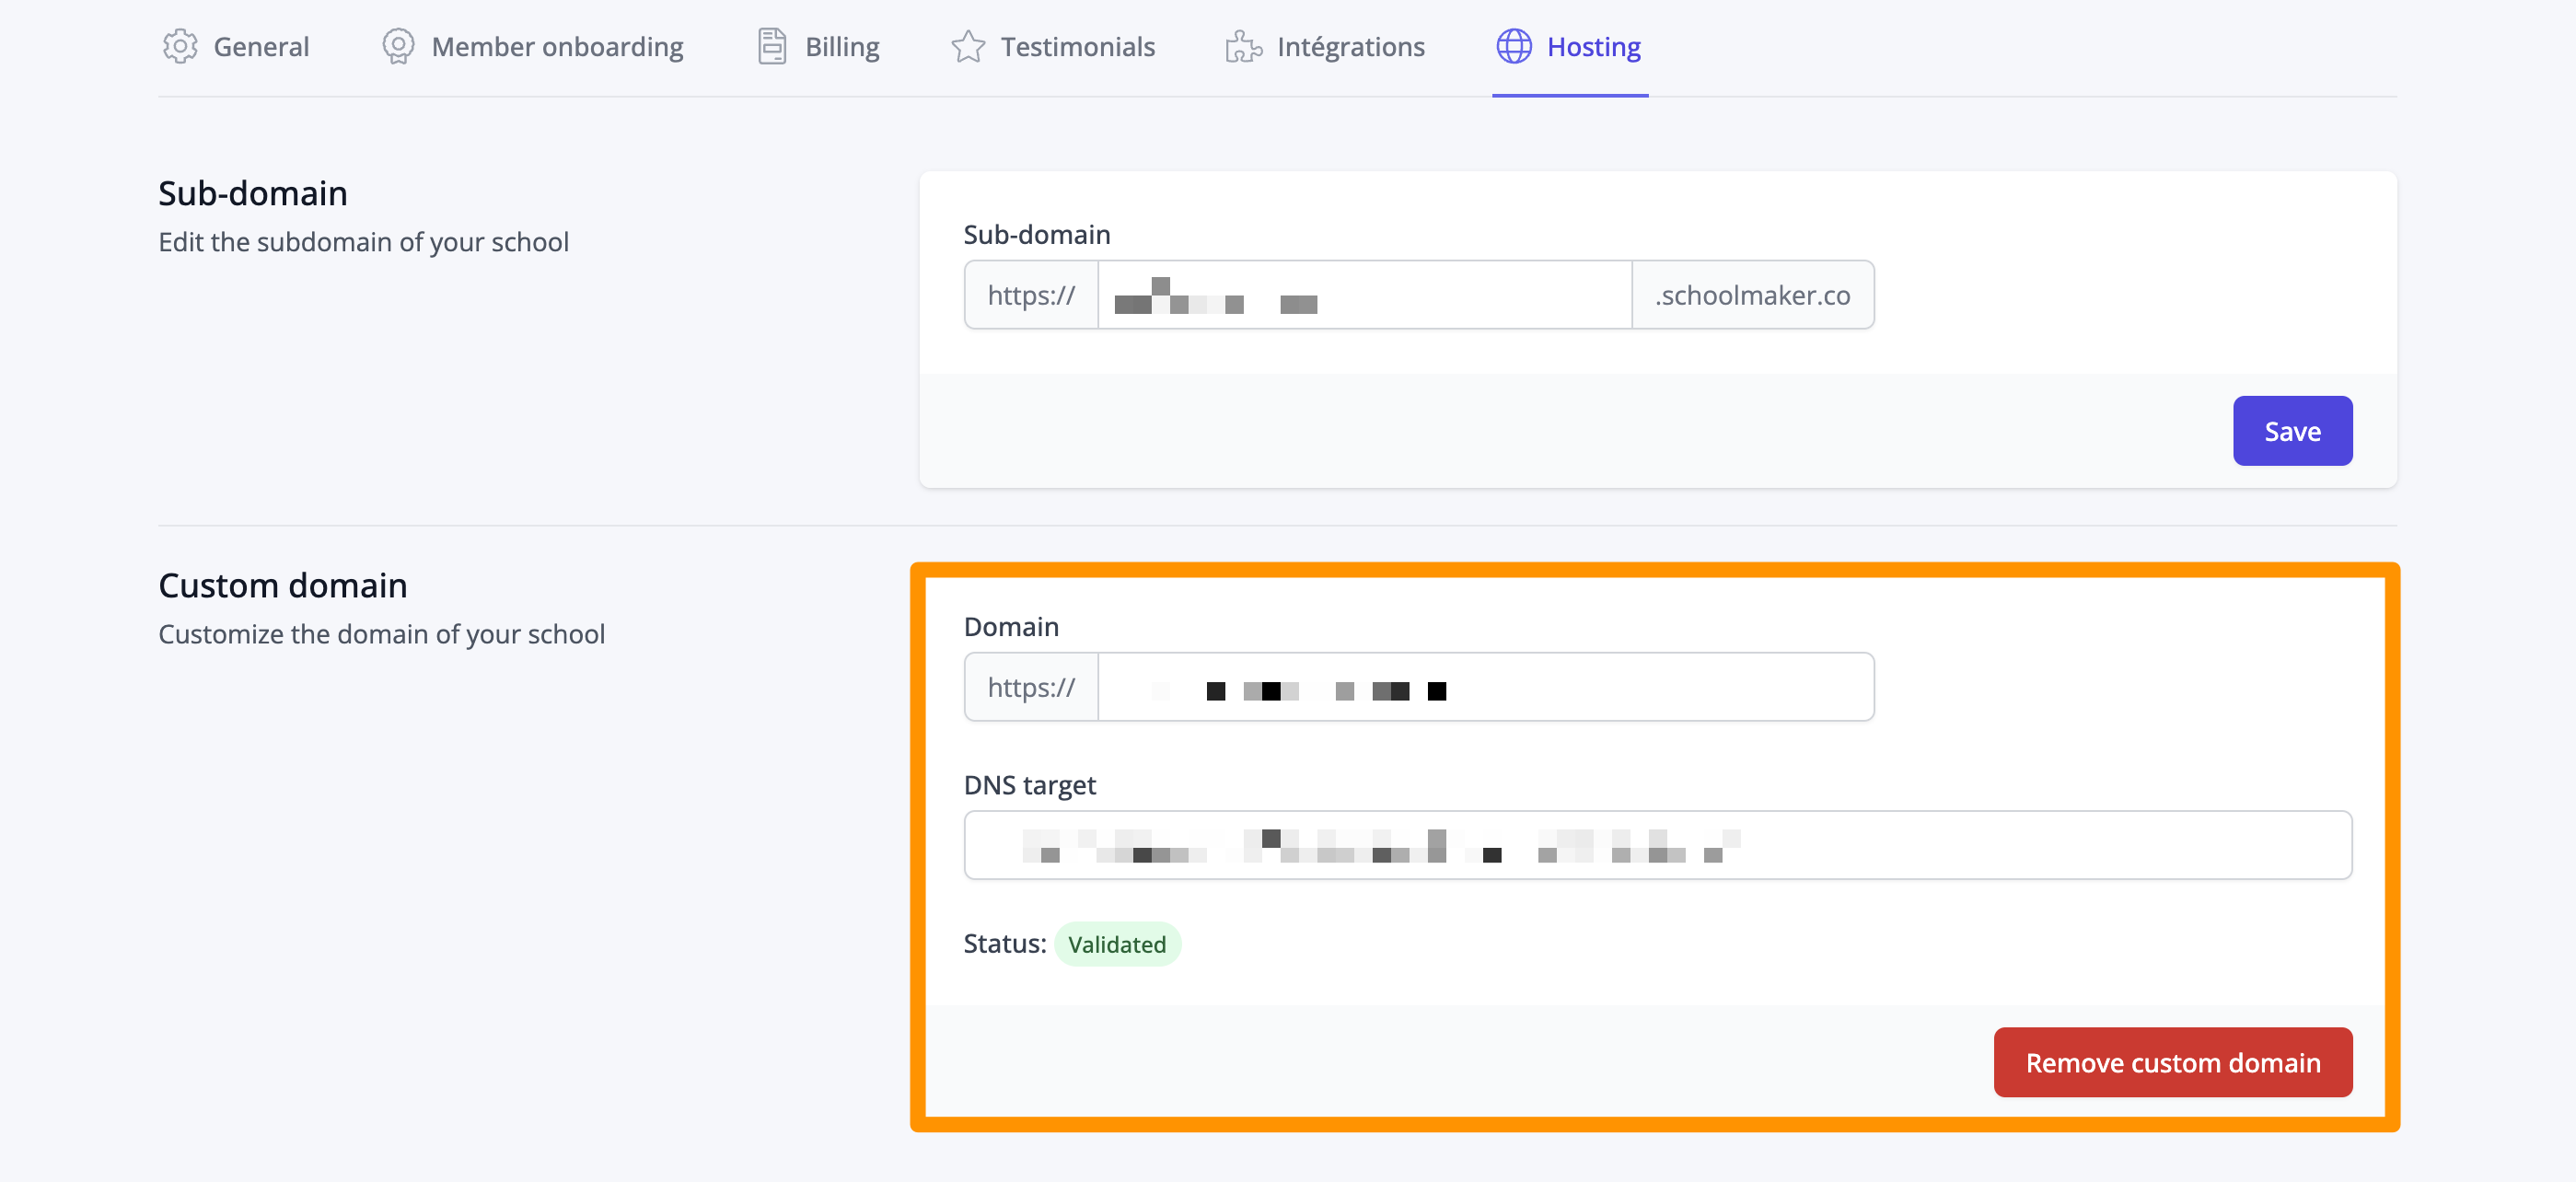
Part 5: Configure custom domains (optional)
If you want to use a custom domain or a subdomain of your website like "learn.yourwebsite.com" for your online school, go to the "Hosting" tab and follow the instructions to connect a custom domain. You can also change your SchoolMaker subdomain.
How to create and configure your built-in community
Let's quickly create a dedicated Space for your course in your built-in community.
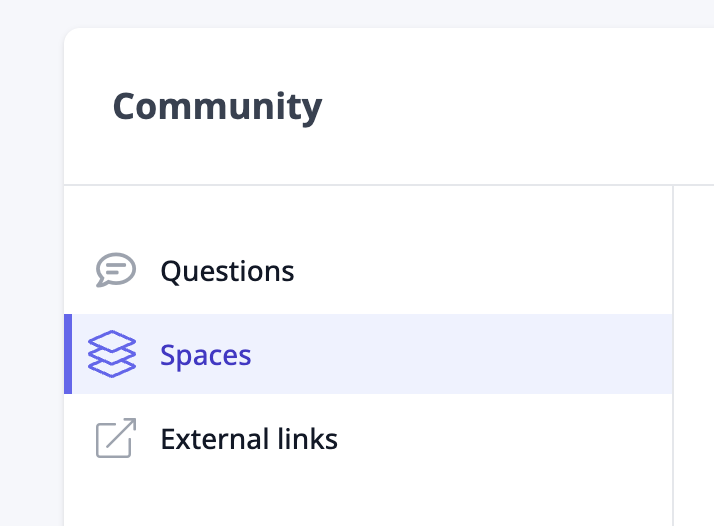
Click on the "Community" tab:

Click click on the "Spaces" tab:
Then create a new Space with the "New space" button, and configure your space:
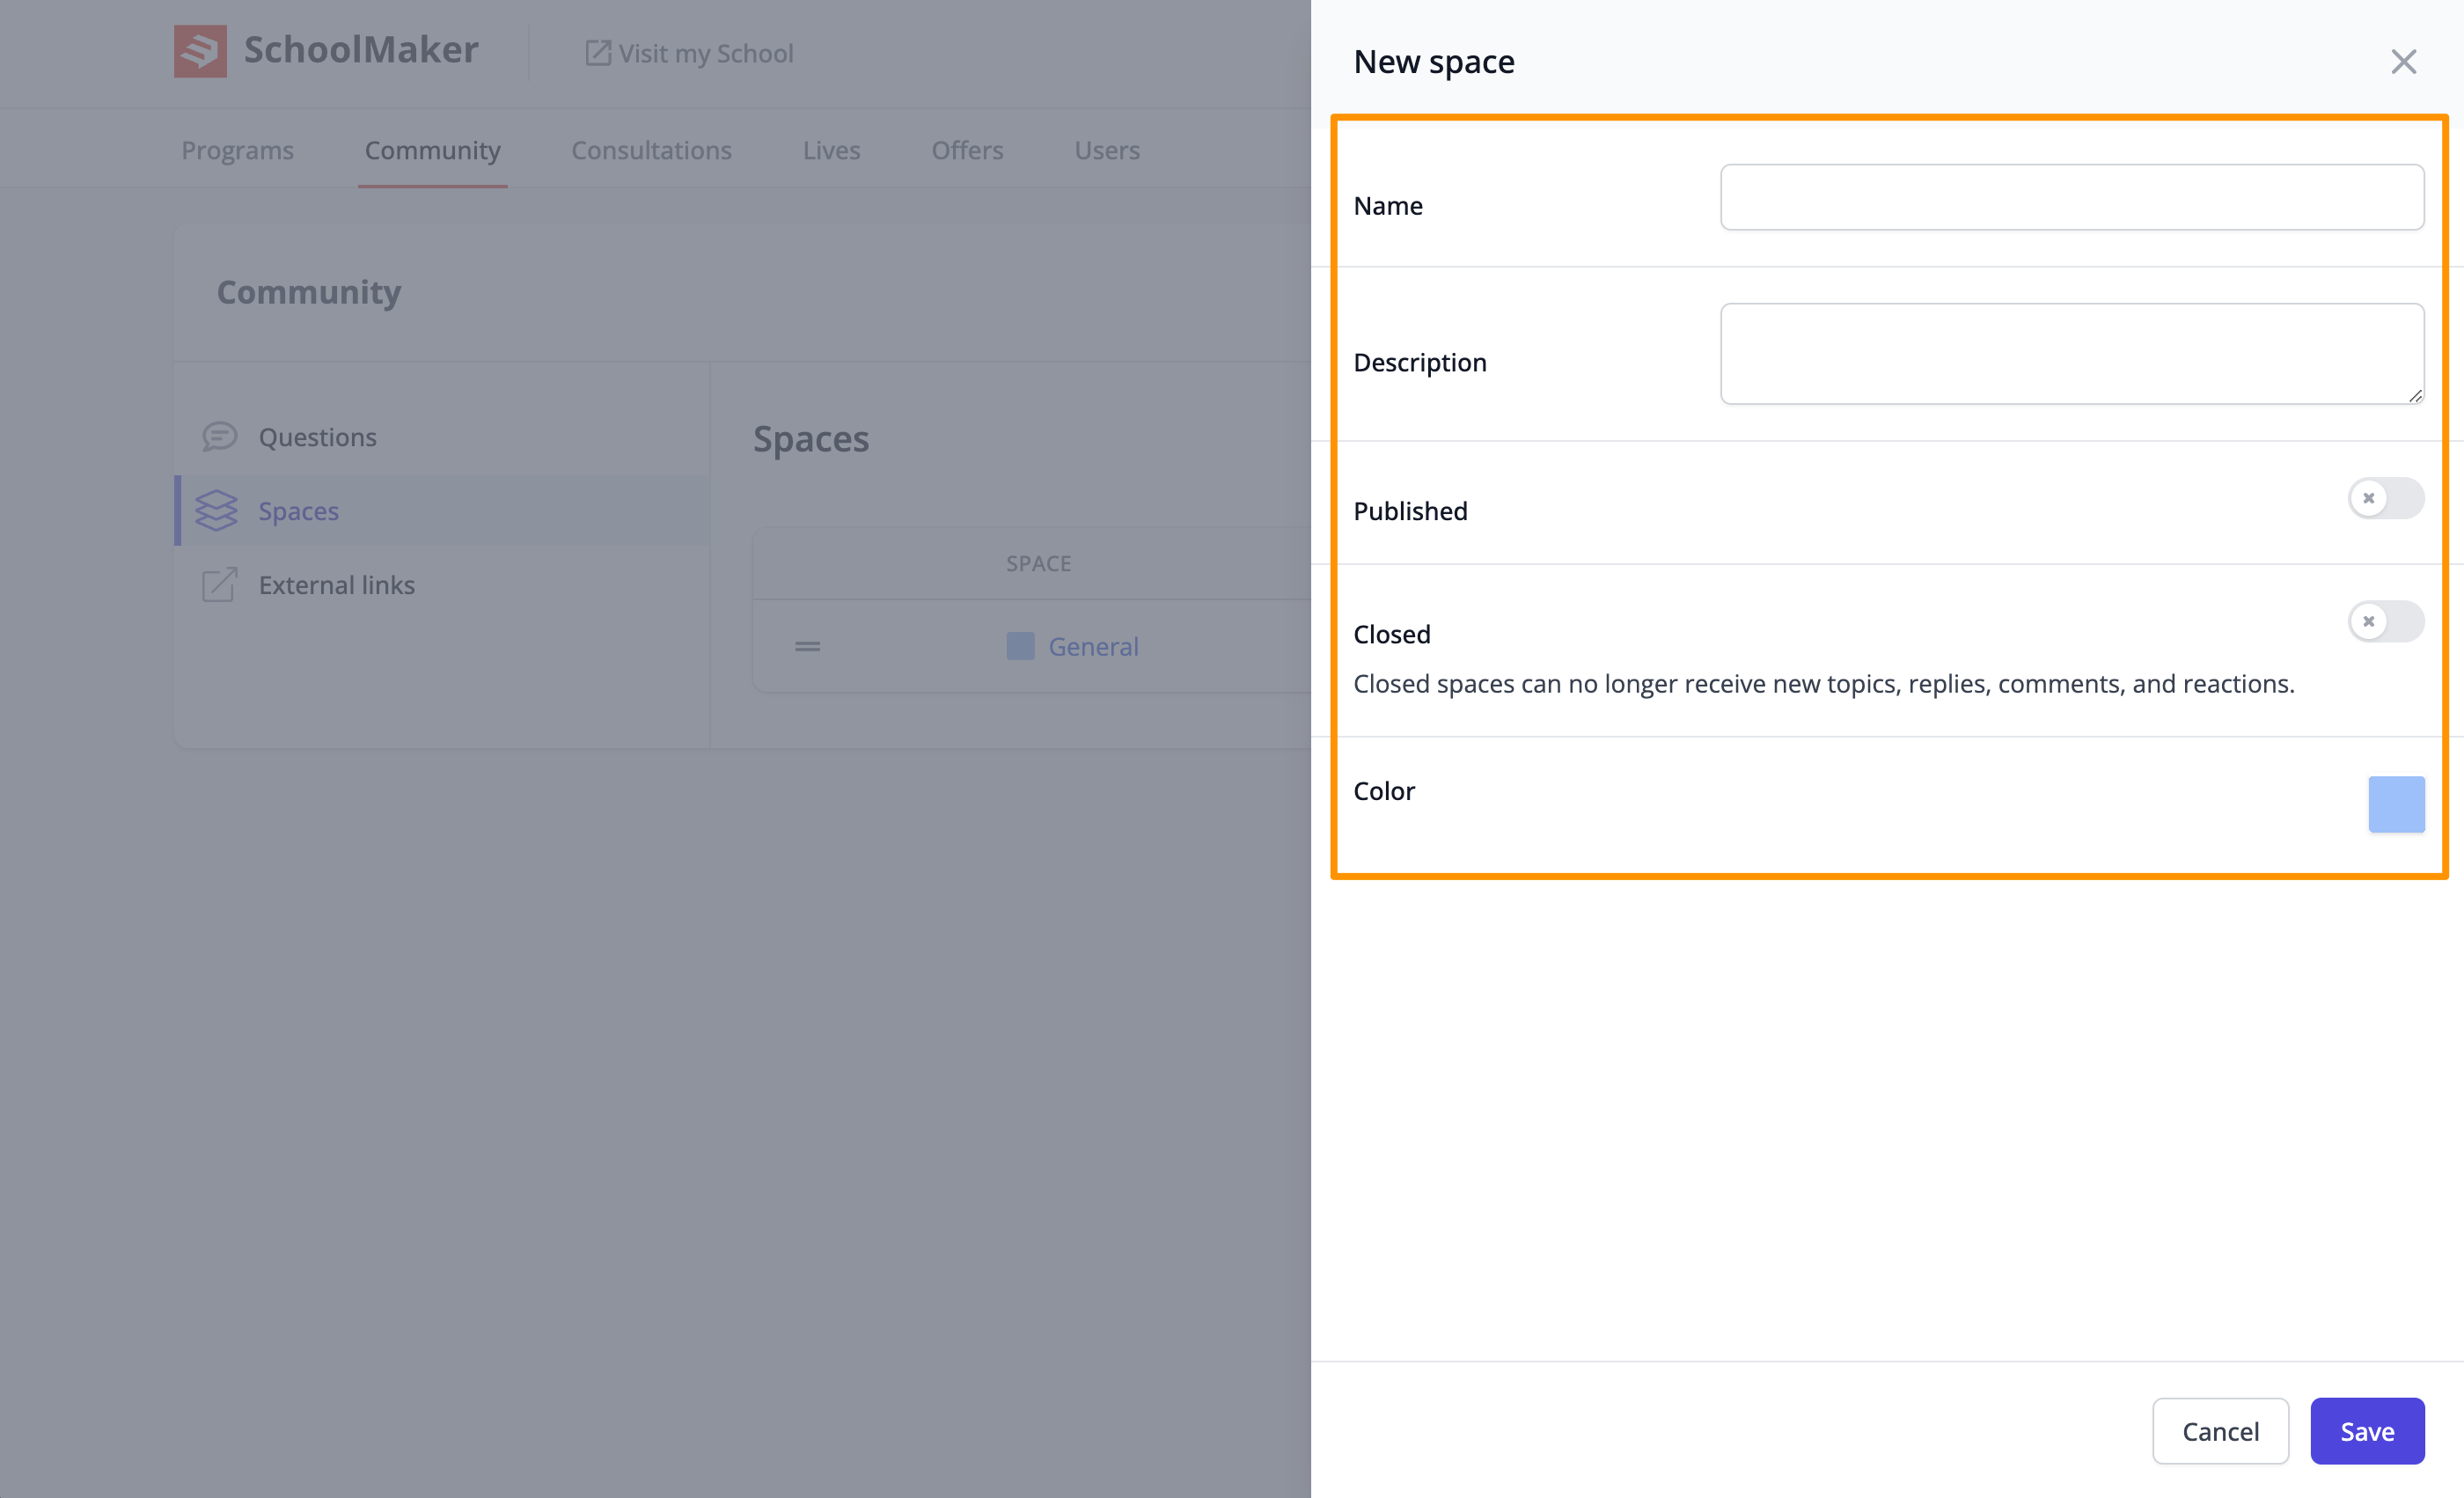
(I recommend only creating one Space with the name of your course for now)
Don't forget to toggle on "Published" and to save your new Space.
How to create and configure a program step-by-step
Next, follow these steps to create a program and configure it:
Part 1: Create the program and configure general settings
Step 1: Create the program
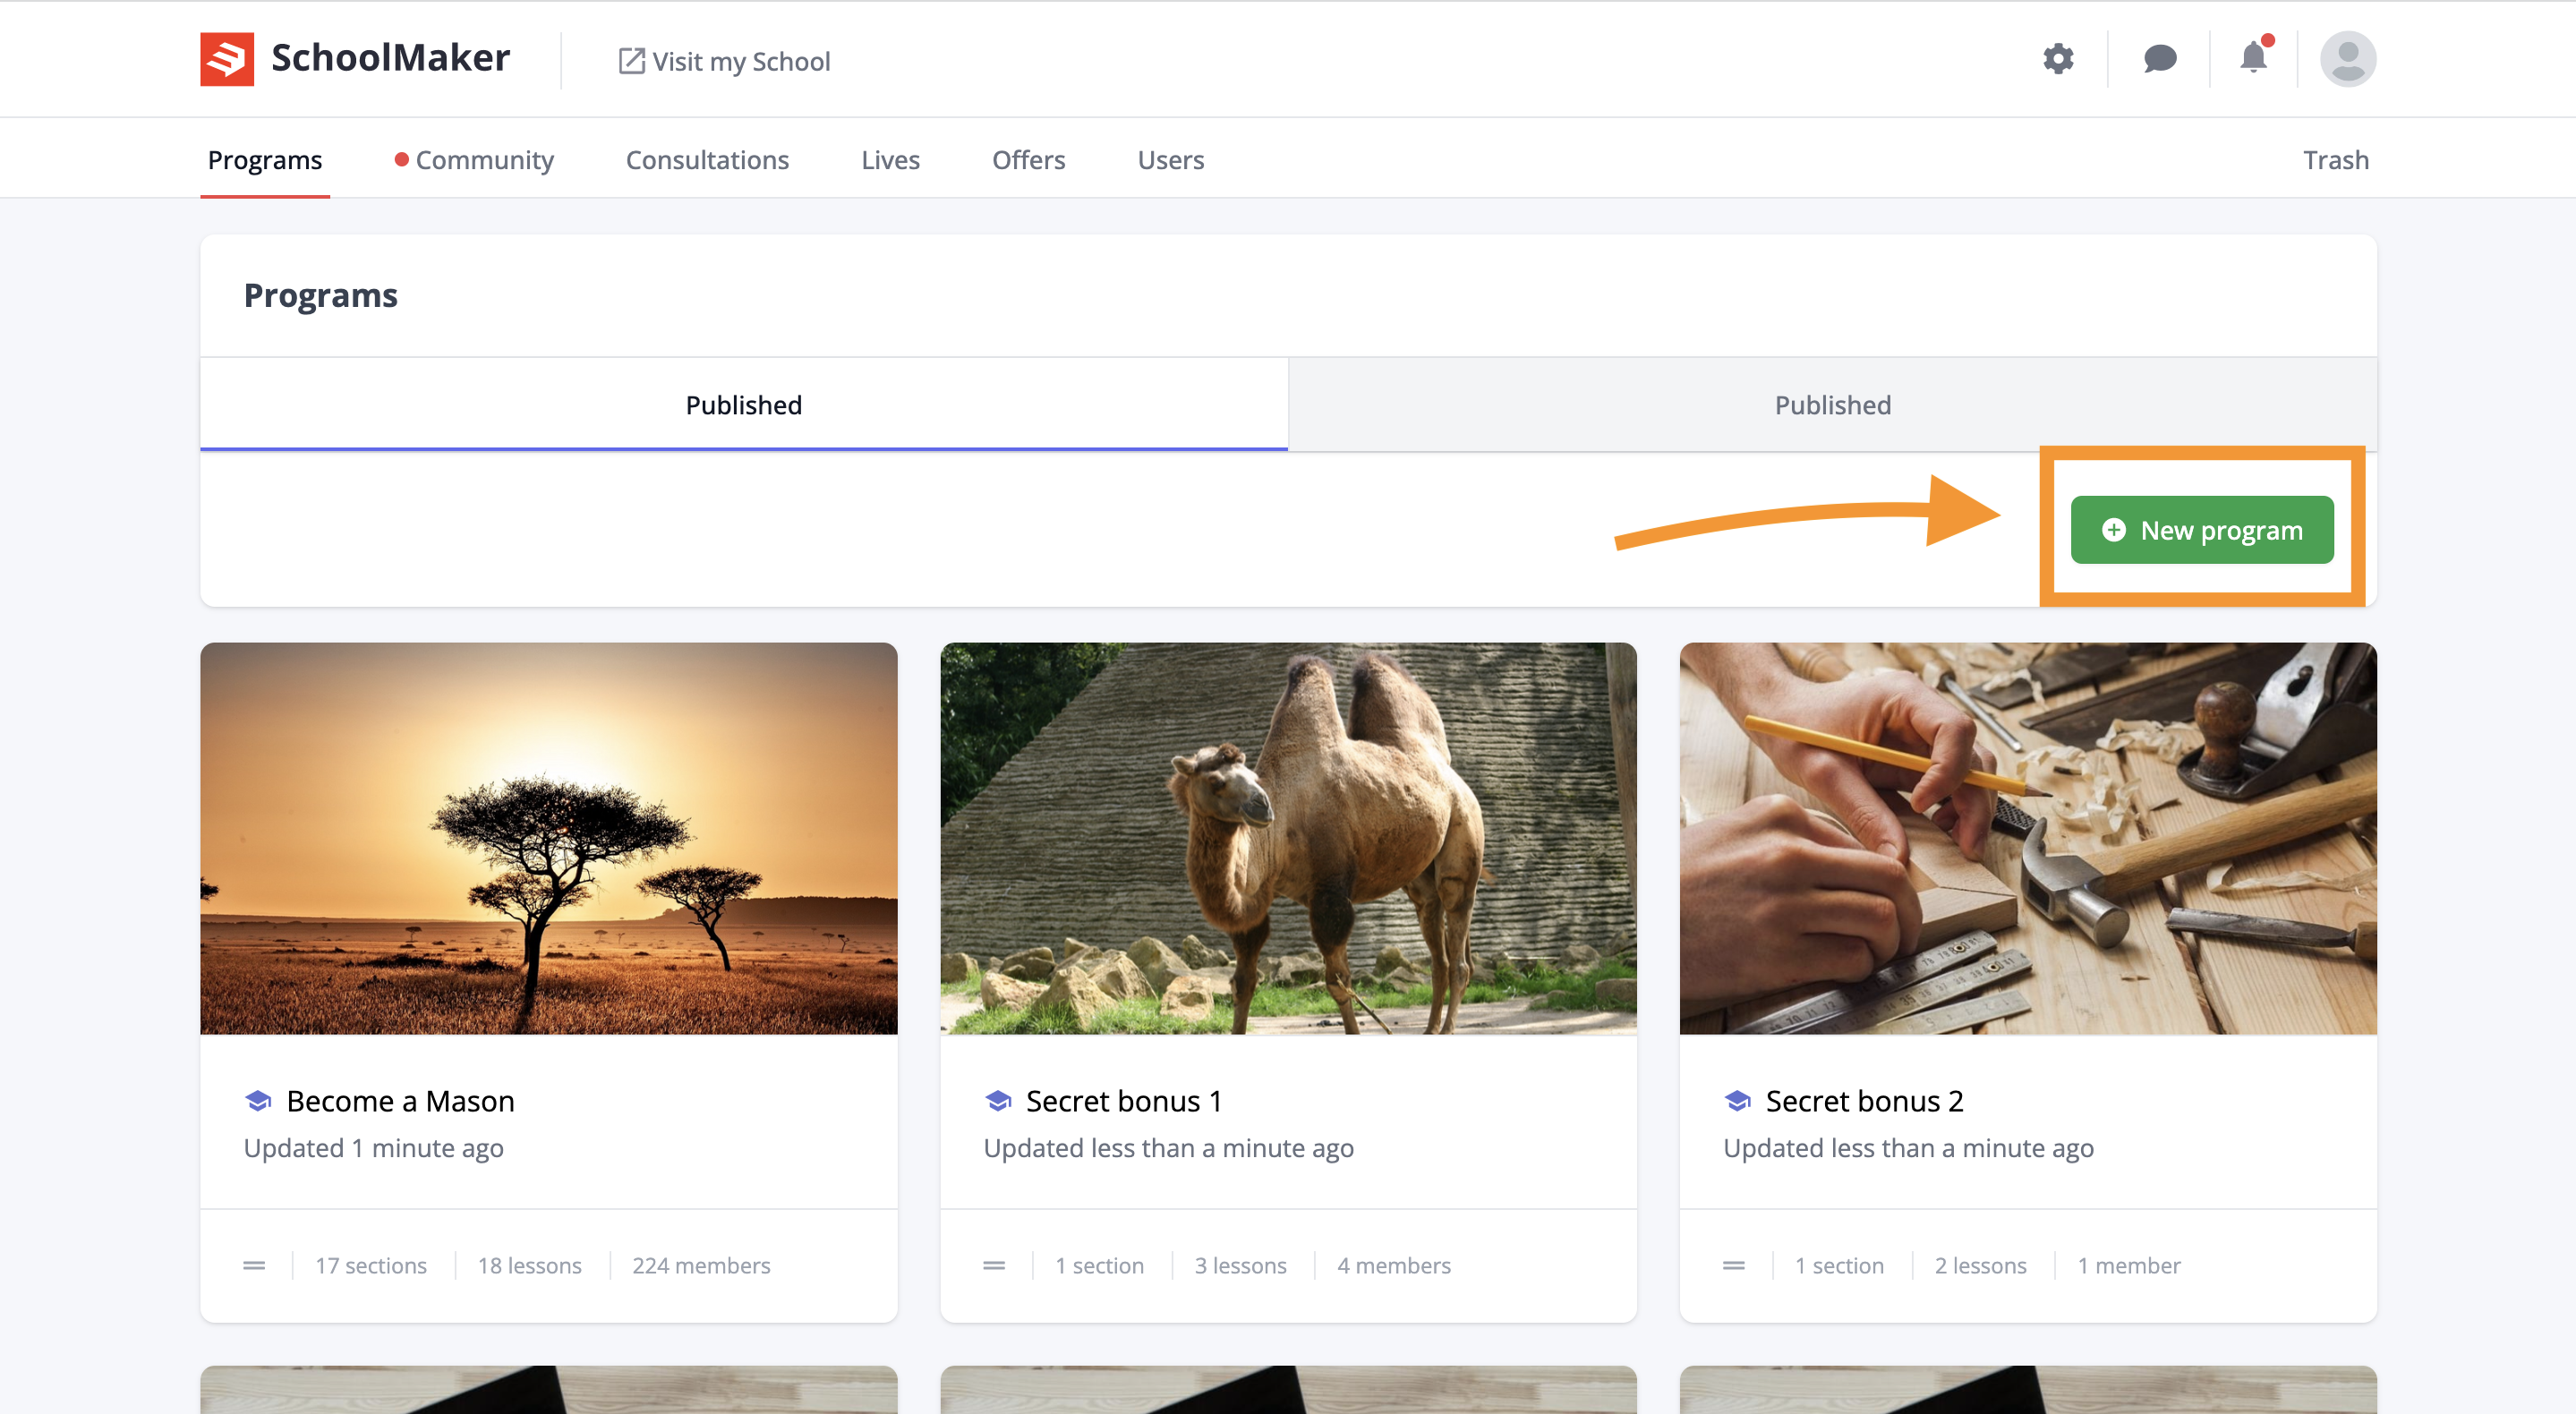
Click on the "Programs" menu in the menu bar.
Then click on "New program".
Step 2: Go to program settings
To configure your program, click on the gear.

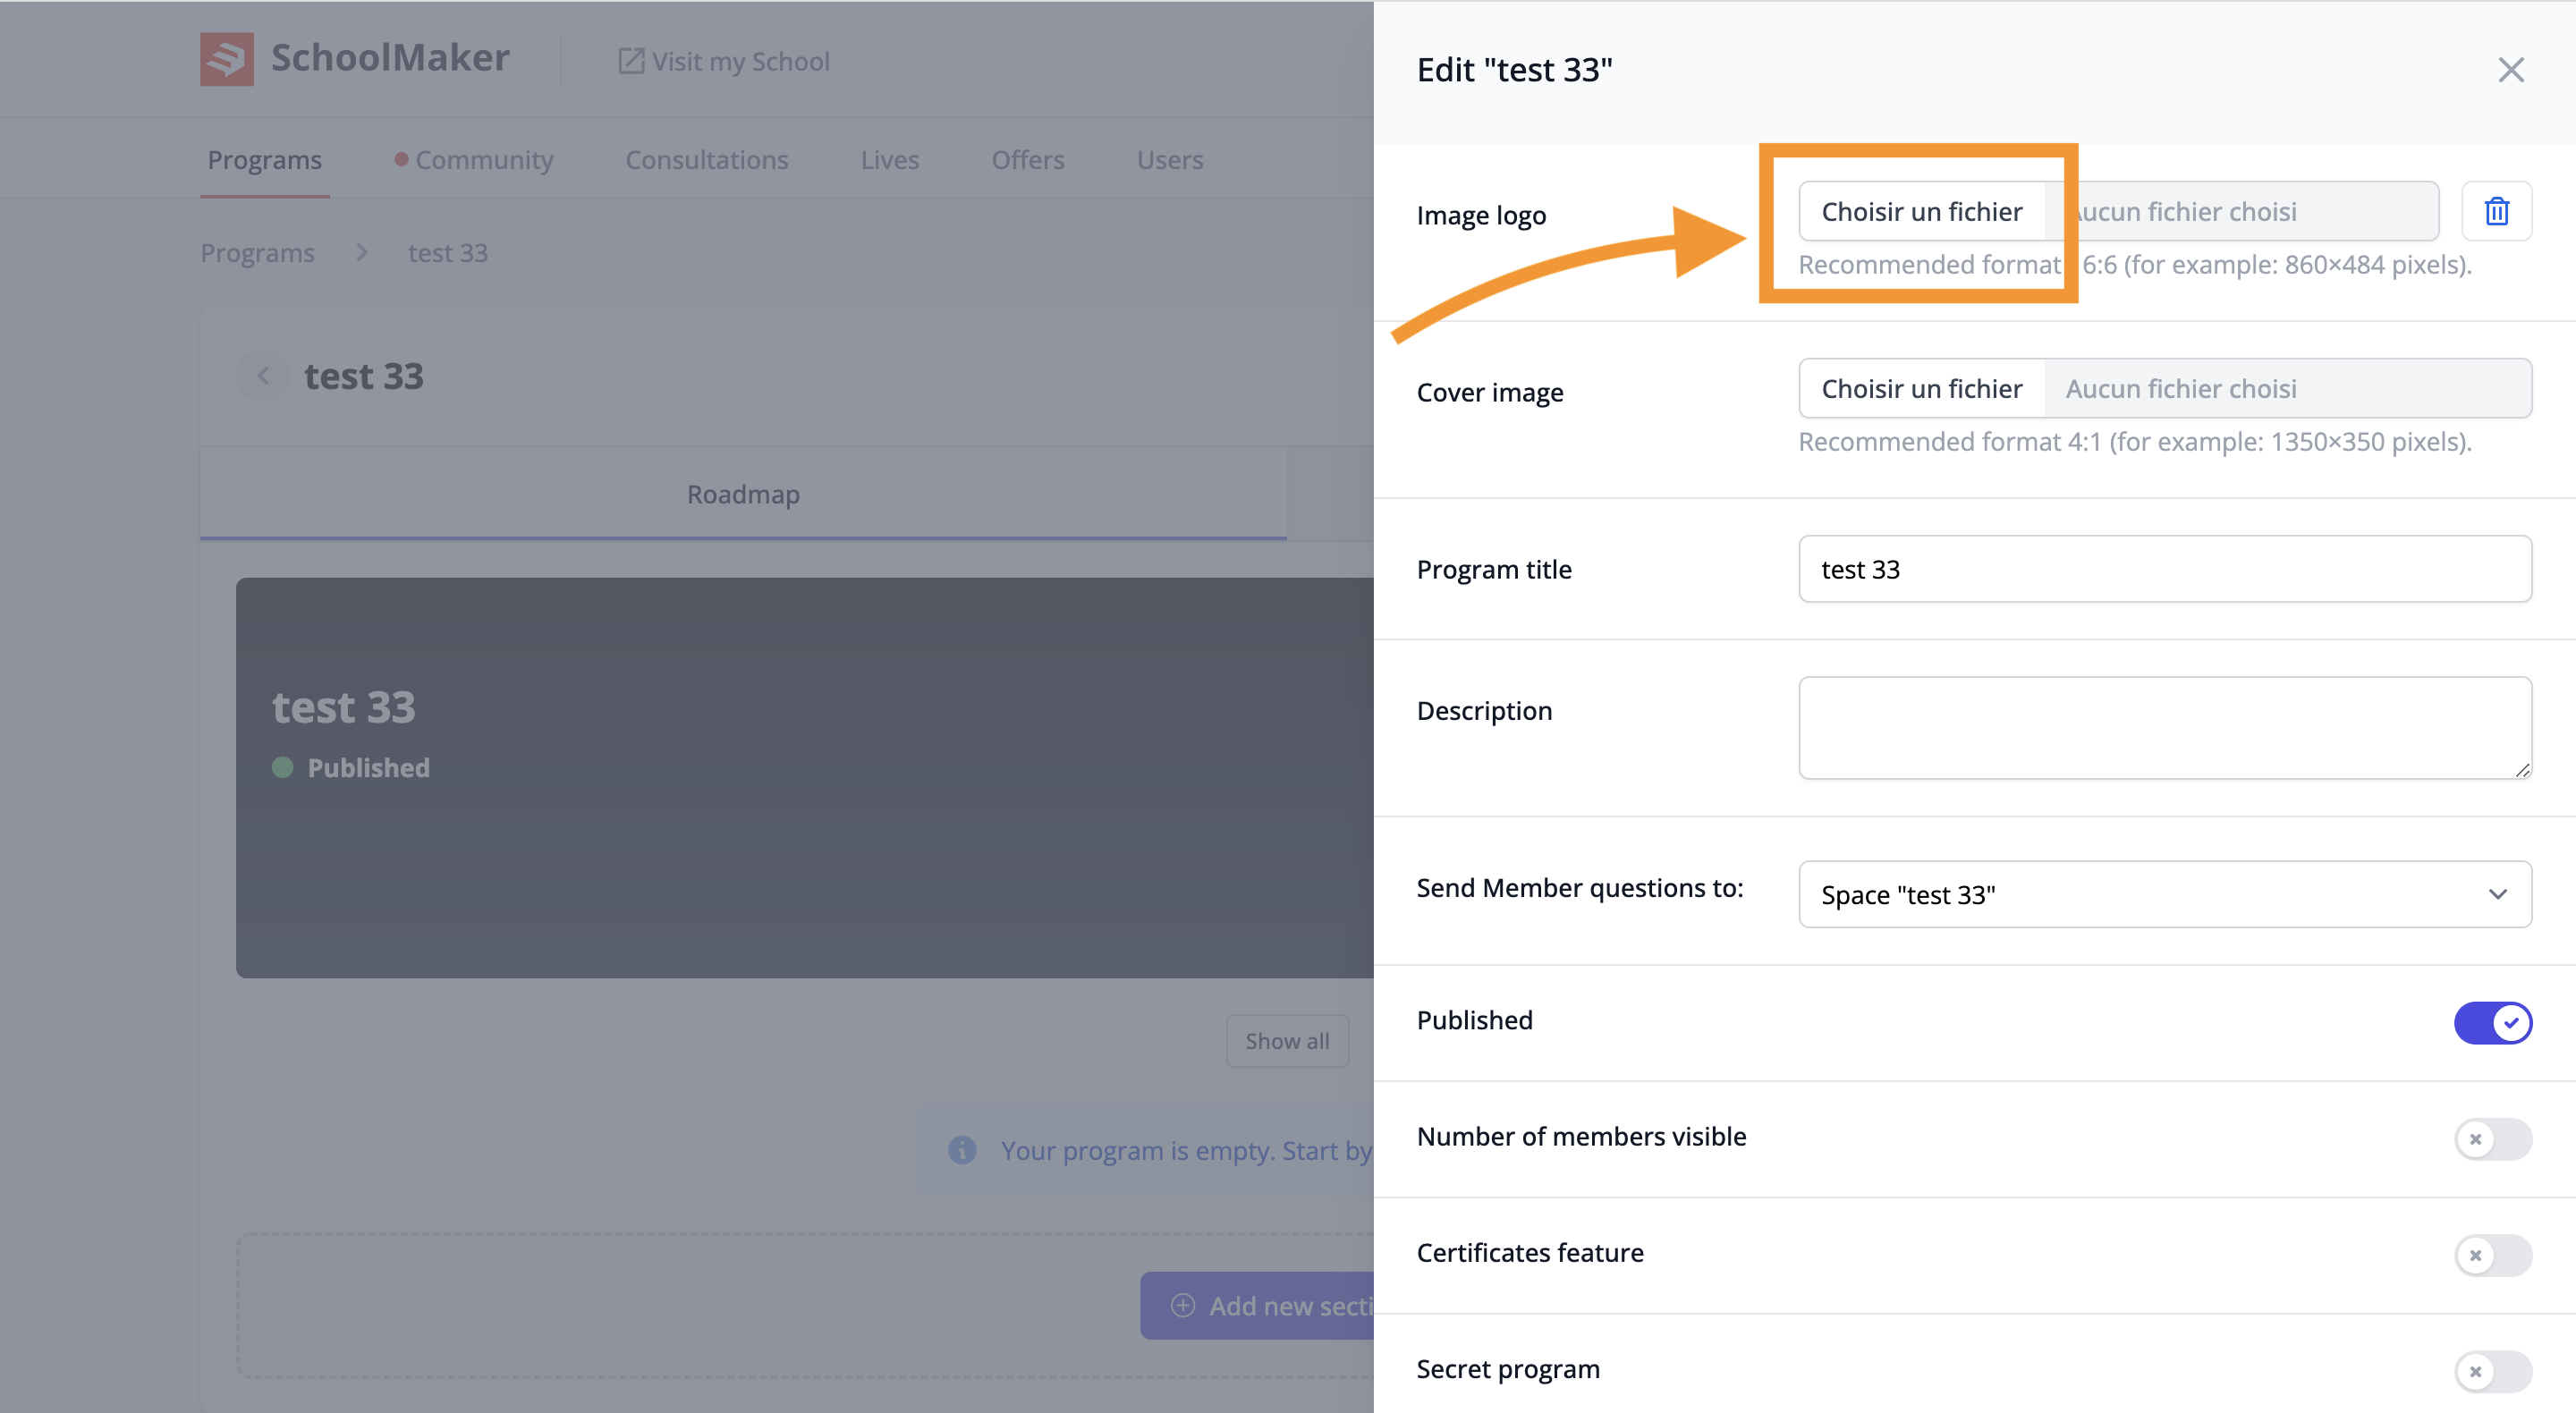
Step 3: Add a logo image
A program's logo image displays when a member is on their school's program listings.
Click "choose file" to select an image on your computer.
The recommended aspect ratio is 16:9 (for example 860 x 484 pixels).
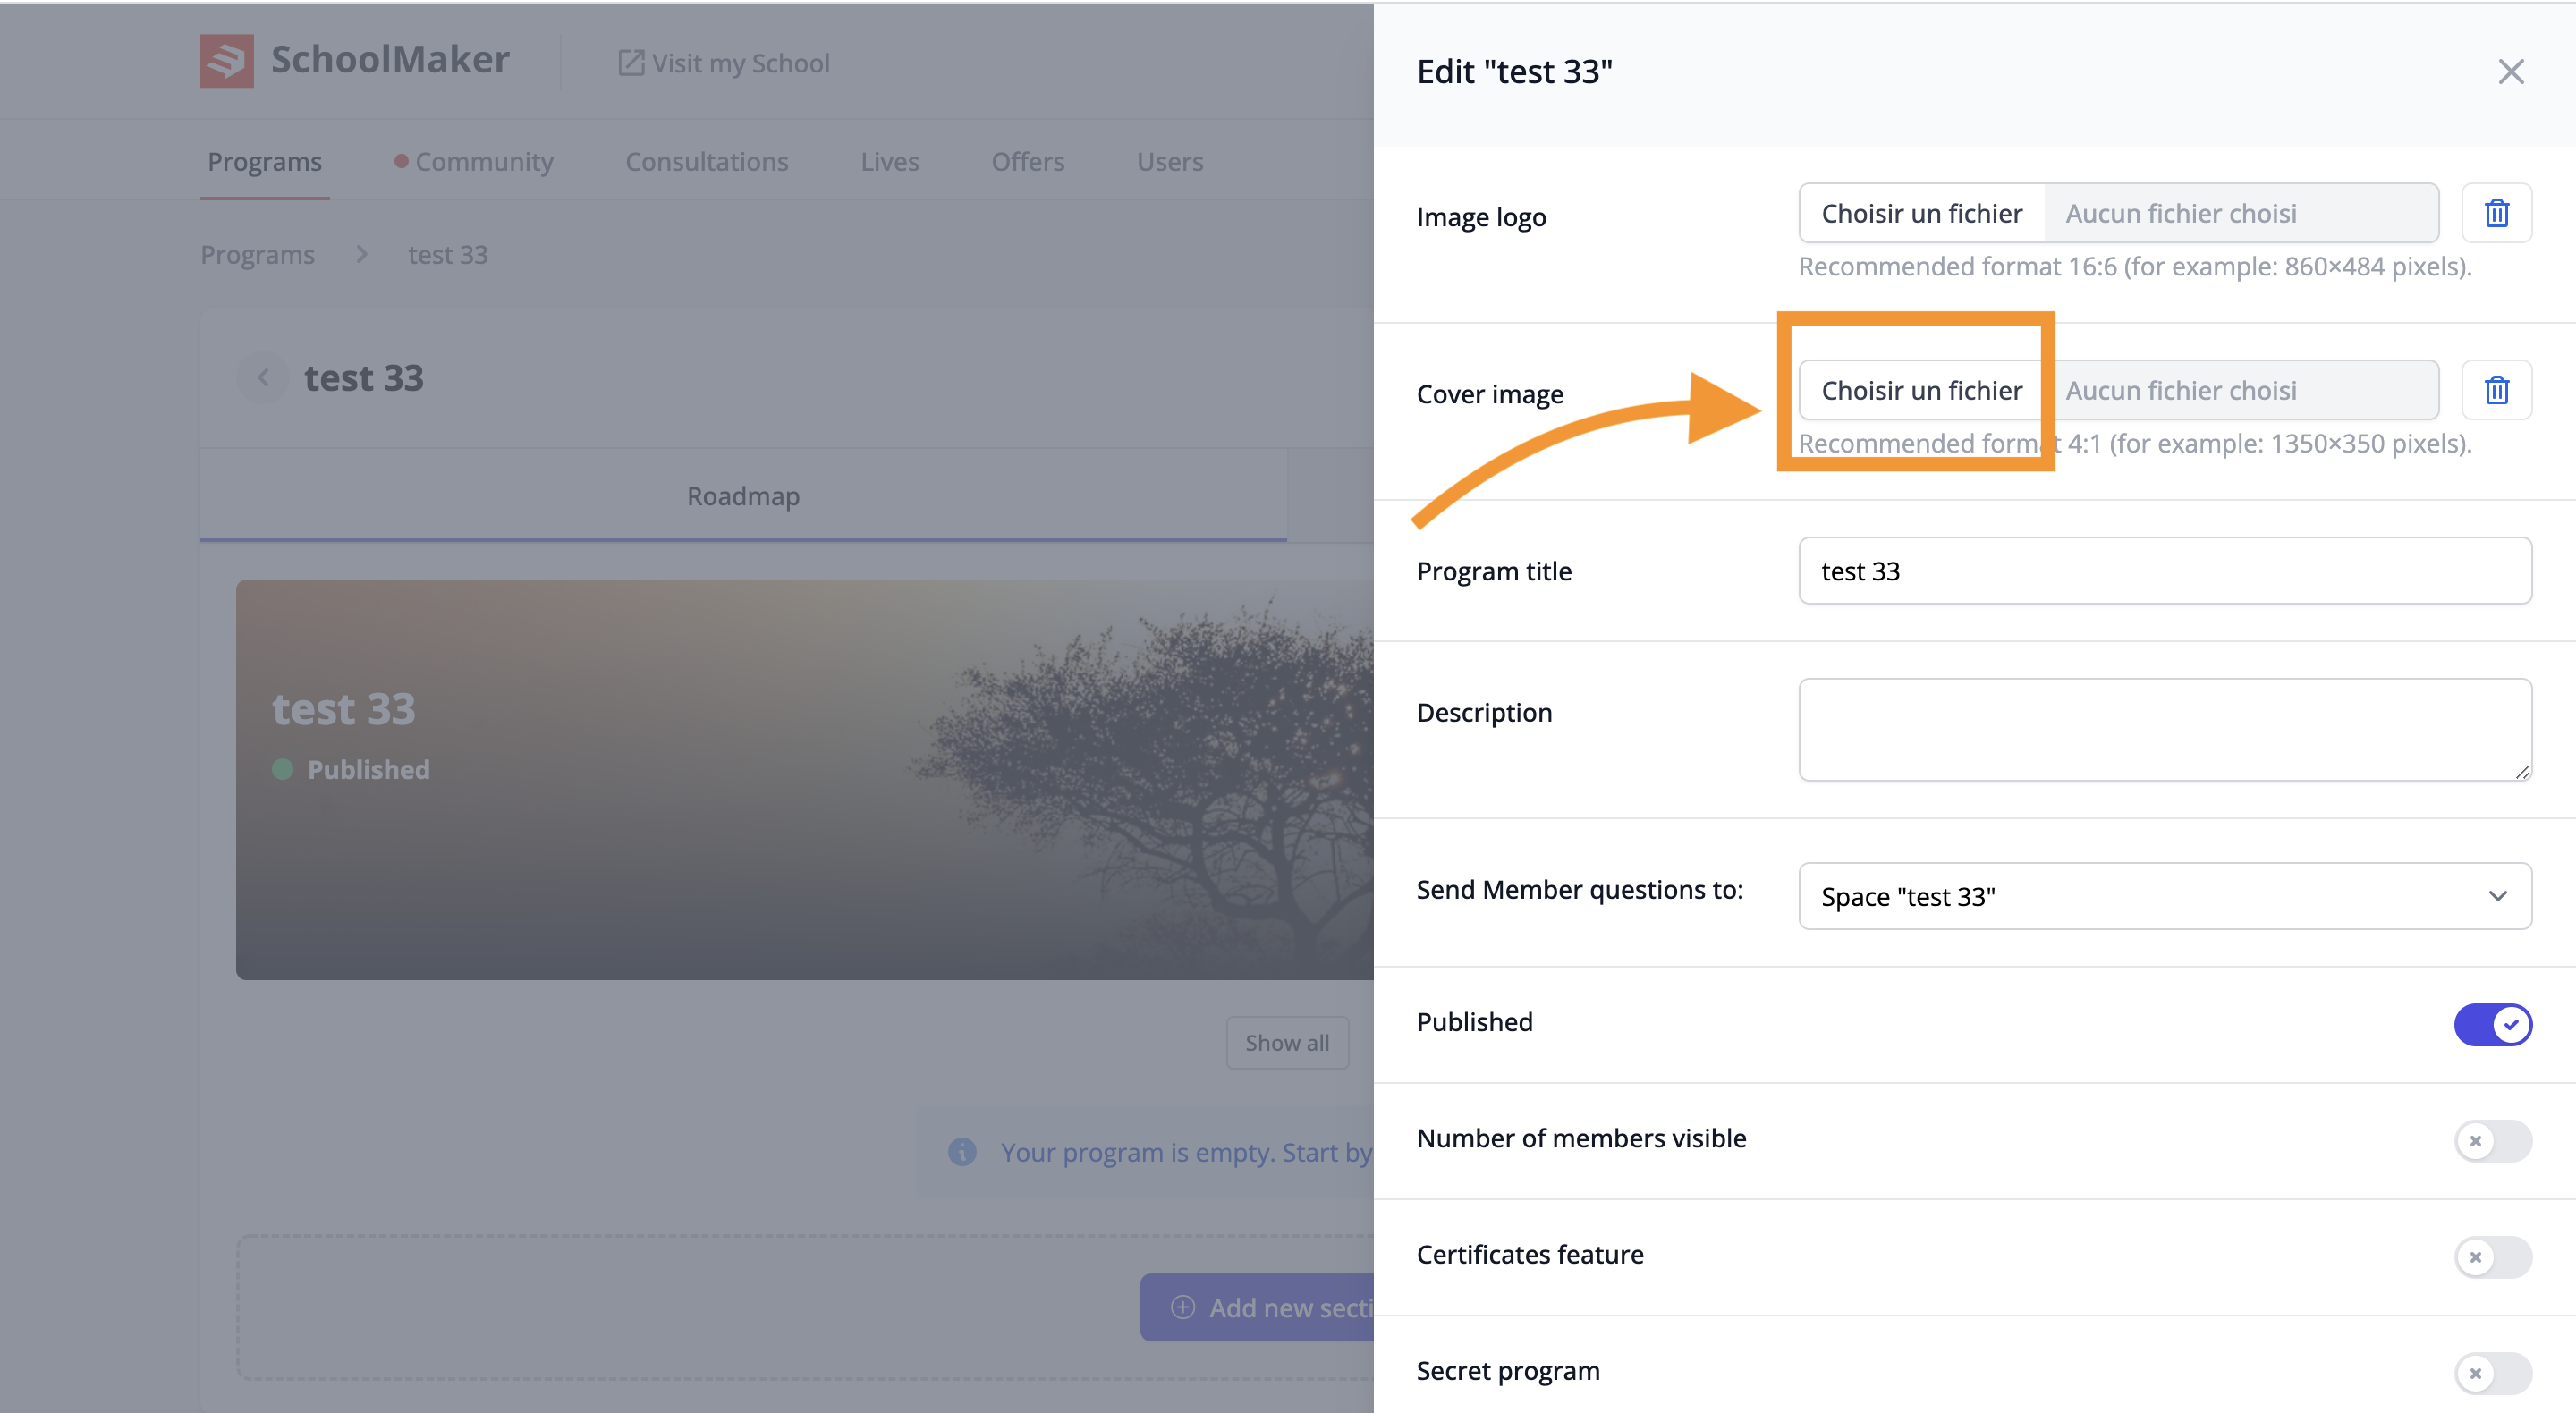
Step 4: Add a cover image
The cover image appears when a member is inside the program.
Click "choose file" to select an image on your computer.
The recommended aspect ratio is 4:1 (for example 1350 x 350 pixels).
Step 5: Name your course
Add the name of your course in the "program title" box.
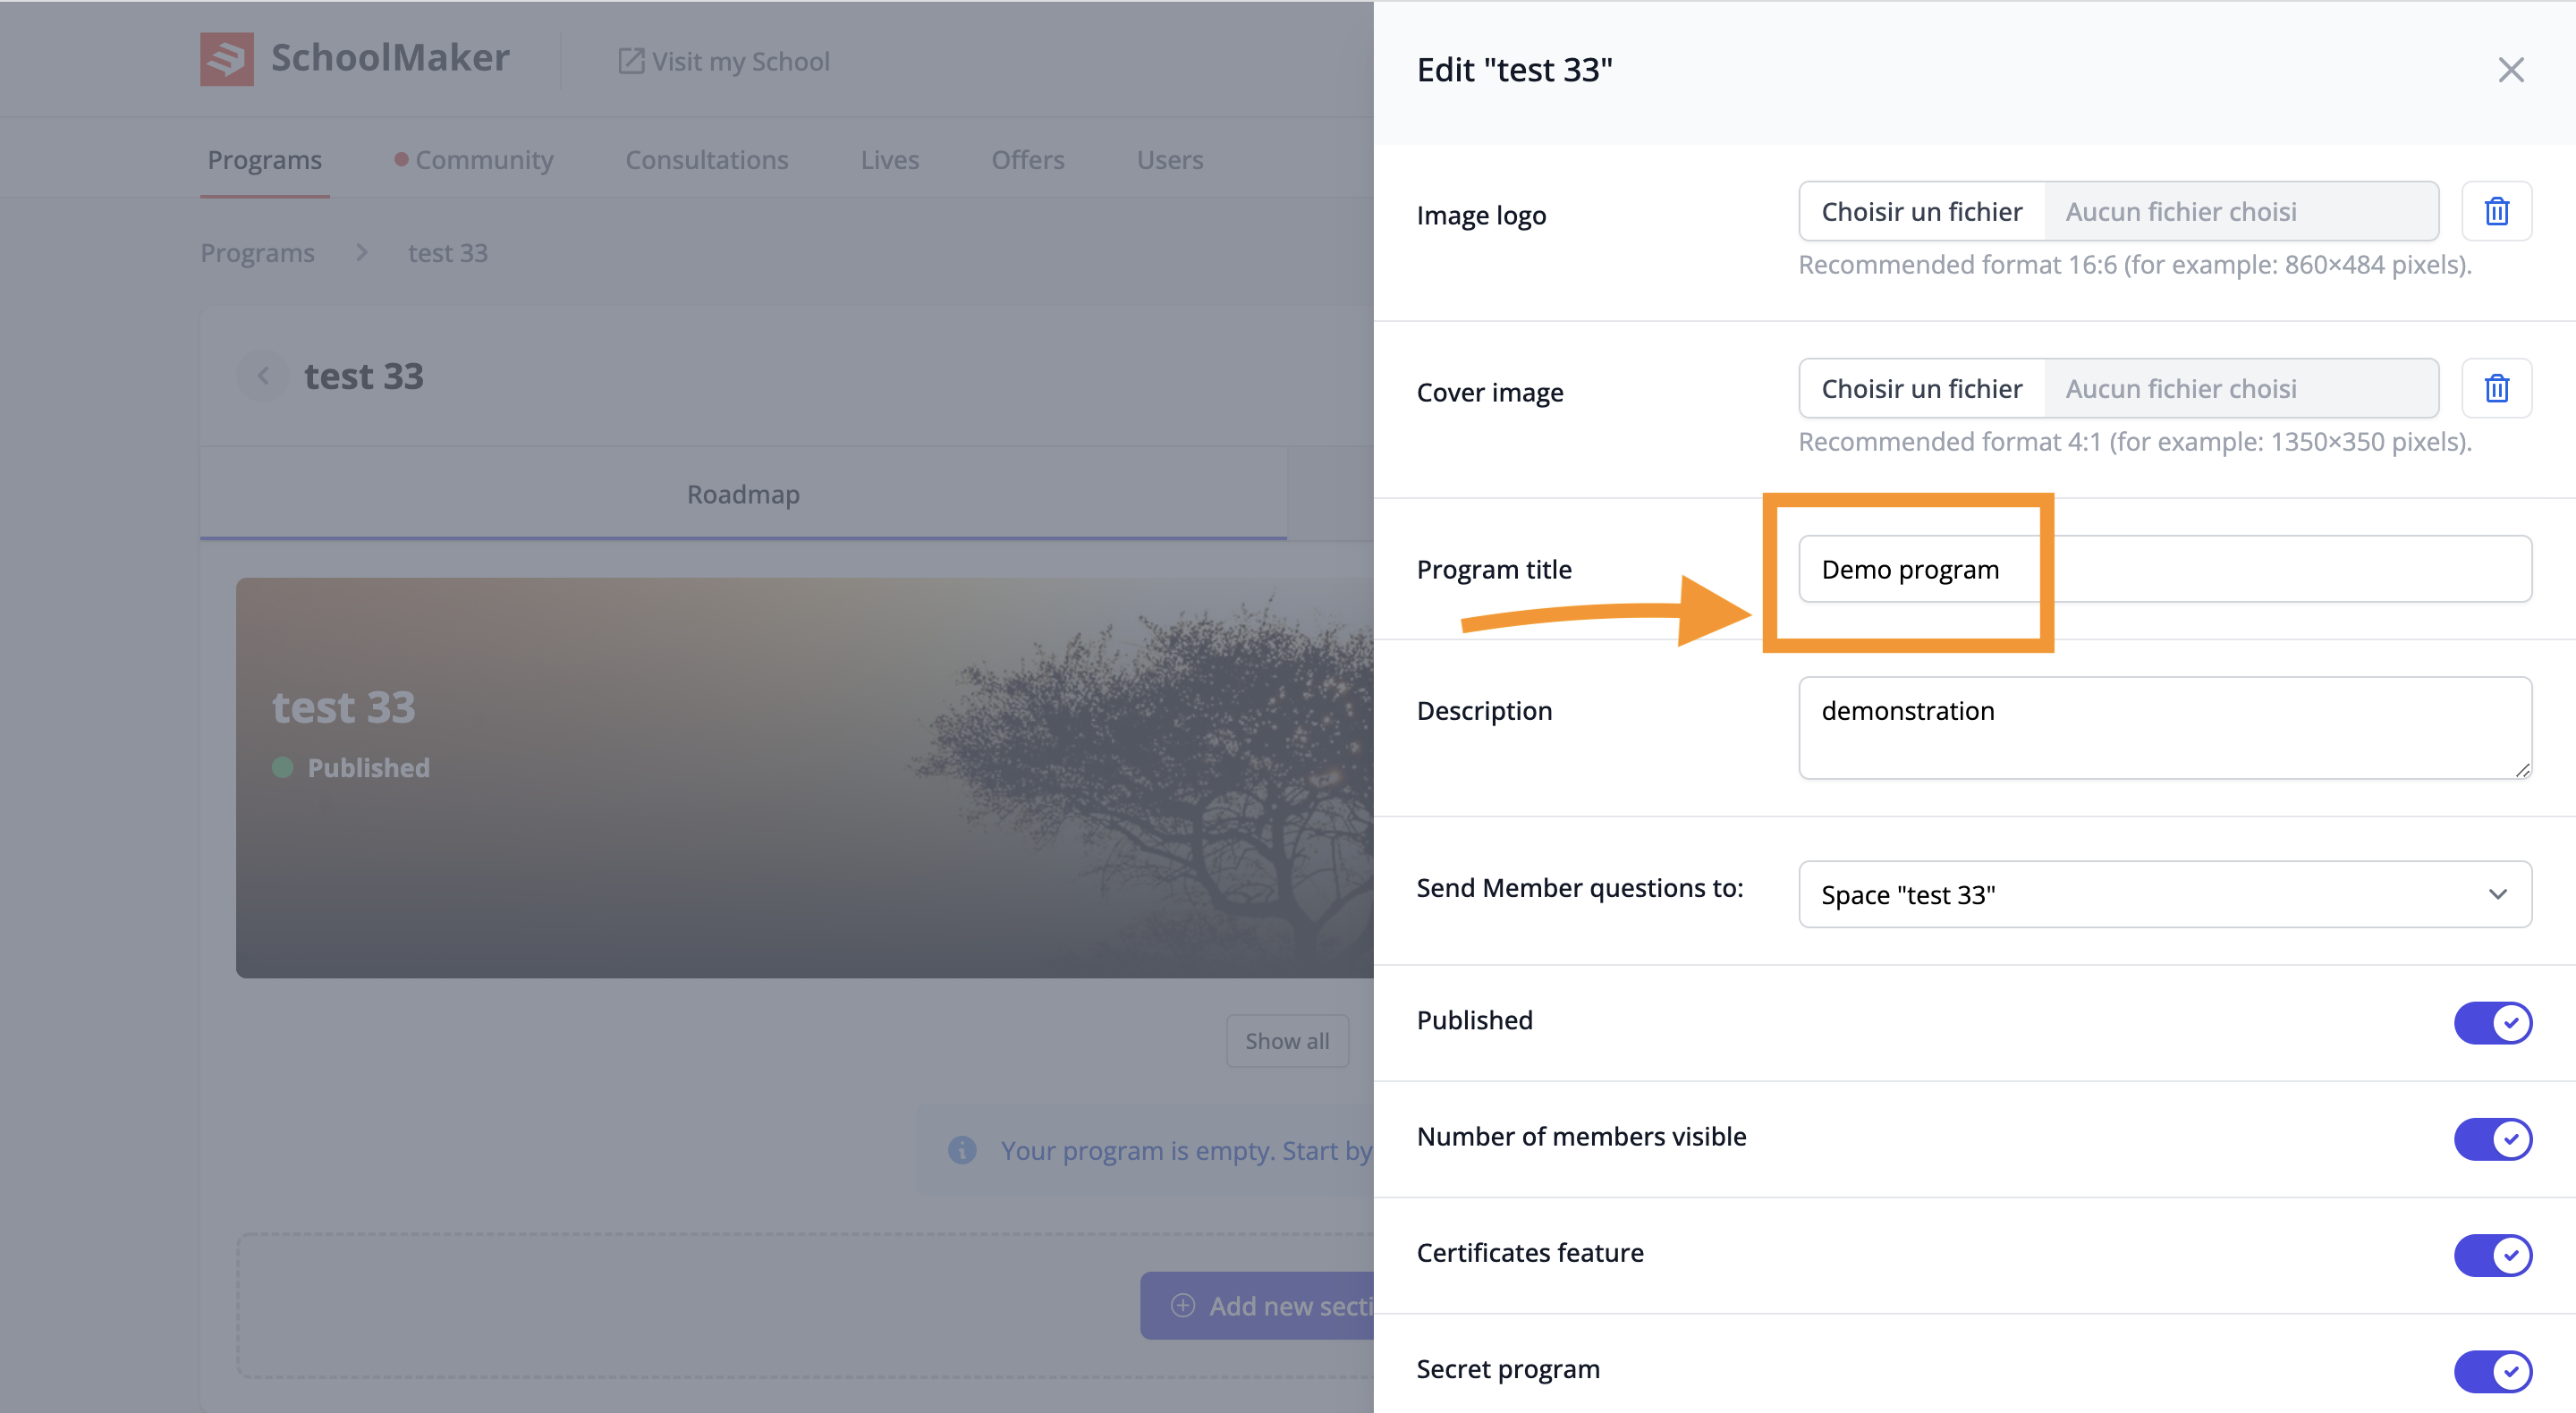
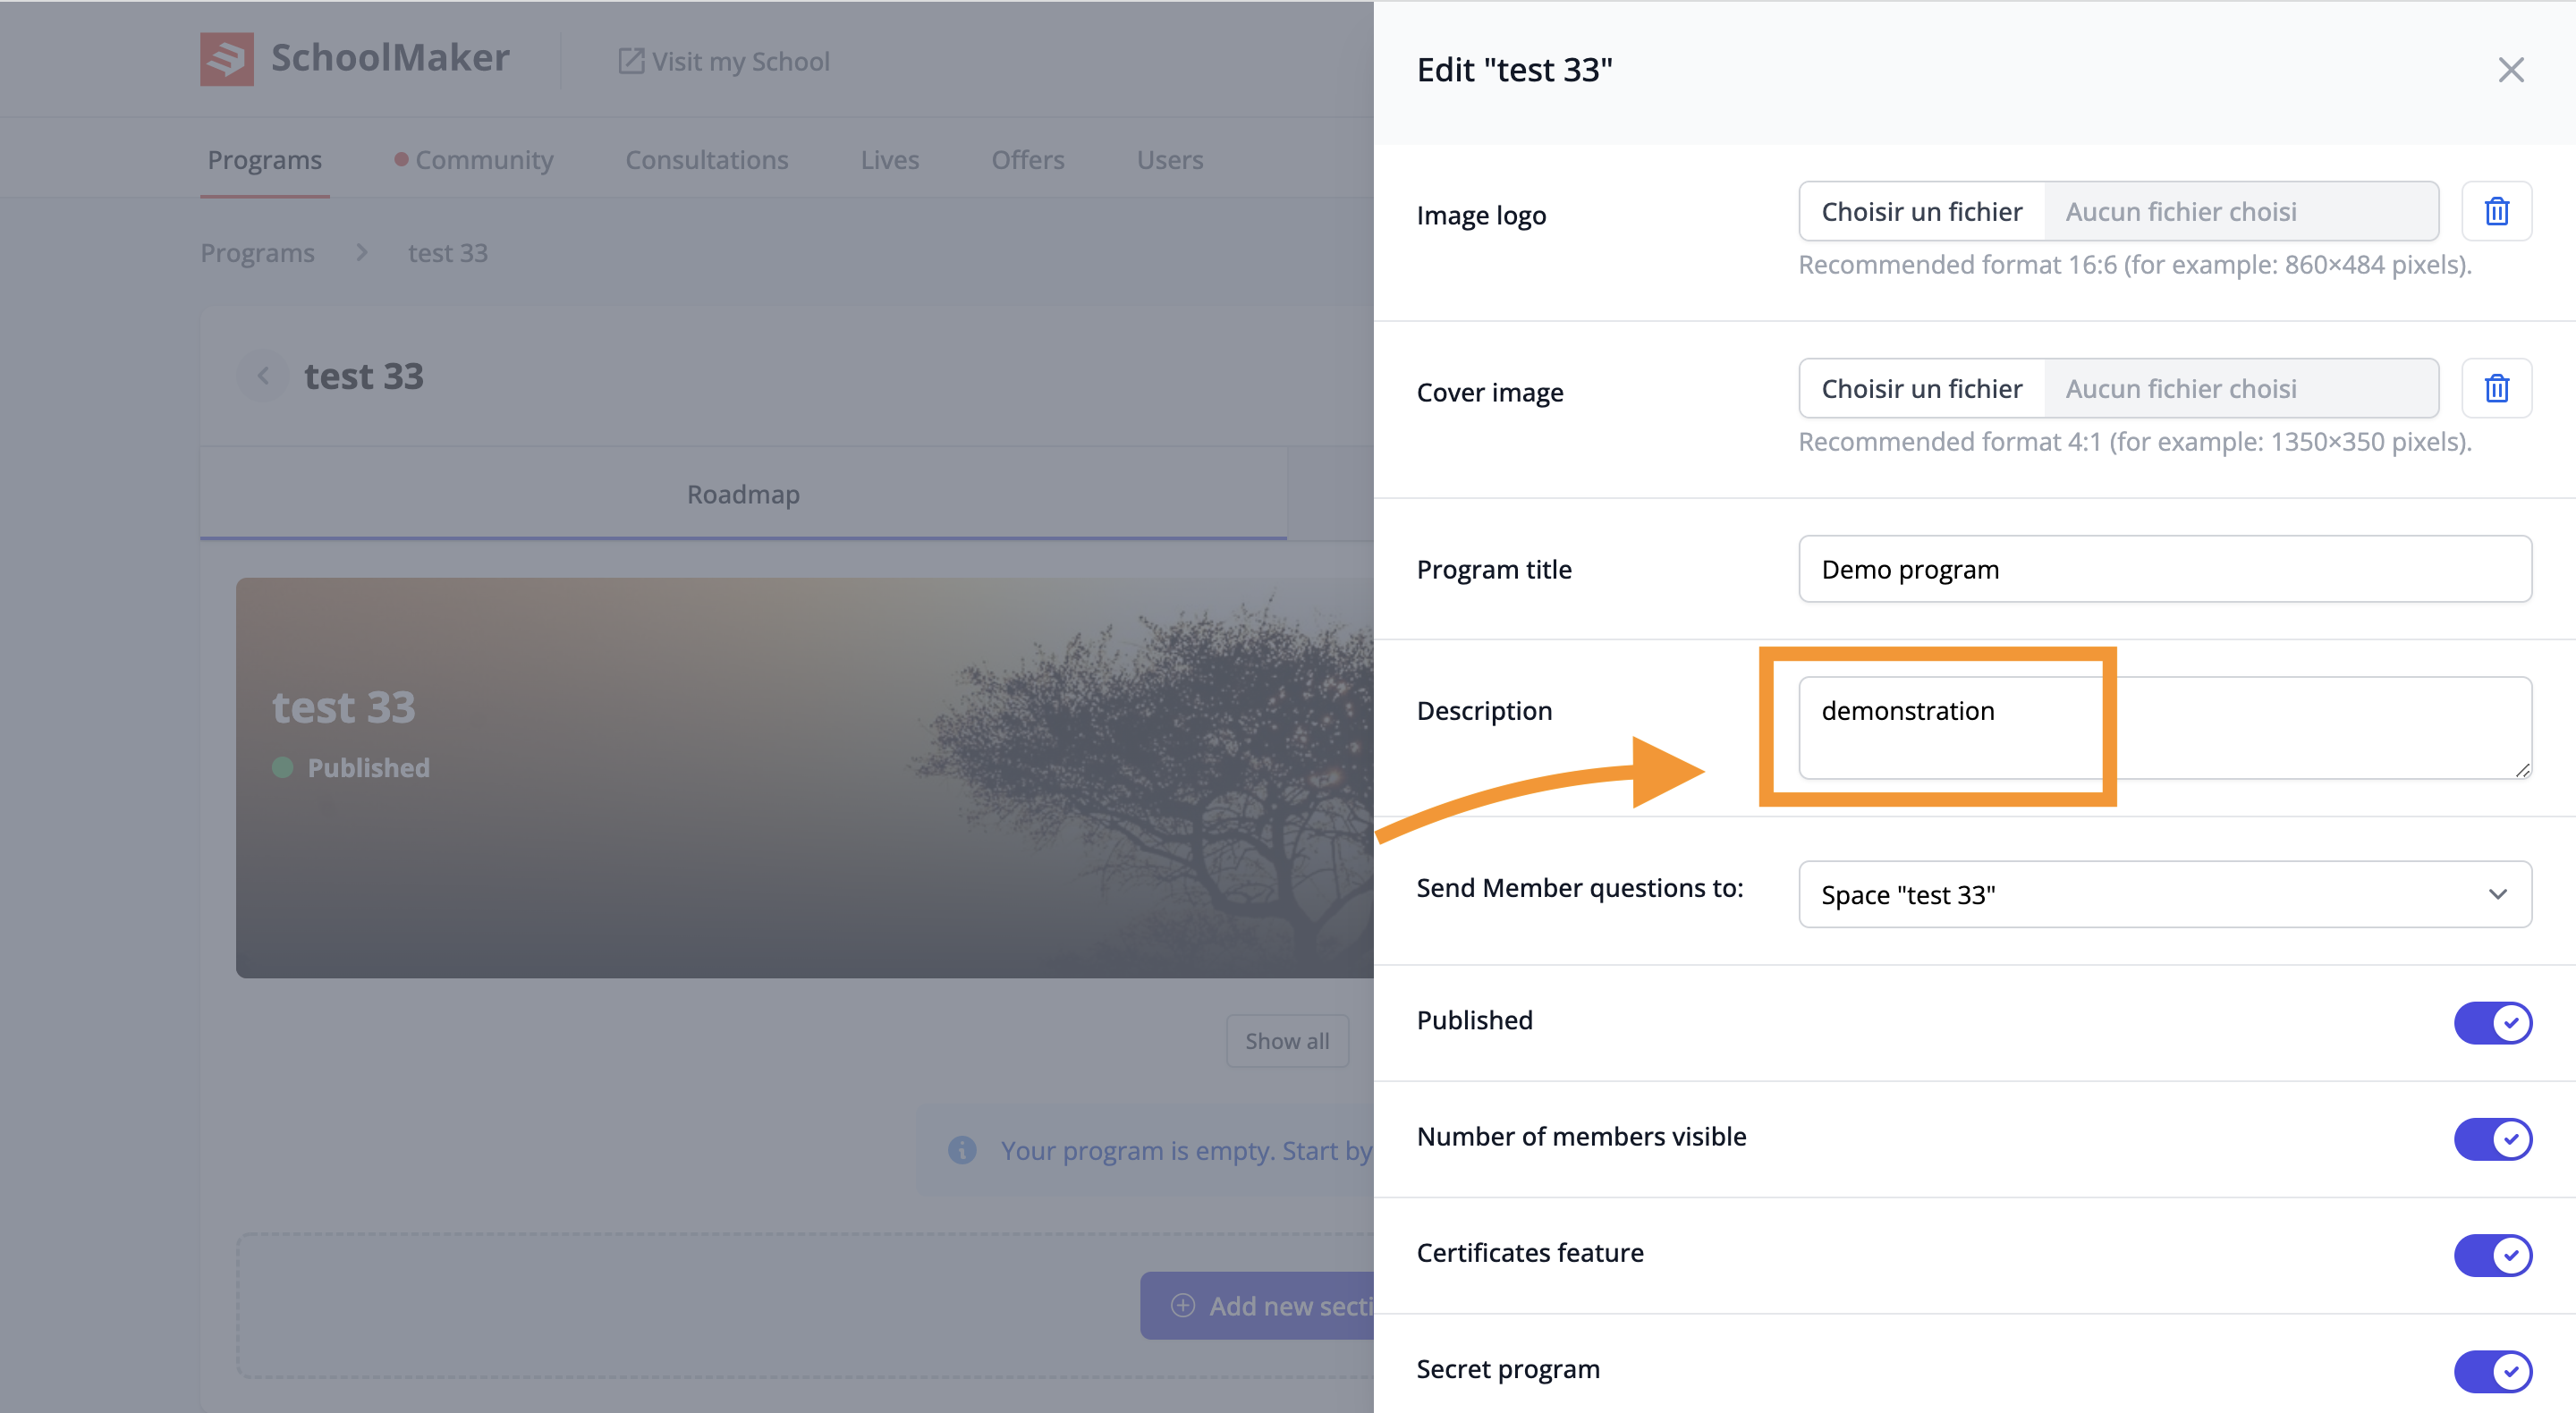
Step 6: Add a description of your course
Add the description of the program in the "Description" box below the previous box.
For example: "In this course, you will learn how to build a wooden house from A to Z".
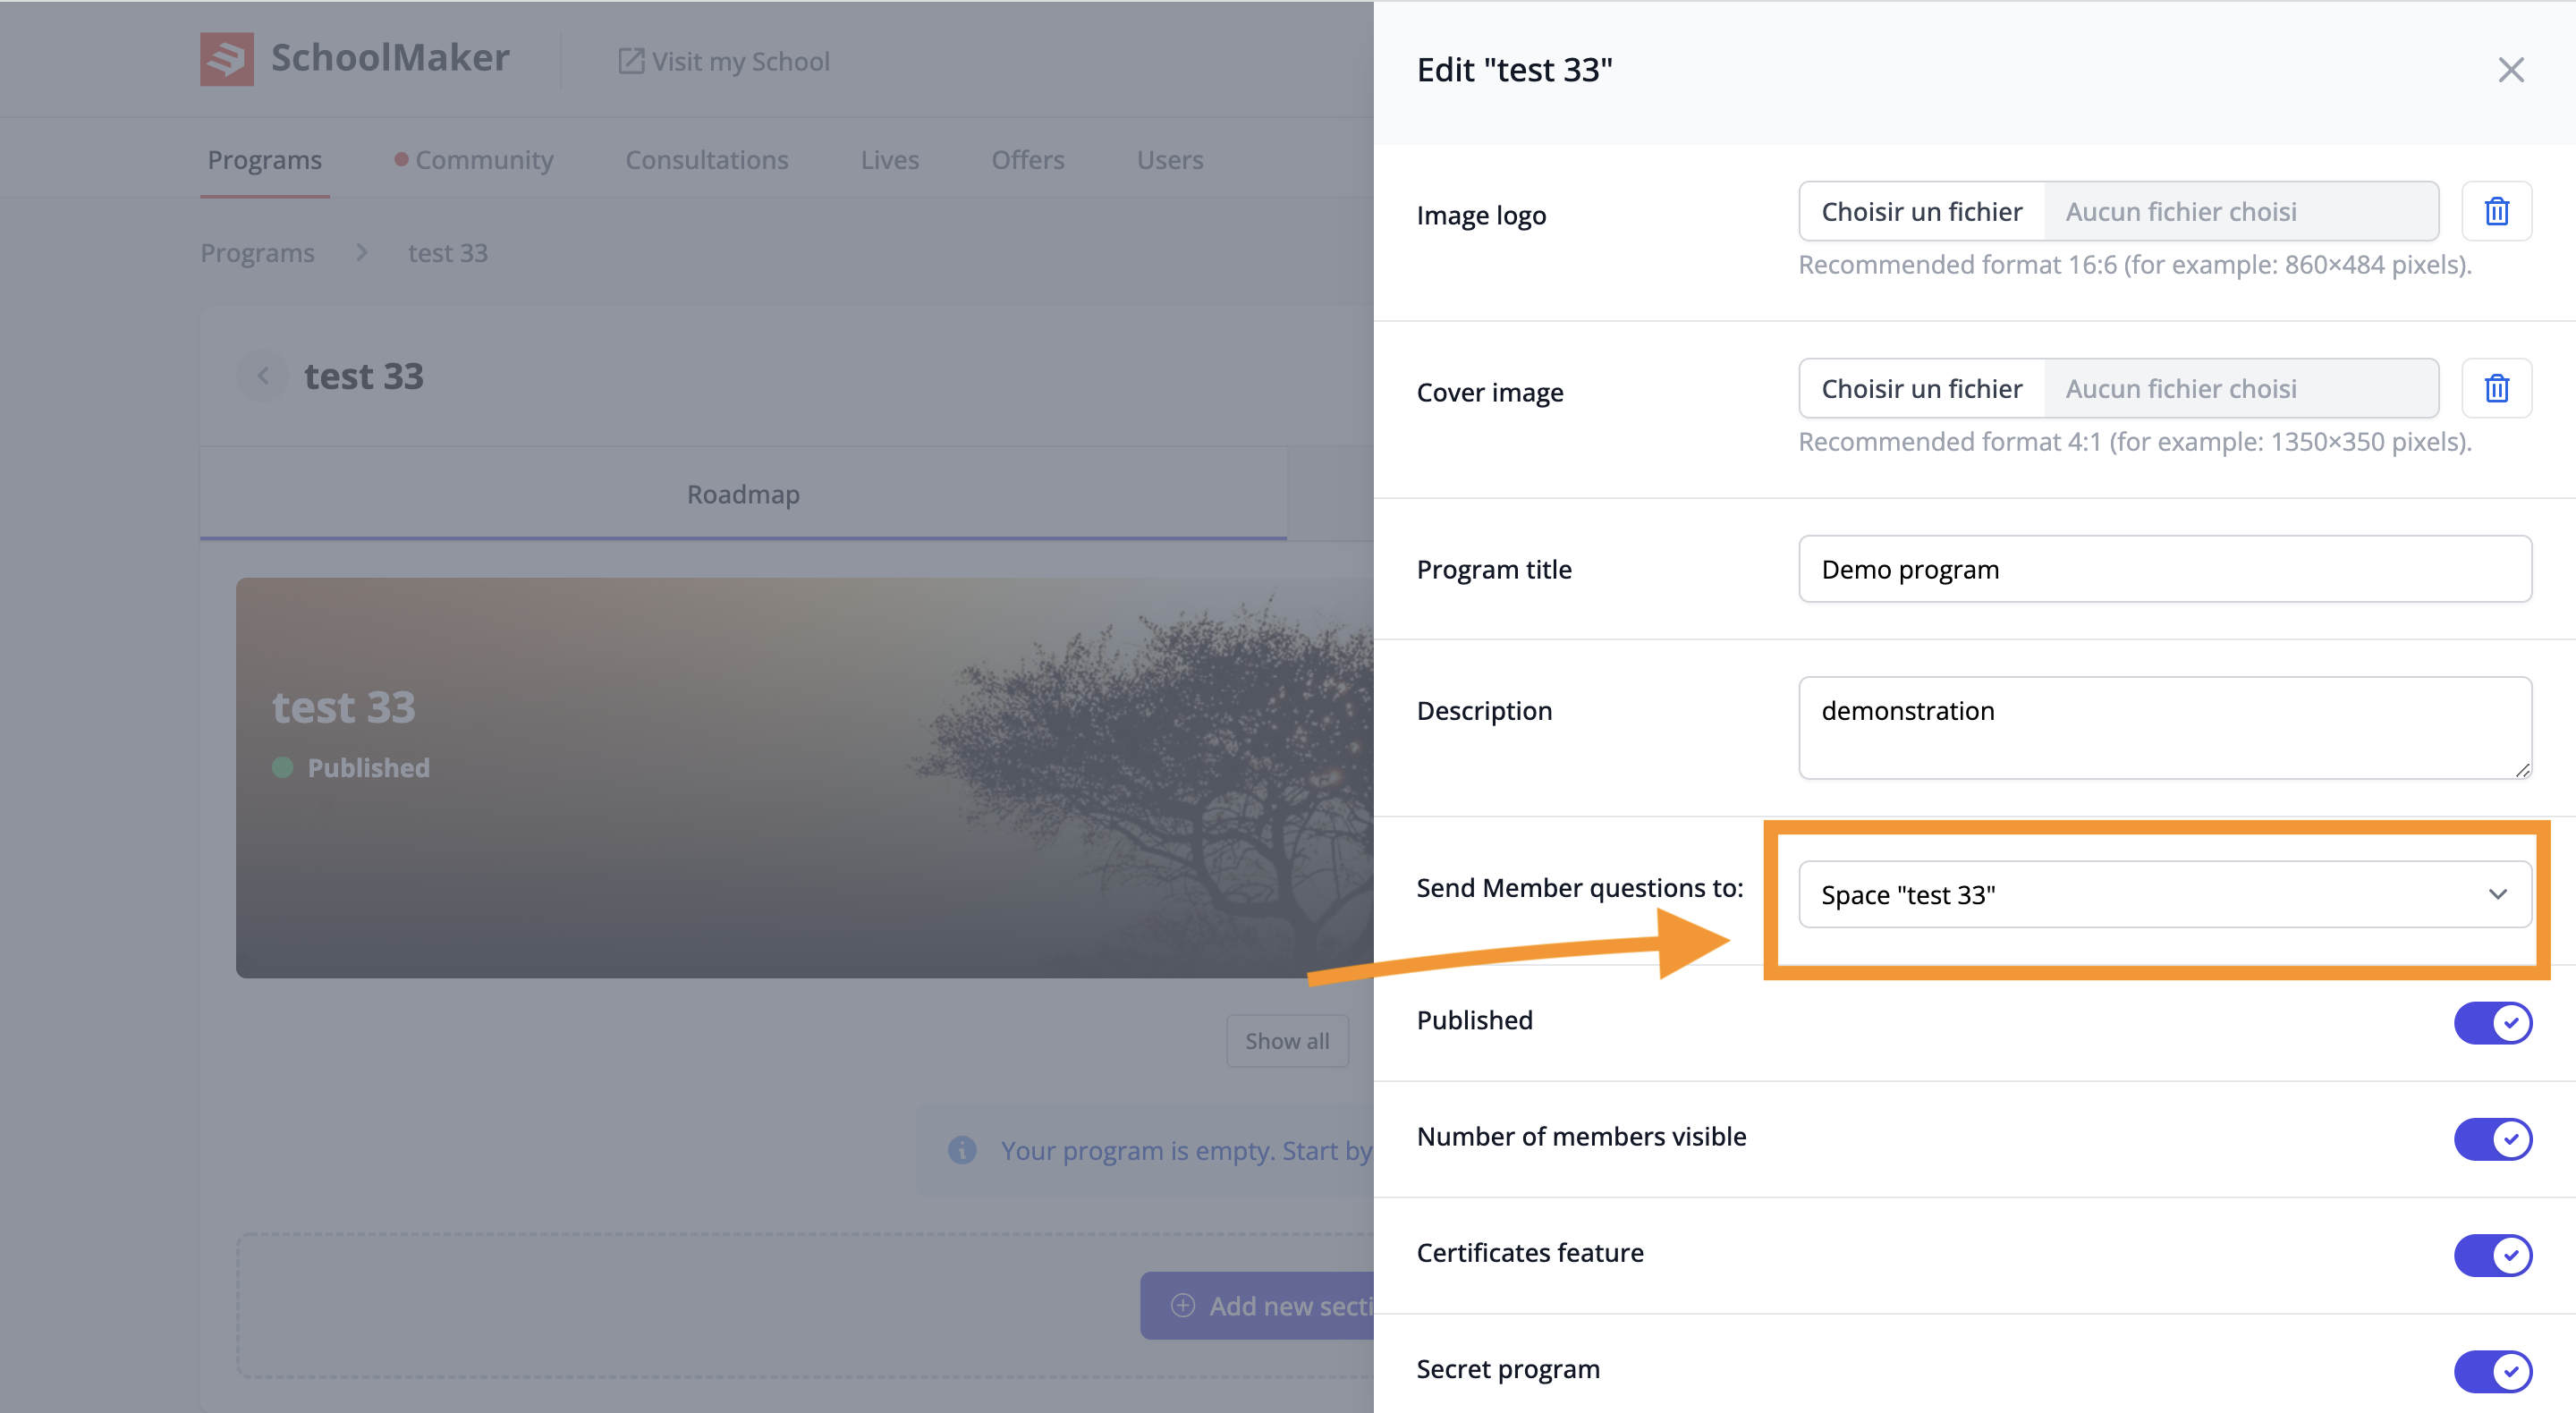
Step 7: Choose the destination of lesson questions
Below each lesson, your members will be able to ask questions which will also be posted in your built-in community.
Select the space you created earlier in the "Send Member questions to:" dropdown.
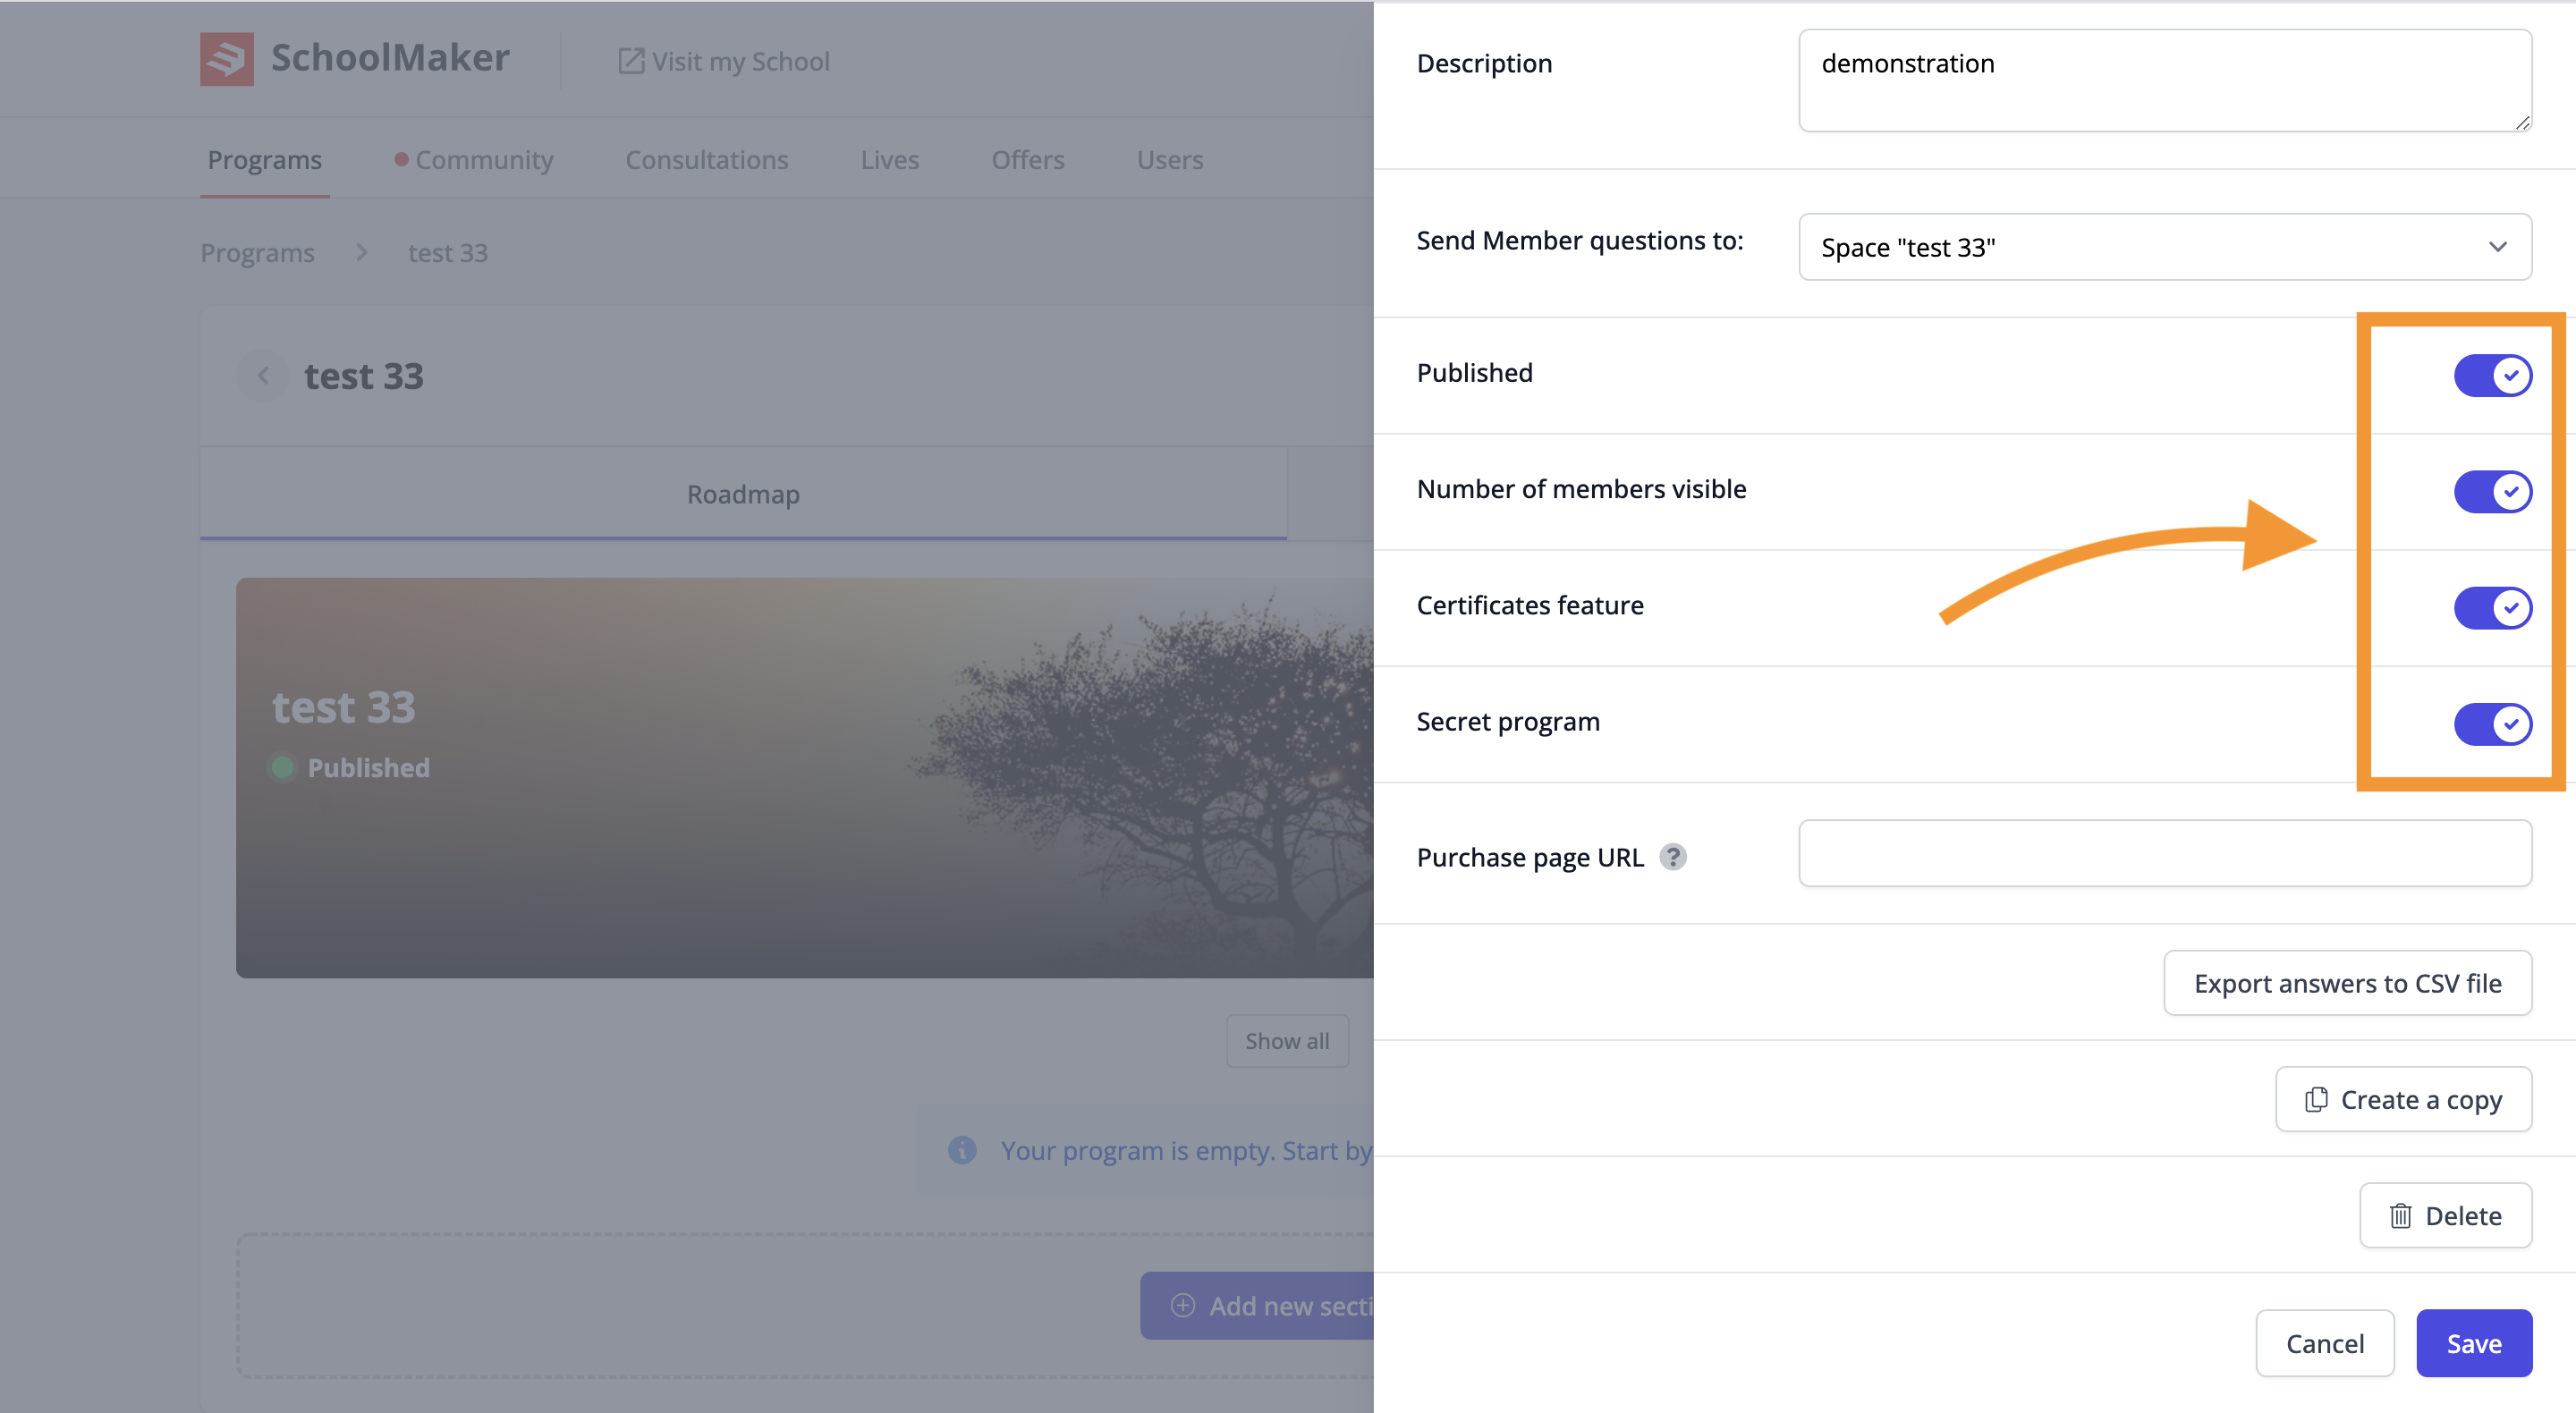
Step 8: Setup advanced features
Then, you have the possibility of activating 4 features by checking or not these toggles:
- The "Published" toggle, which makes the program accessible to members who you gave access to.
- The "Number of members visible" toggle, which makes the number of members of your program visible (including to members of your current programs who have not yet joined this program).
- The "Certificates feature" toggle, which activates the creation of a certificate of completion when a member completes 100% of their program.
- The "Secret program" toggle, which will hide the program for members that haven't joined it.
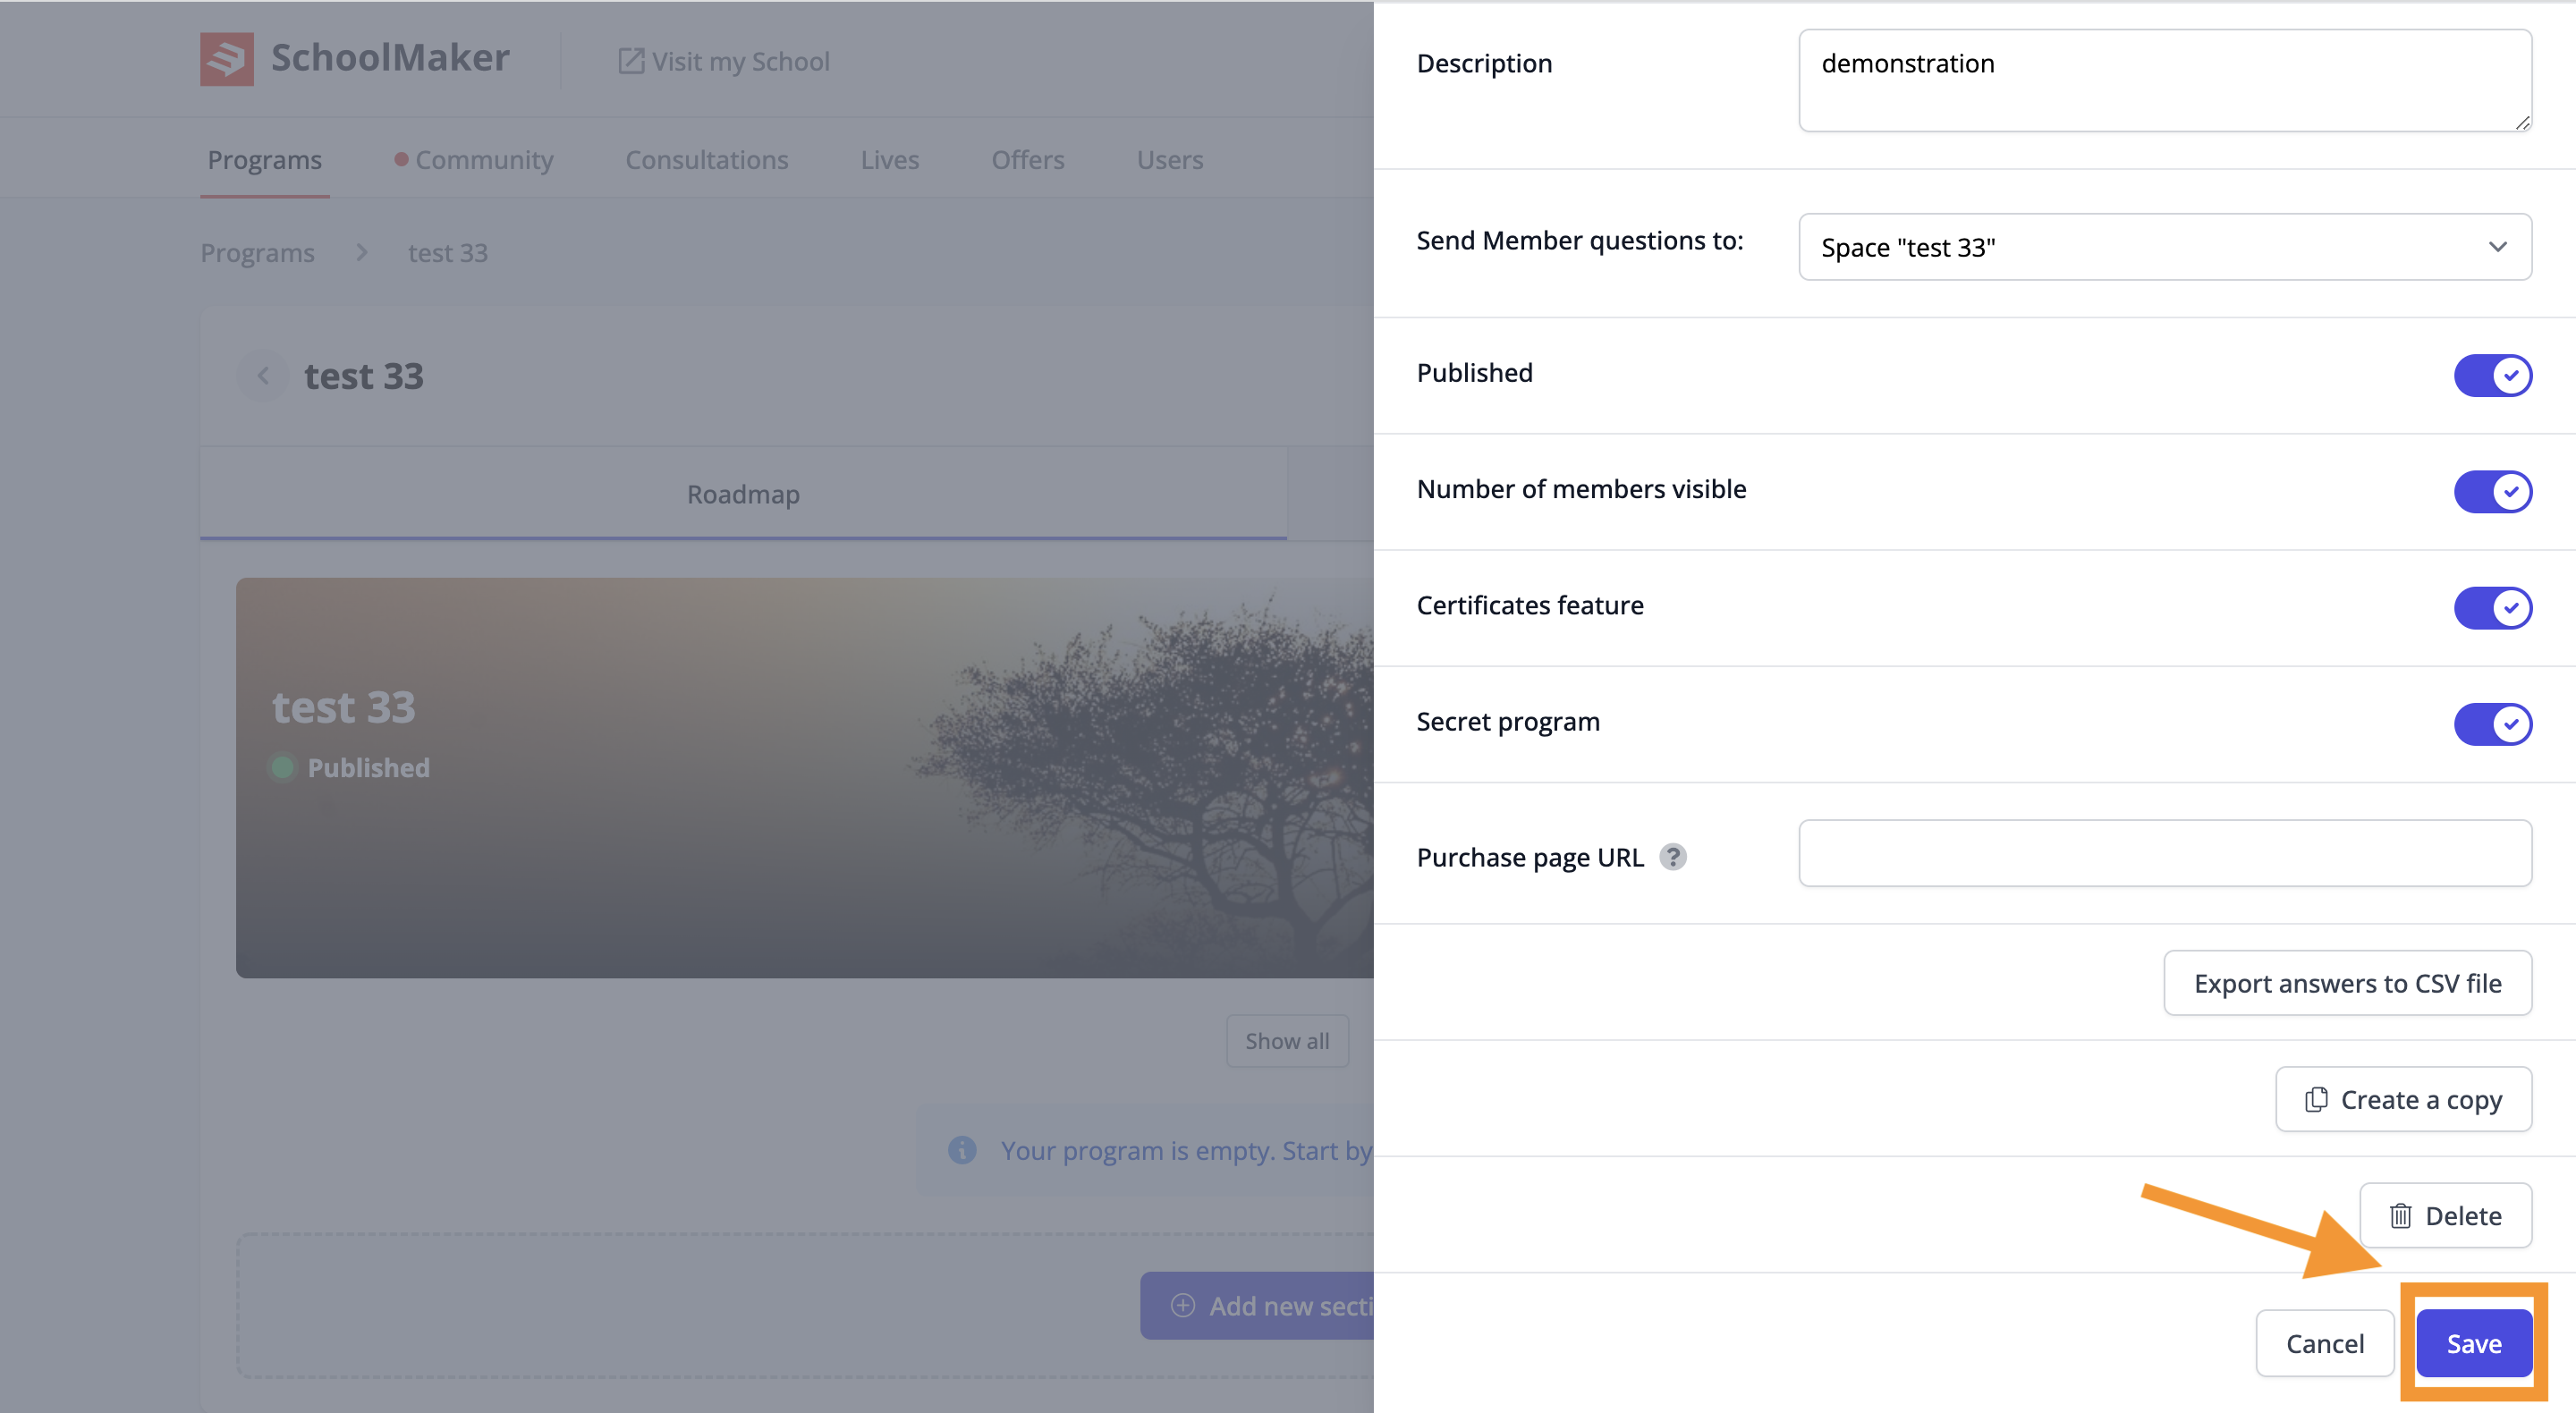
Step 9: Save Changes
Save by clicking on the button: "Save".
Part 2: Create a section and setup it
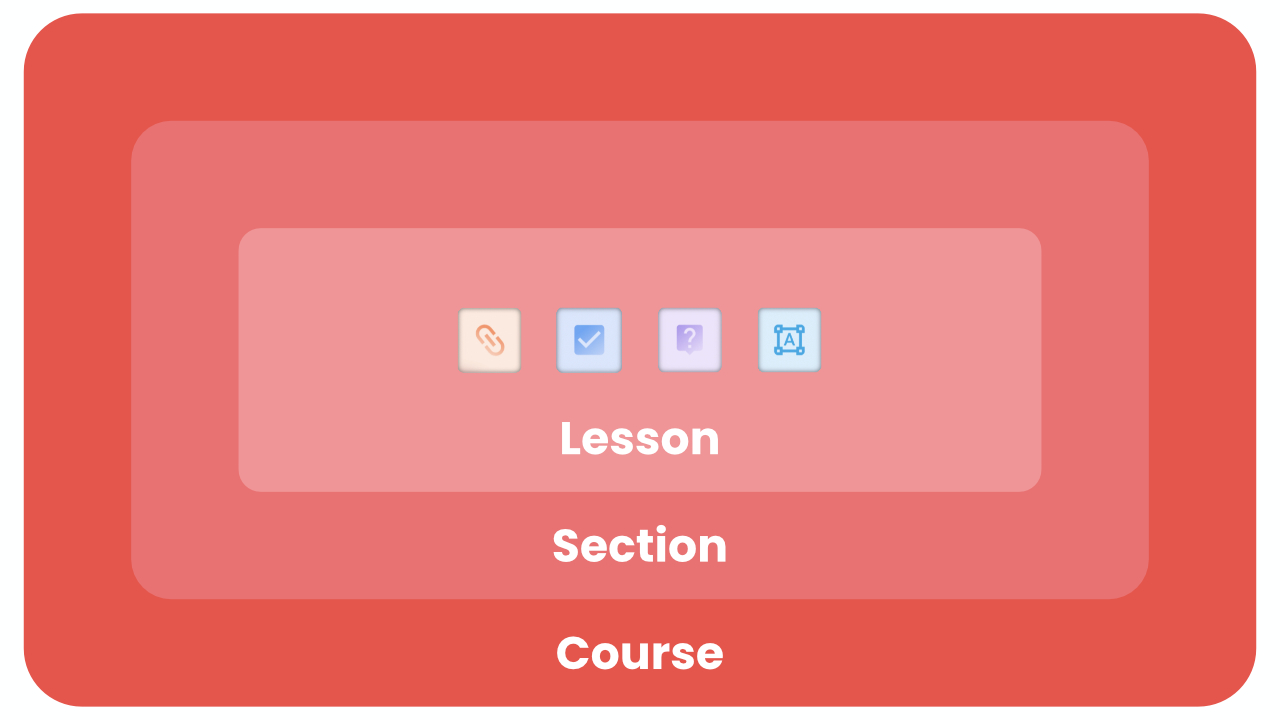
Step 1: Understand the structure of a program on SchoolMaker
Your course contains → course sections, which contain → lessons which contain → action steps
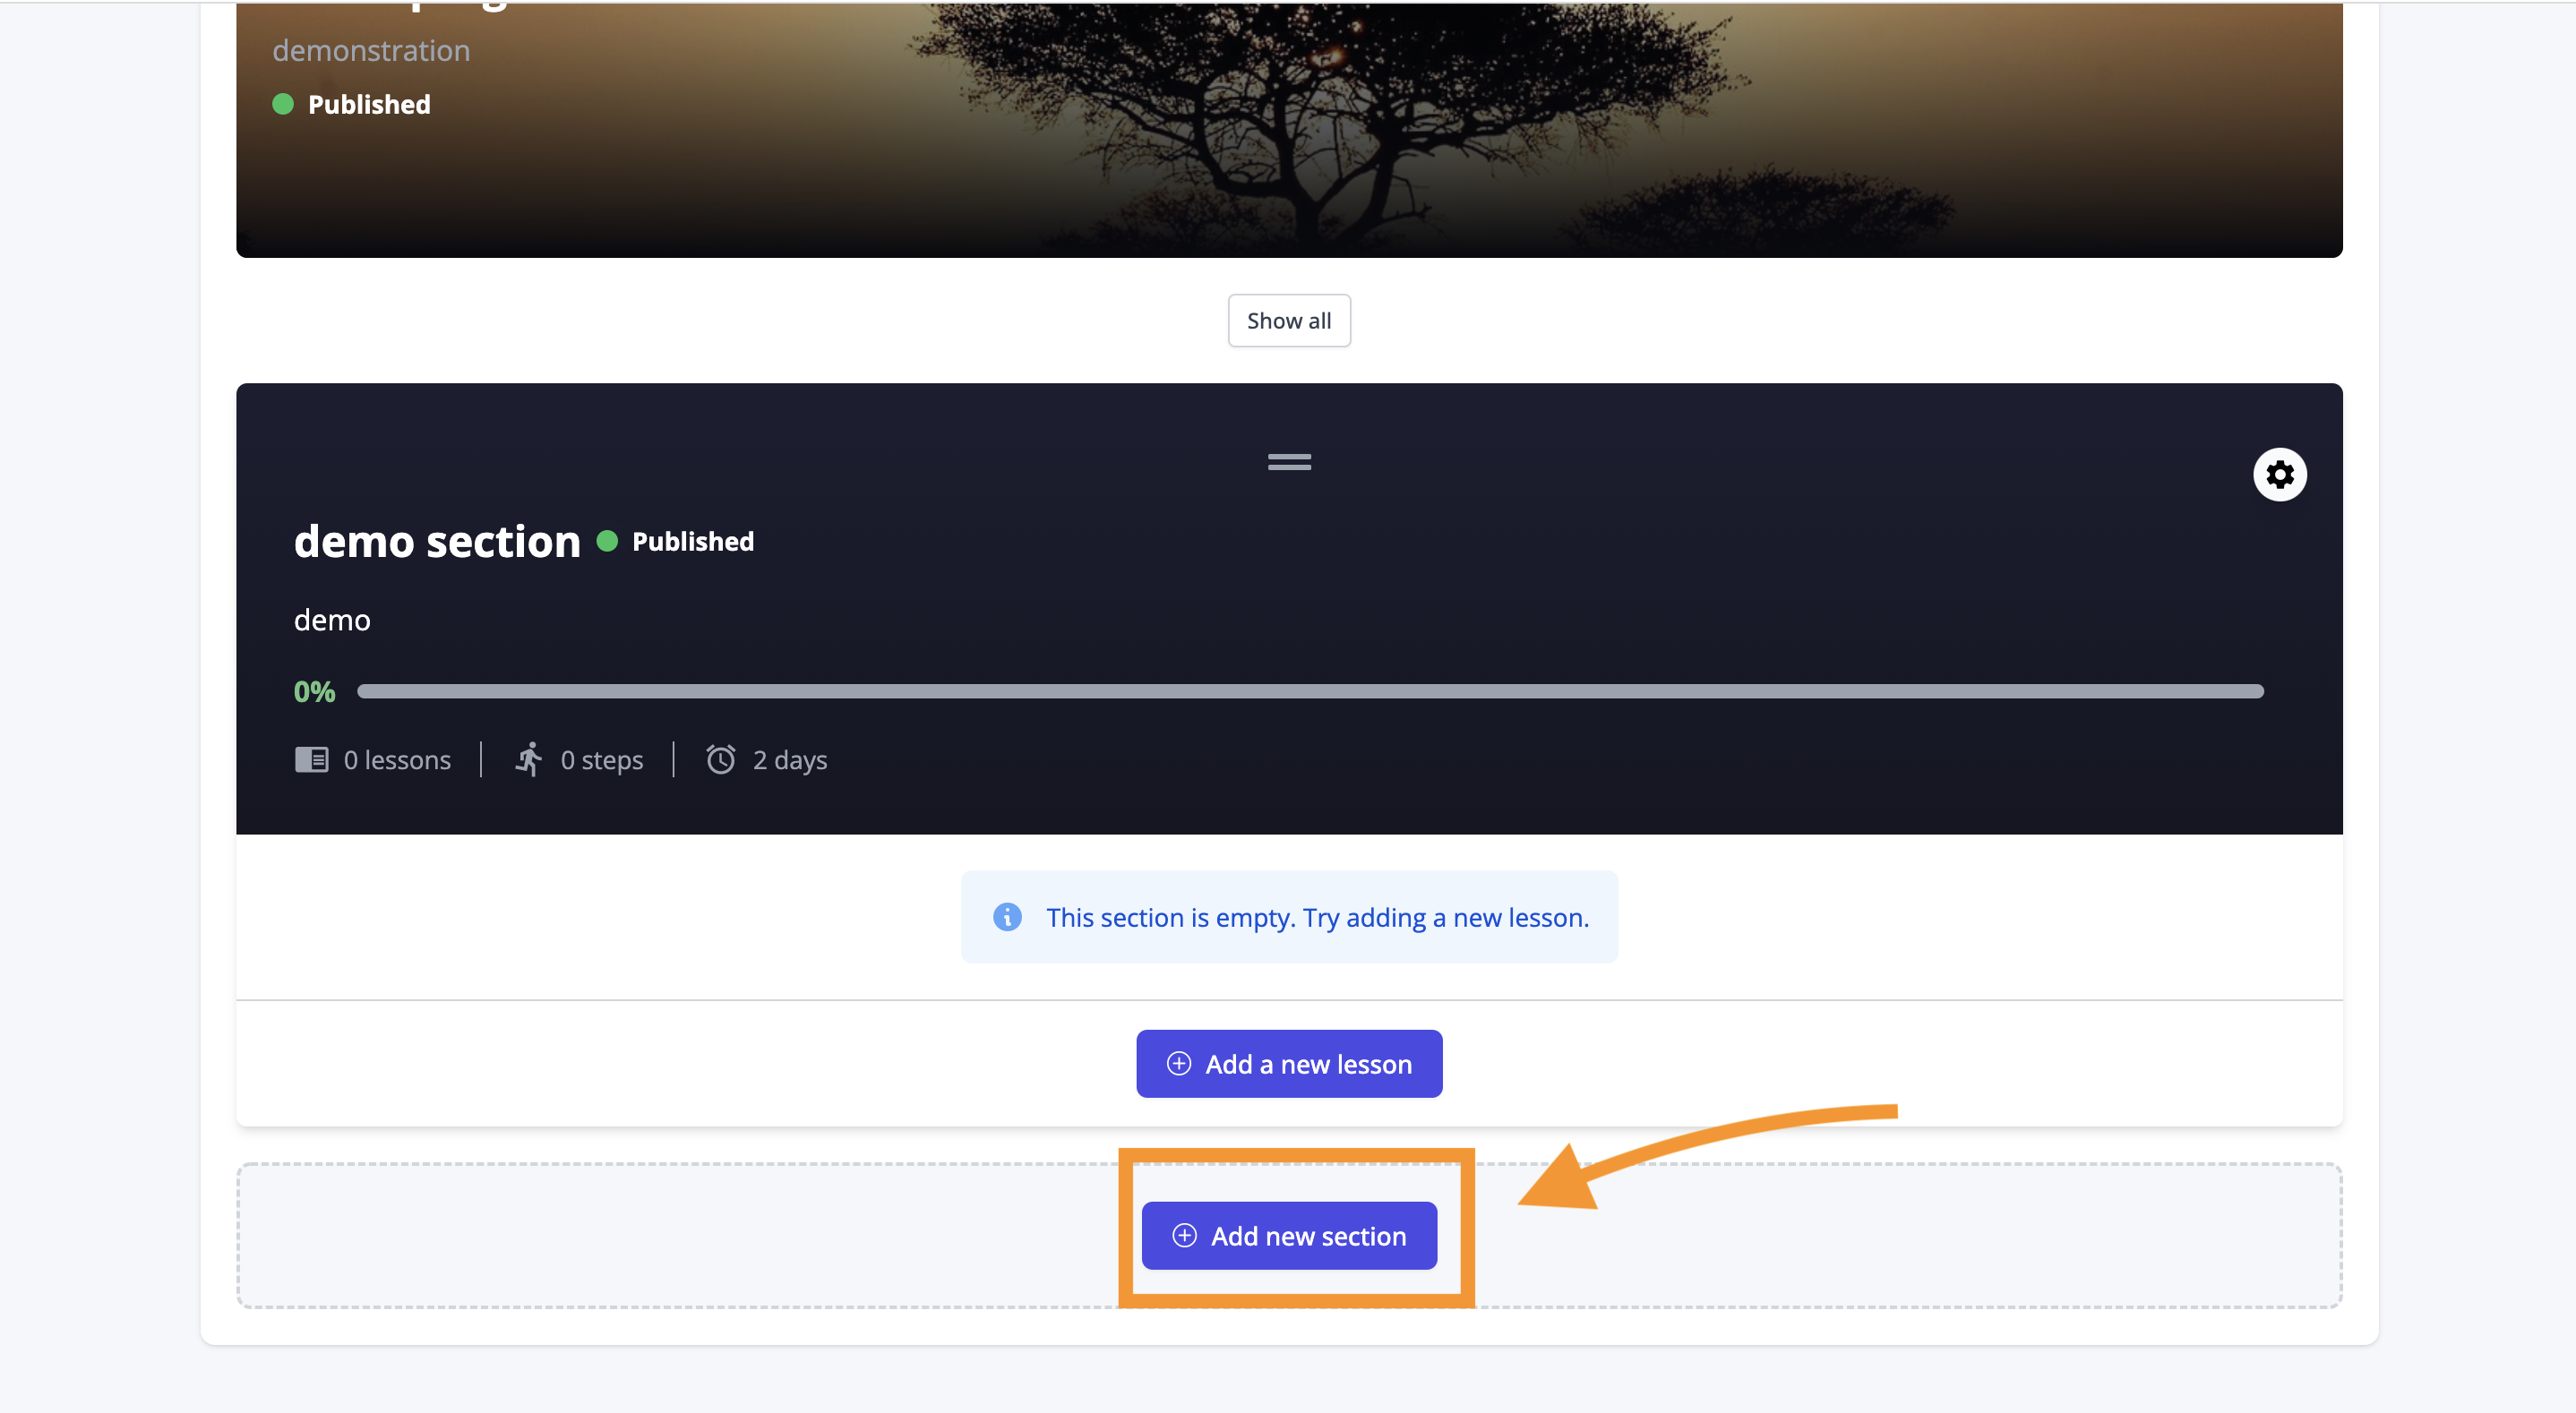
Step 2: Create the section
Click on the "Add a new section" button.
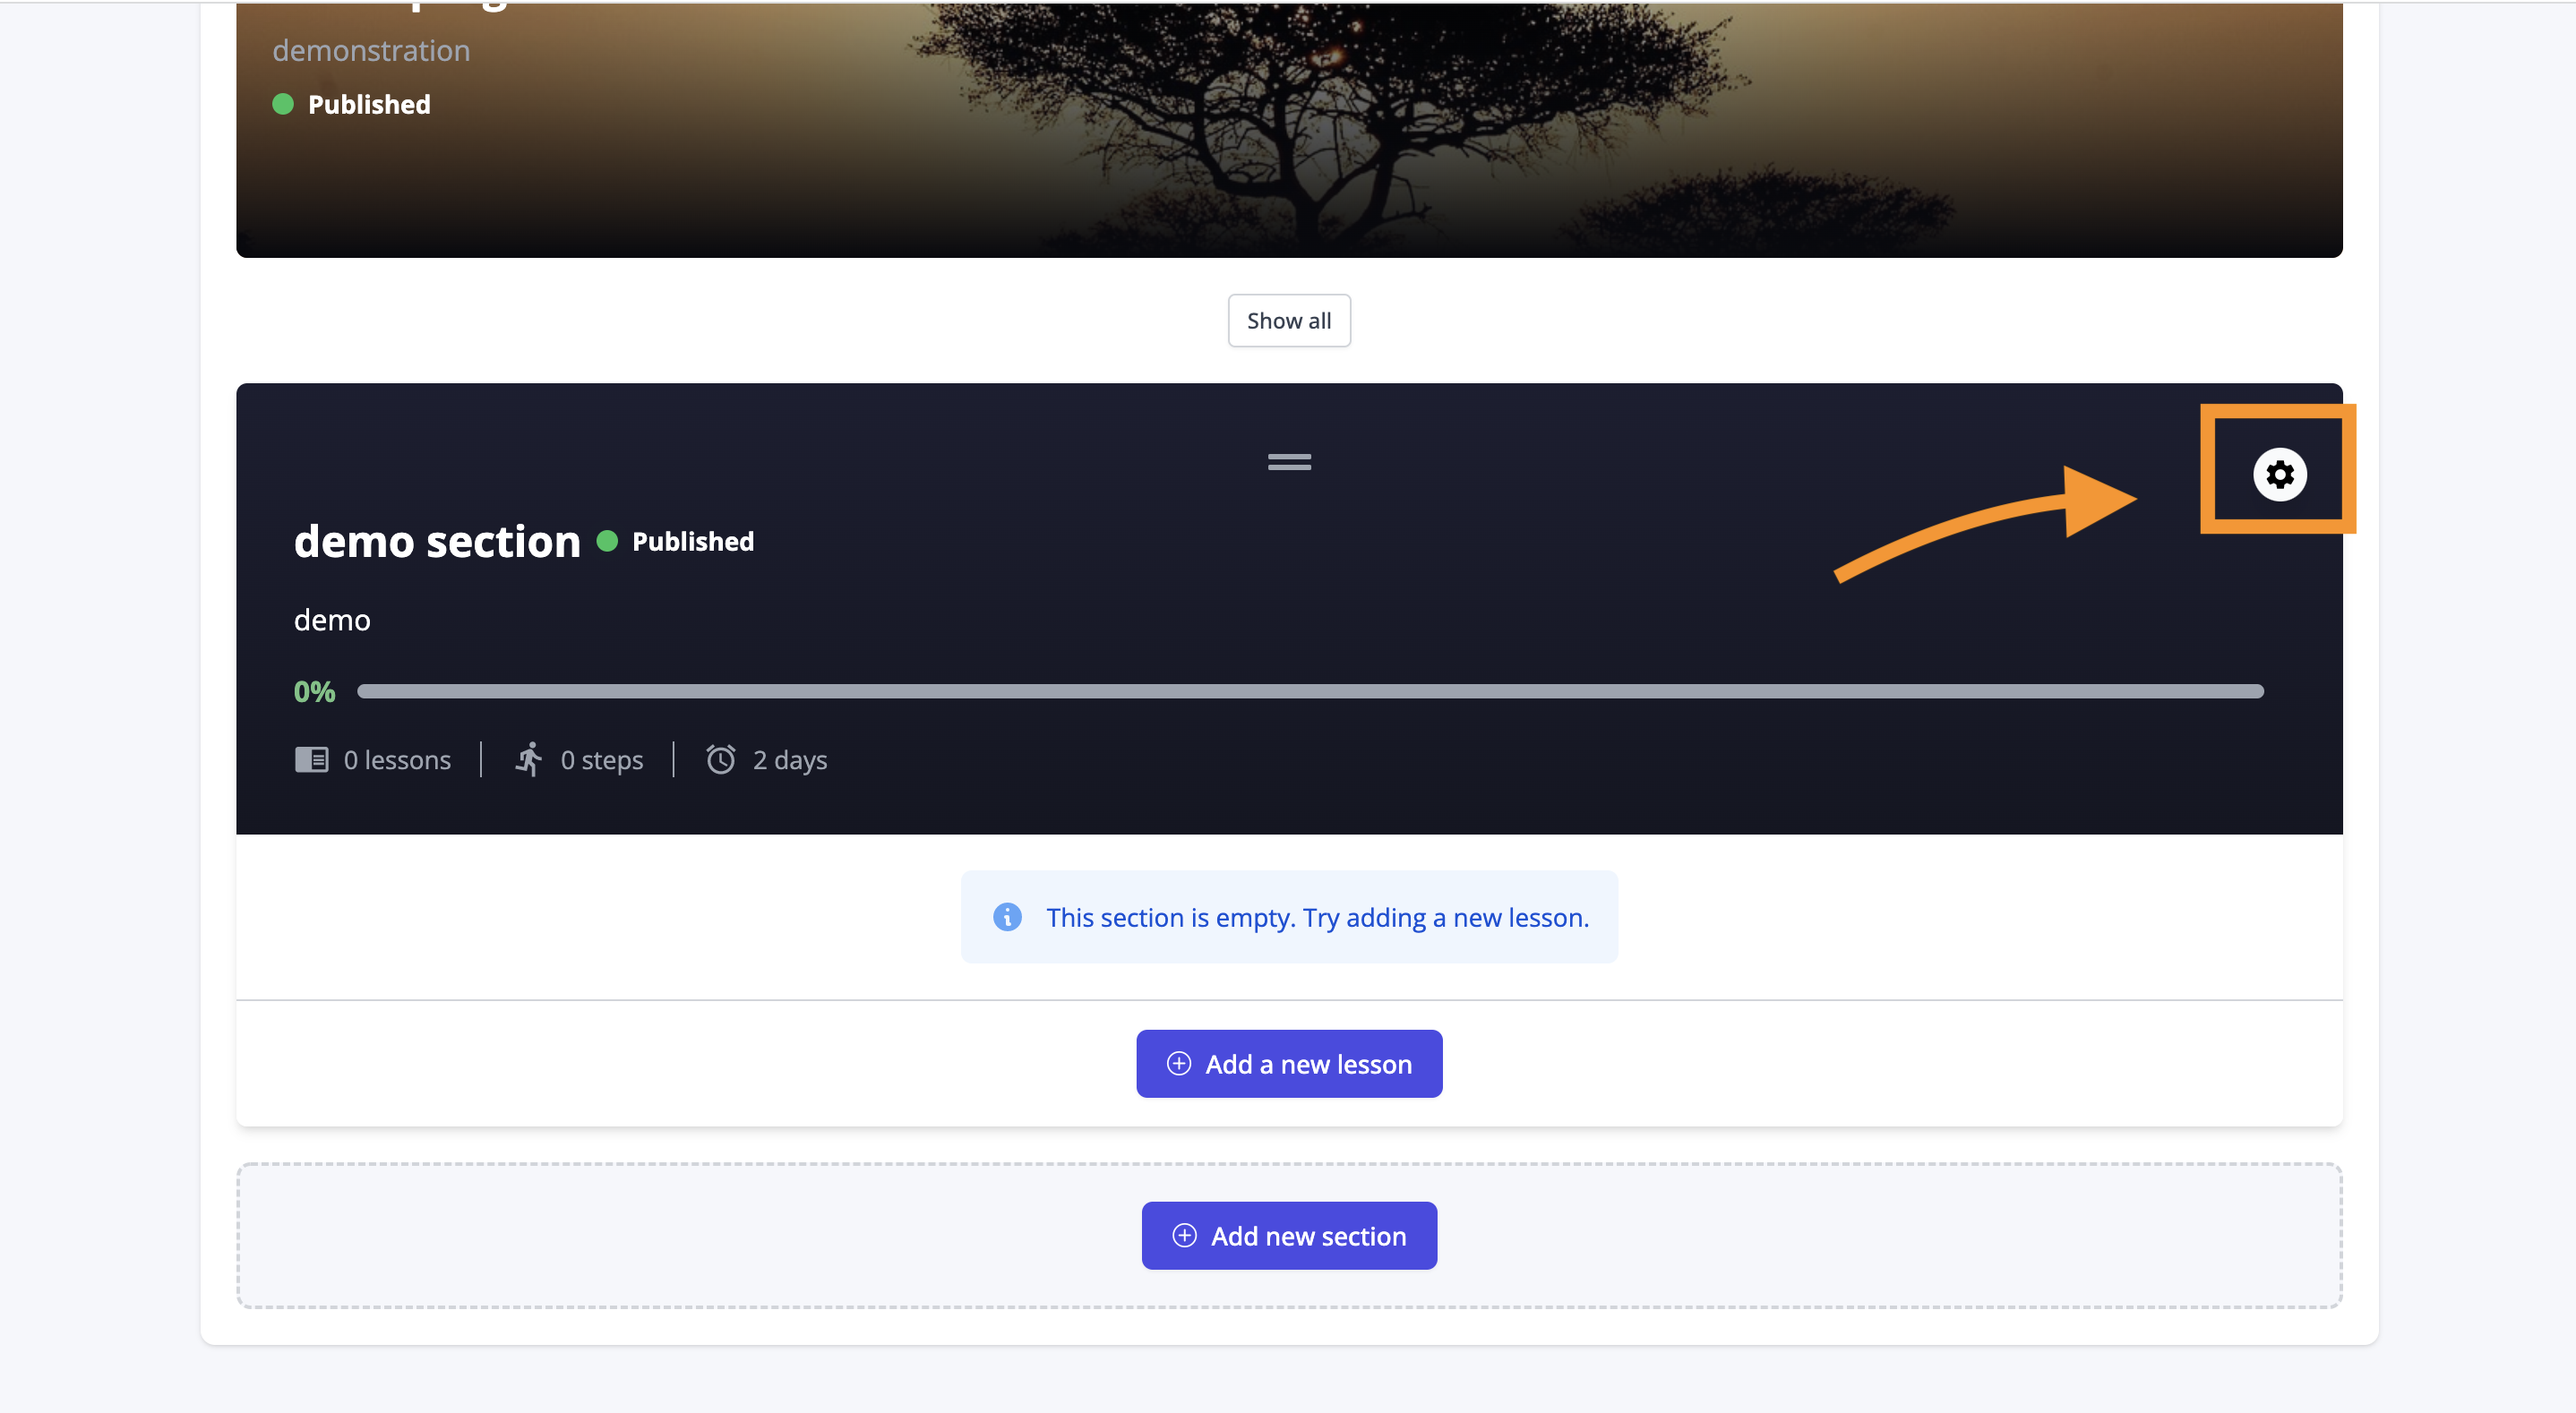
Step 3: Go to section settings
To configure the section, click on the gear.
Step 4: Add a cover to your course section
To illustrate this section with an image, click on "choose a file" and select the image of your choice from your computer.
The recommended aspect ratio is 4:1 (for example 1350 x 350 pixels).
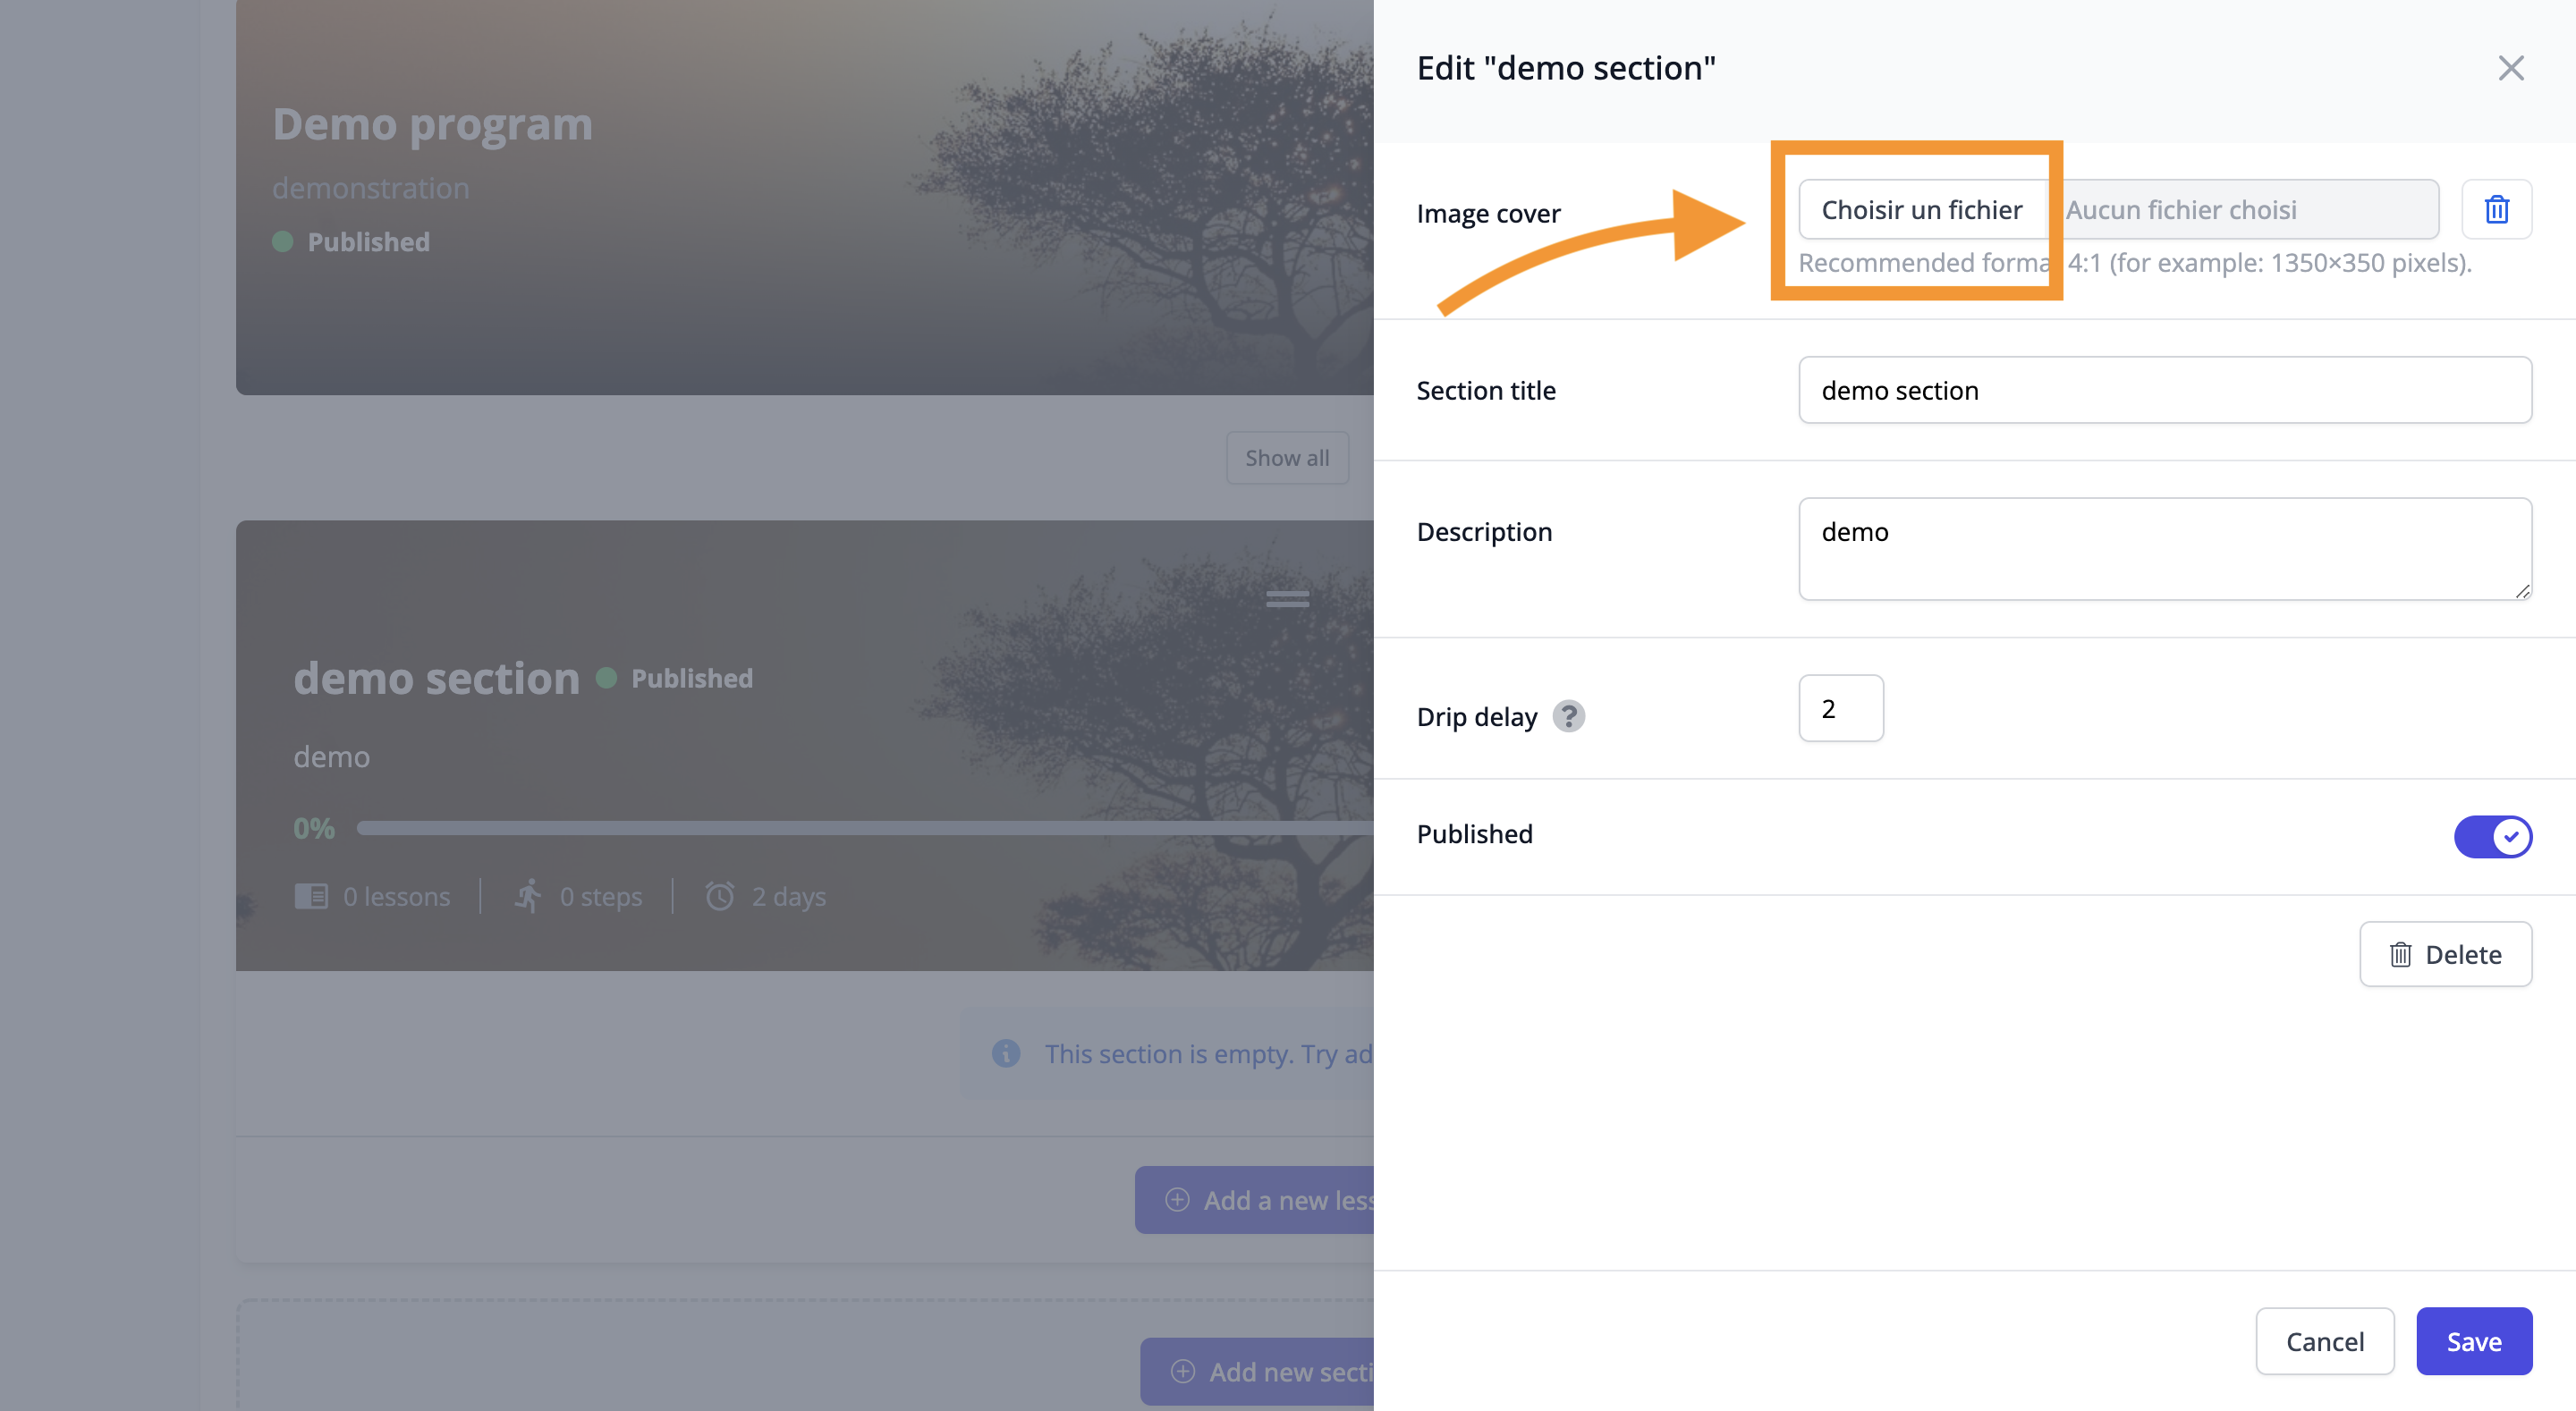
Step 5: Name your course section
Fill in the field named "section title".

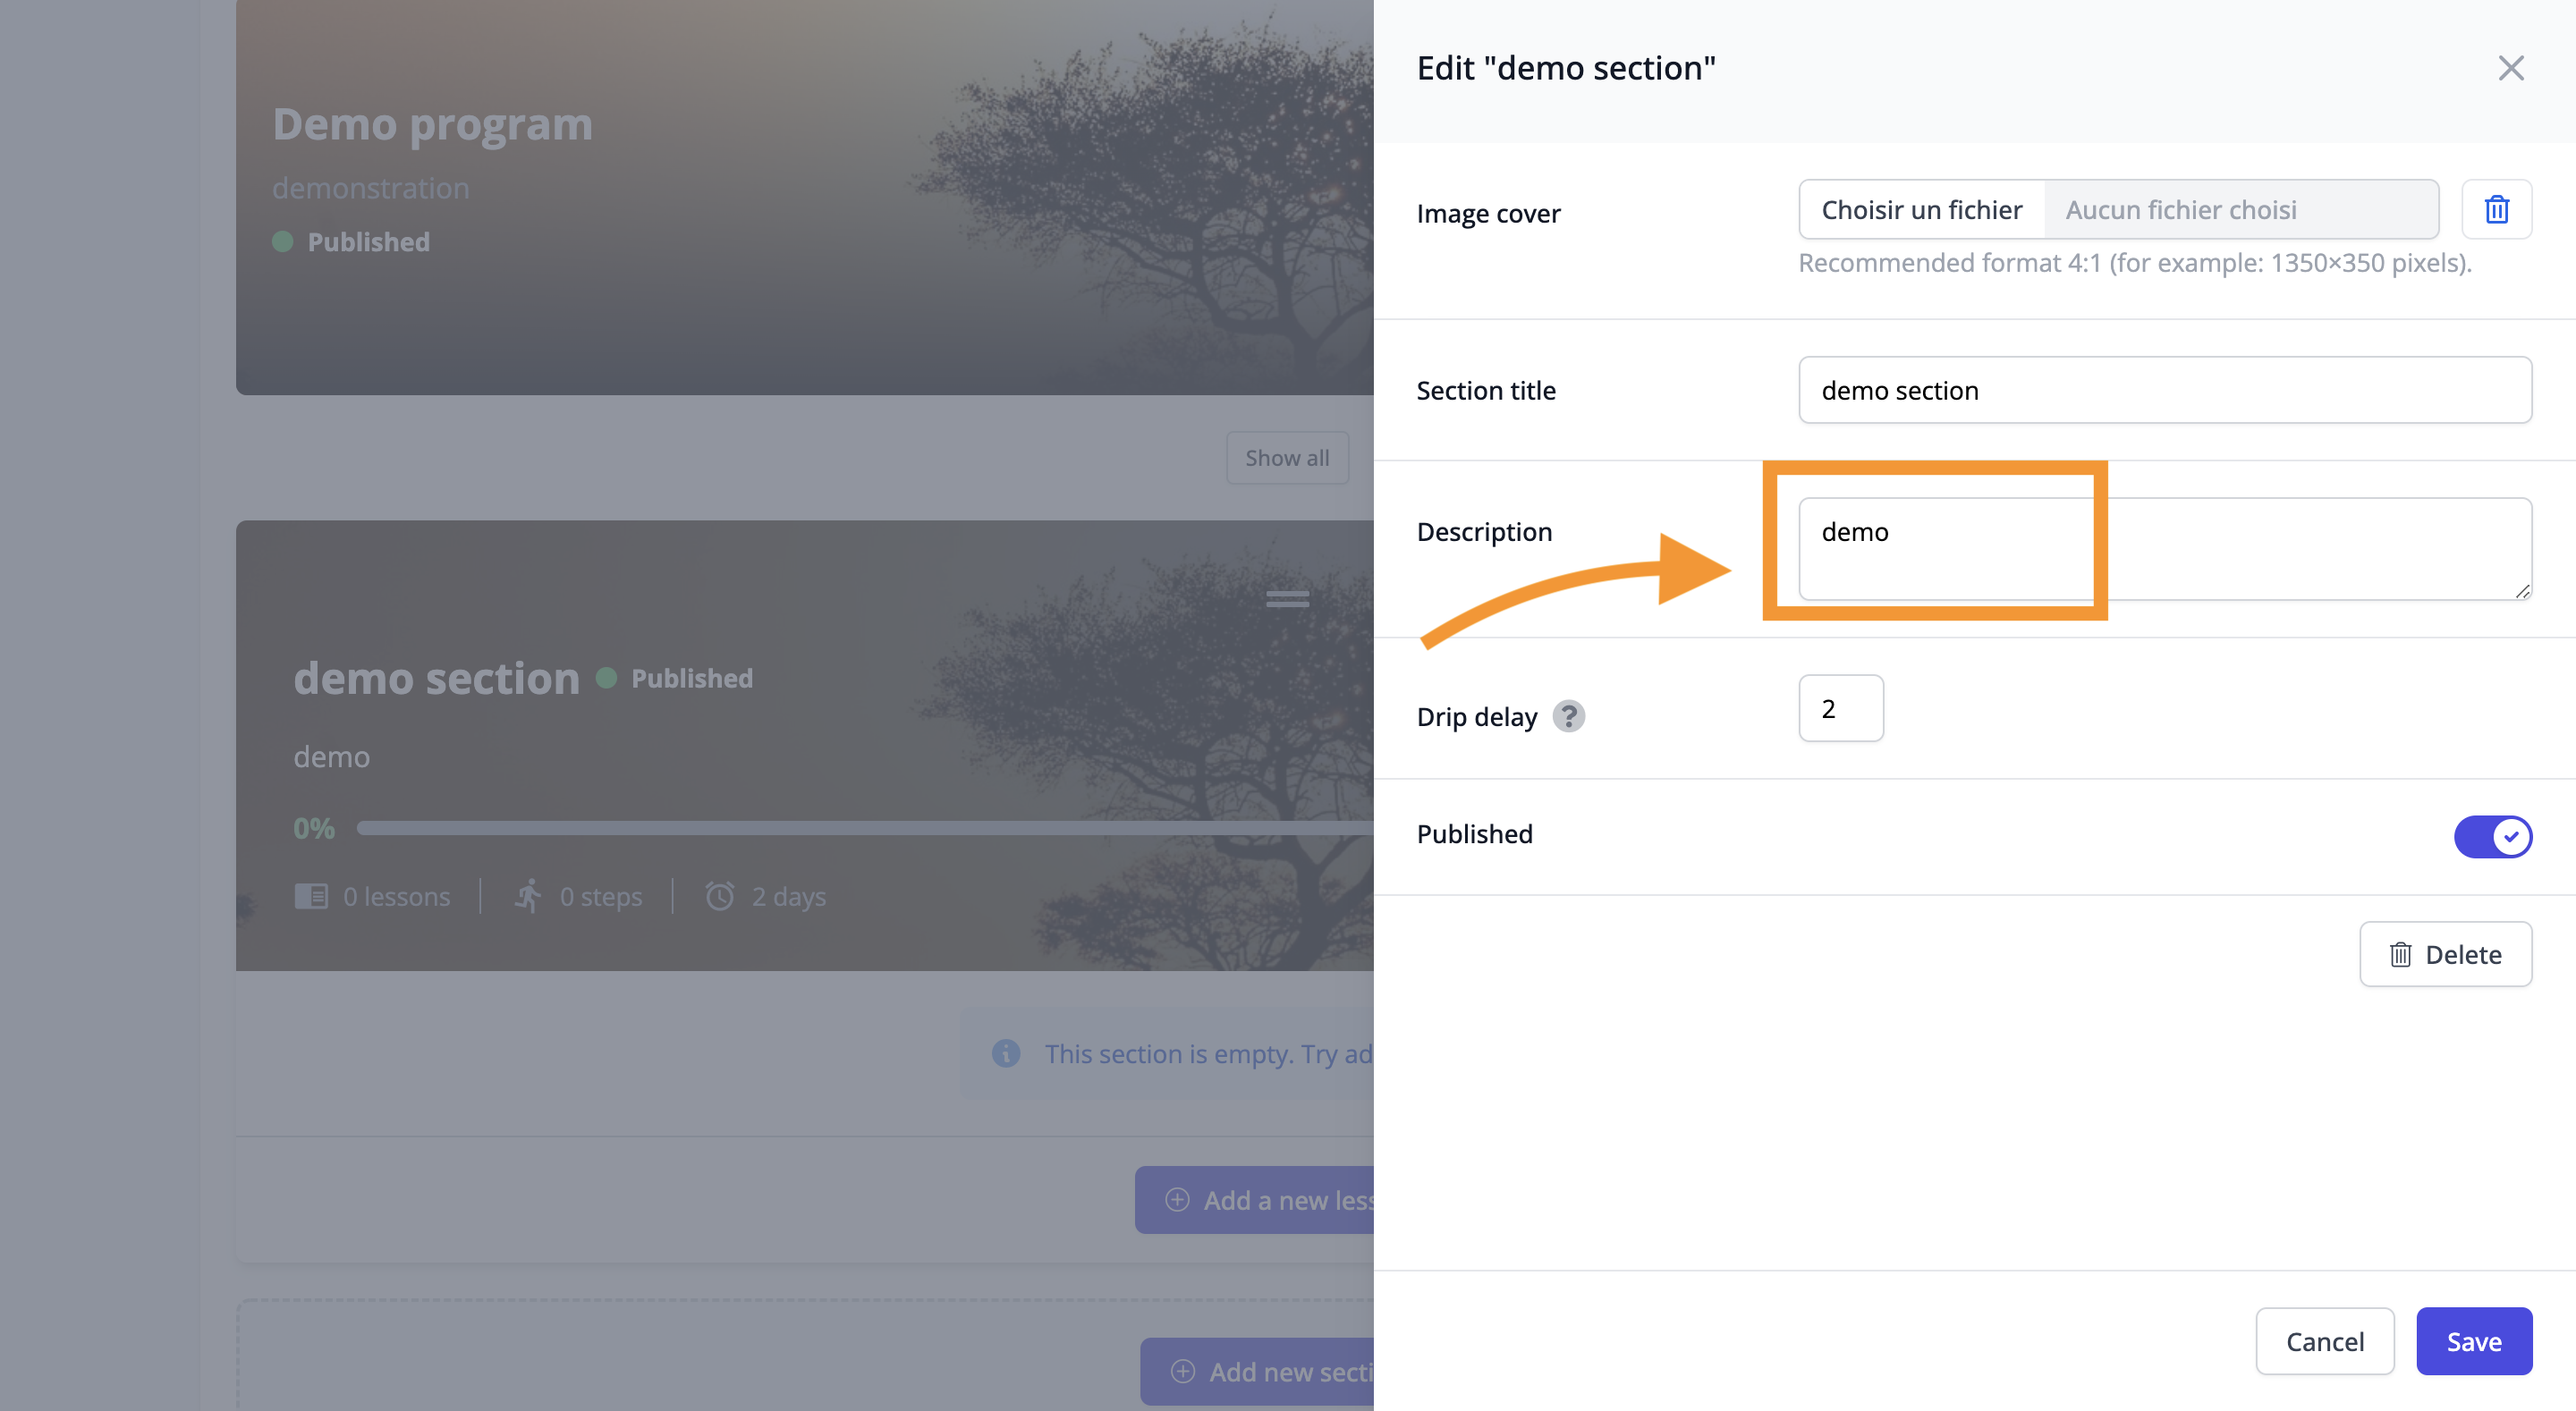
Step 6: Add a description to your course section
Write down the objectives of the section by filling in the field named "description".
Step 7: Add drip to section
Then you can configure the daily delay of the section by filling in the "drip delay" field.
For example, if you set the "delay drip" to 2, program members will have access to this section 2 days after joining the program.

Step 8: Publish (or not) the section
Leave the toggle on if you want the section to be accessible to members of this course.

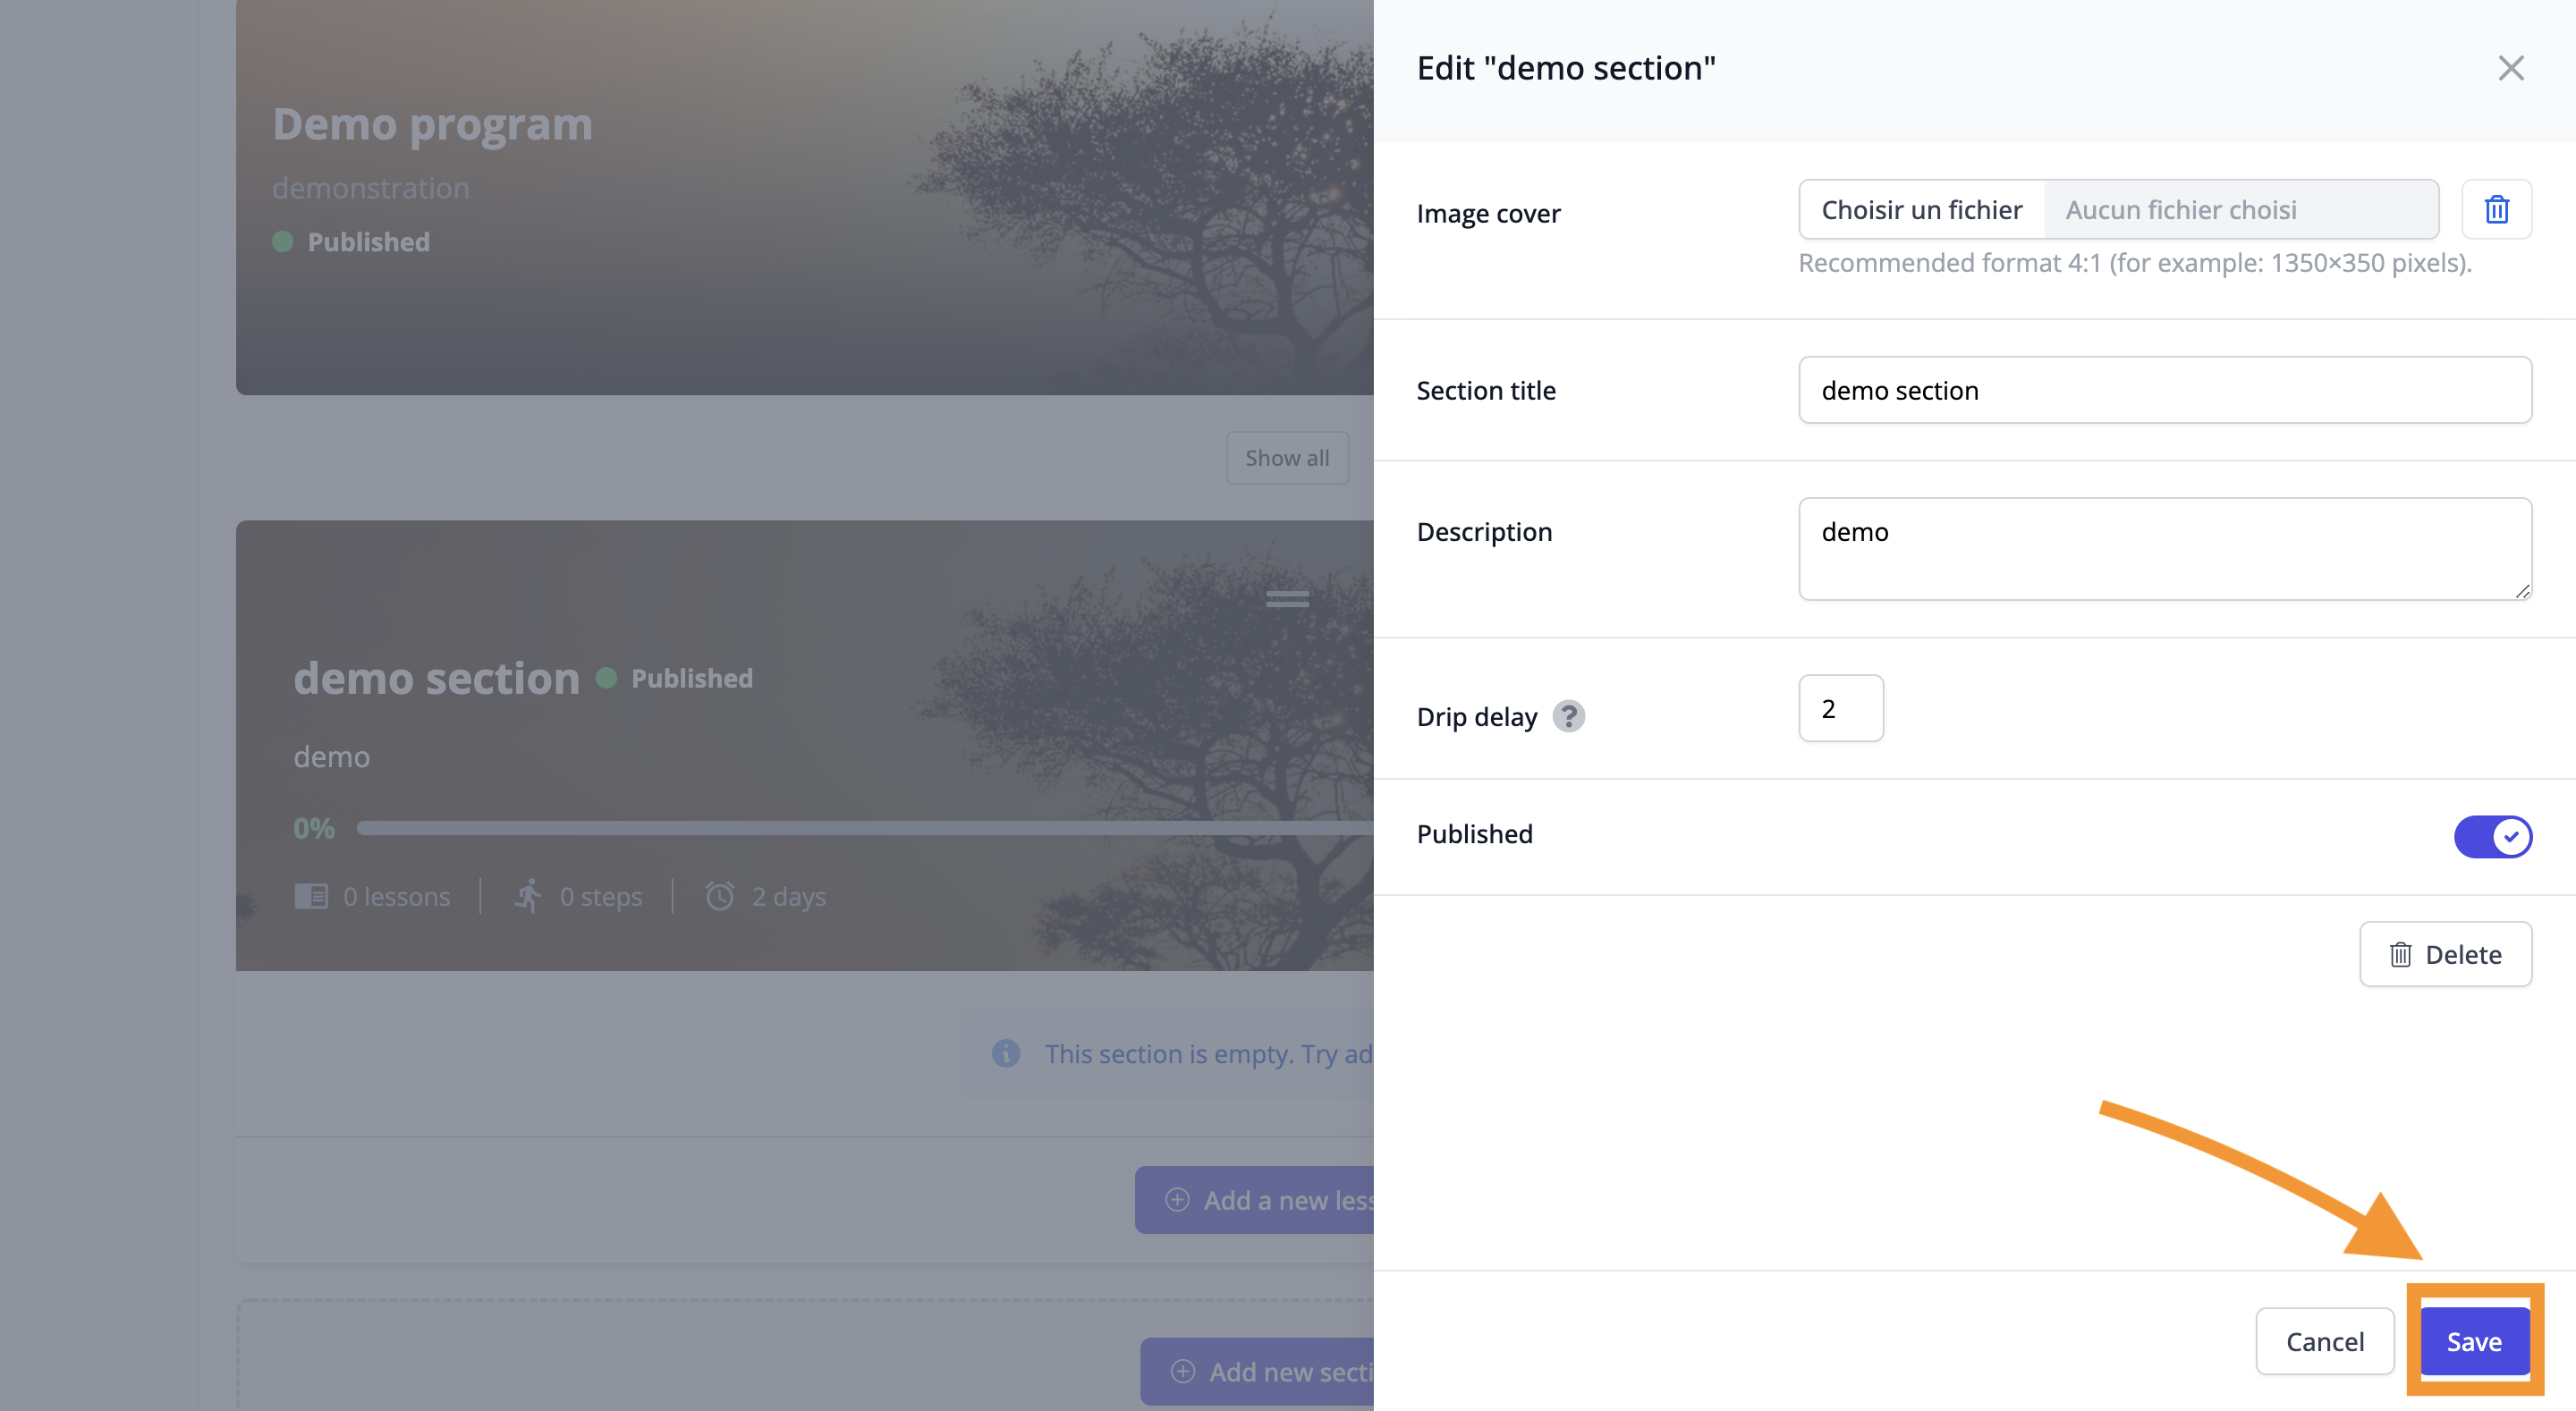
Step 9: Save Settings
Save your configuration by clicking on the "save" button.
Part 3: Create a lesson and setup it
Step 1: Create a new lesson
To add a lesson click on the "Add a new lesson" button.

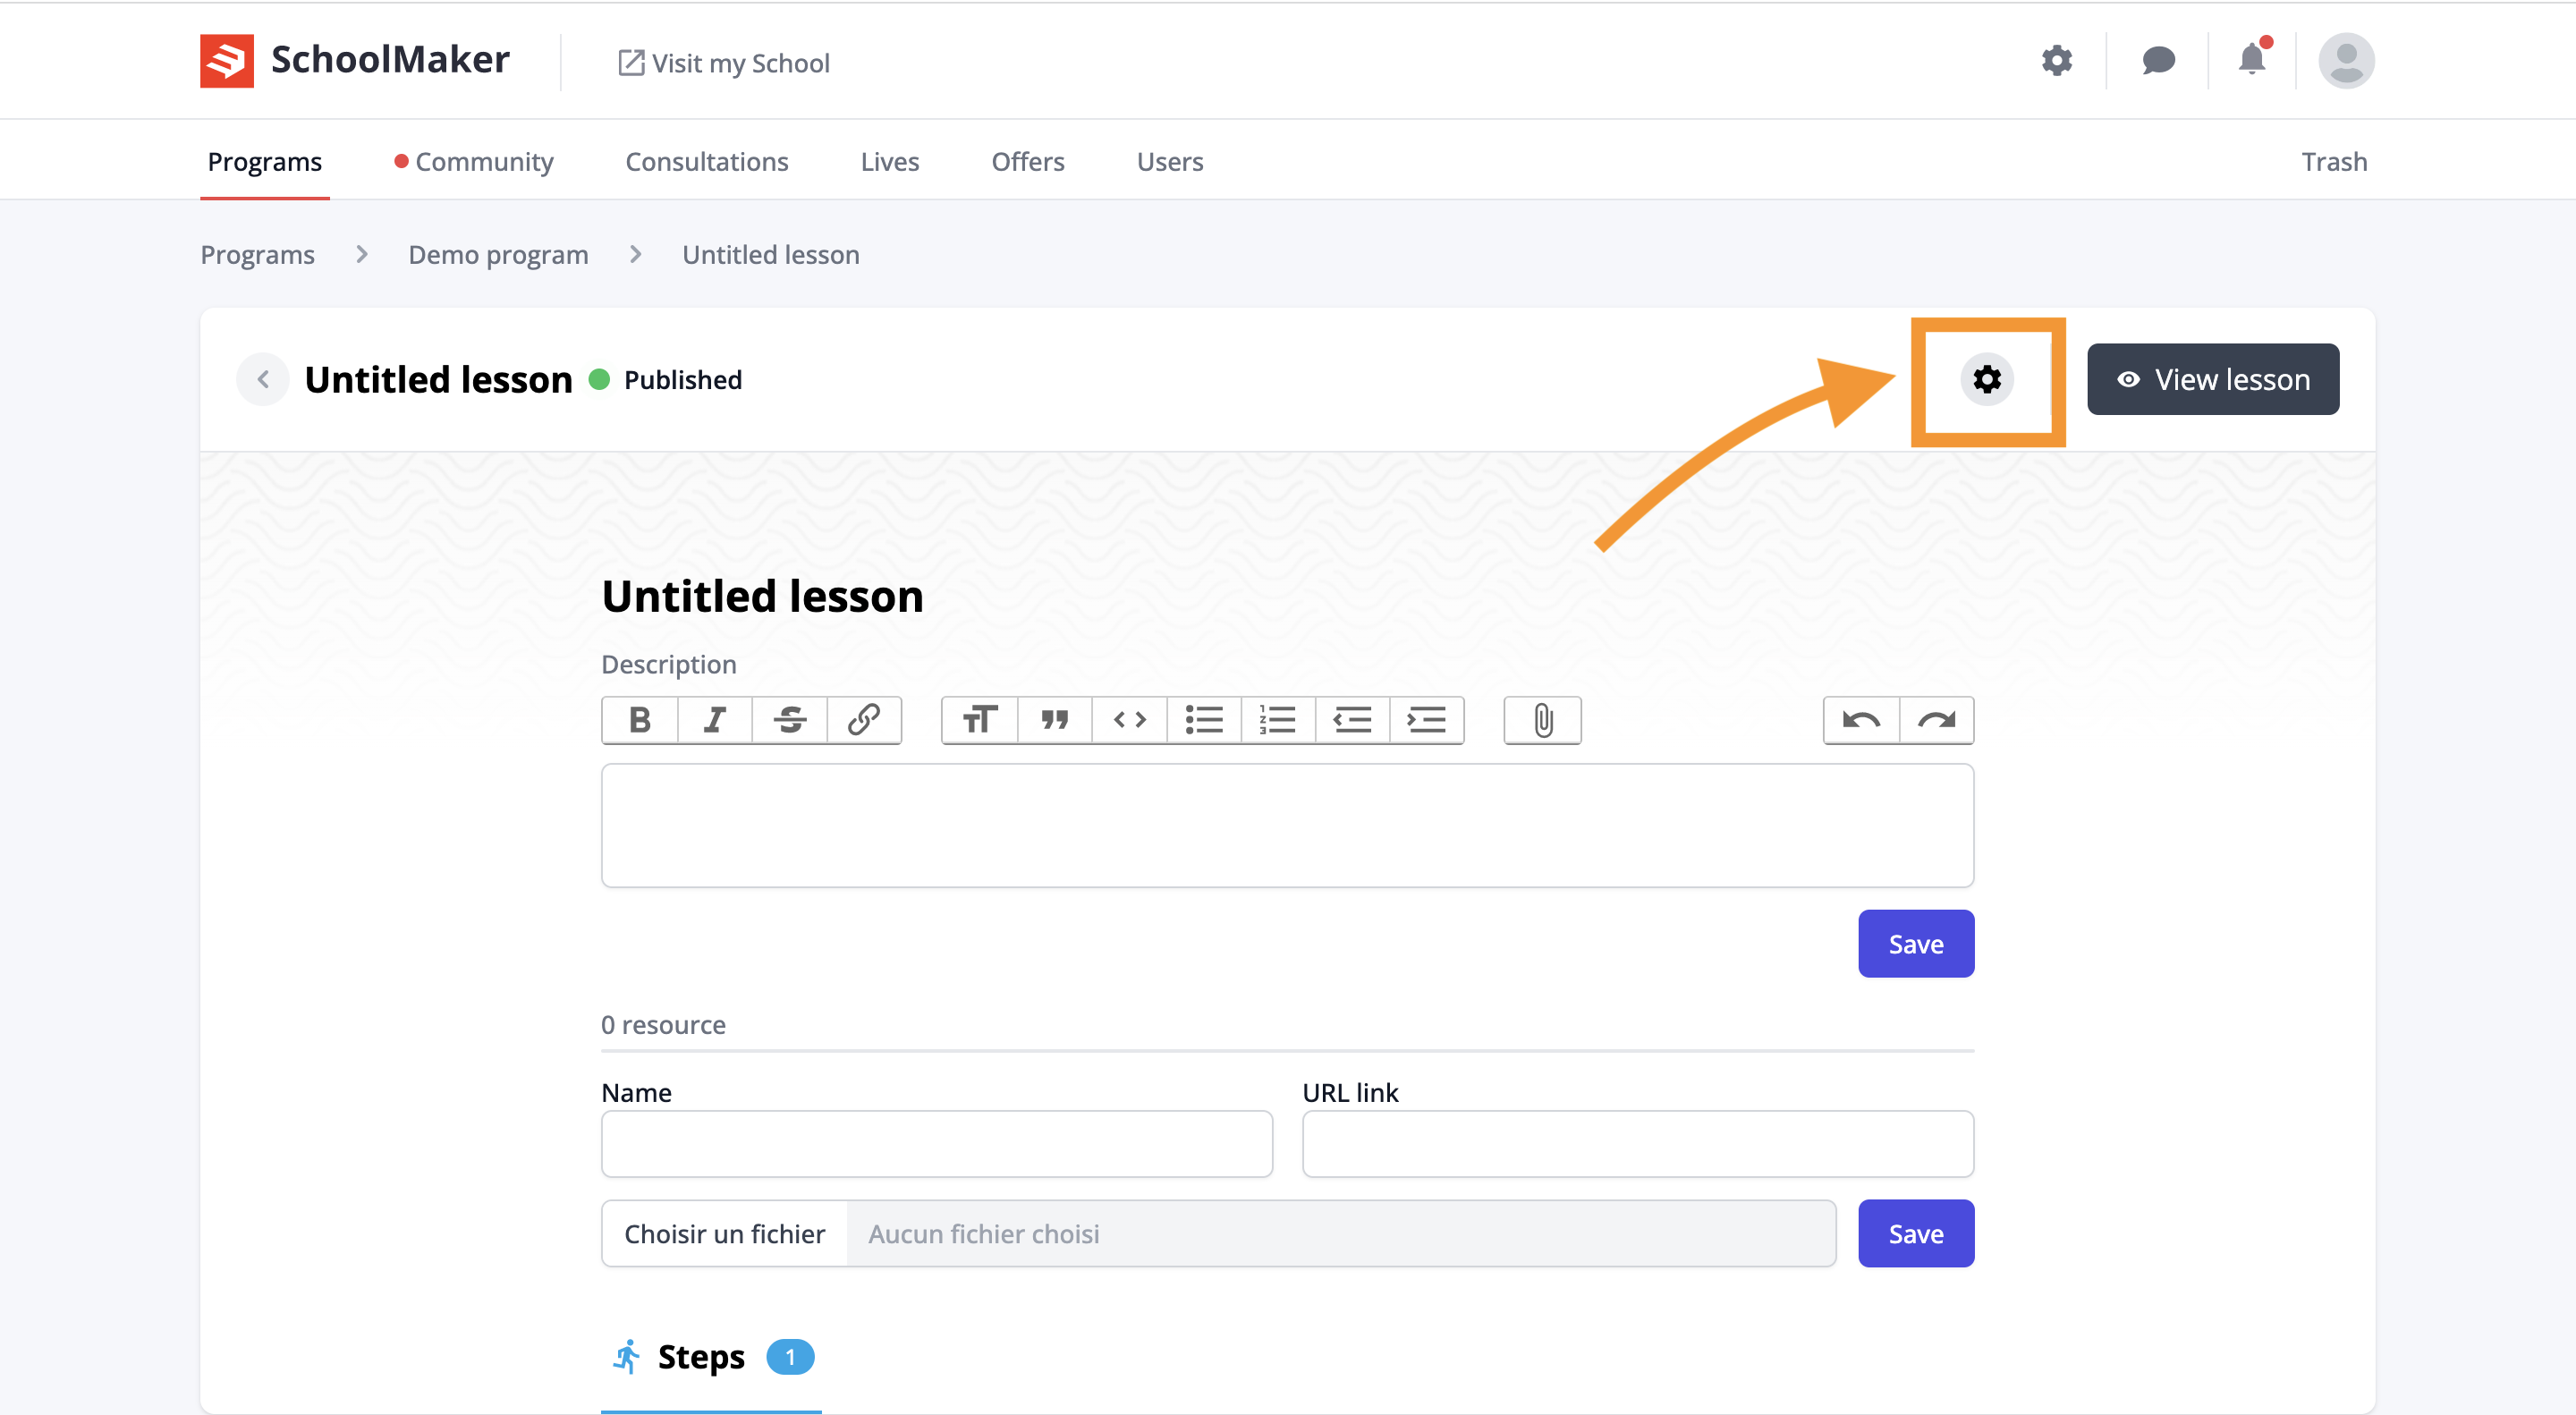
Step 2: Go to lesson settings
Click the gear to access lesson settings.
Step 3: Name the lesson
Indicate the name of the lesson by filling in the text field named "name".
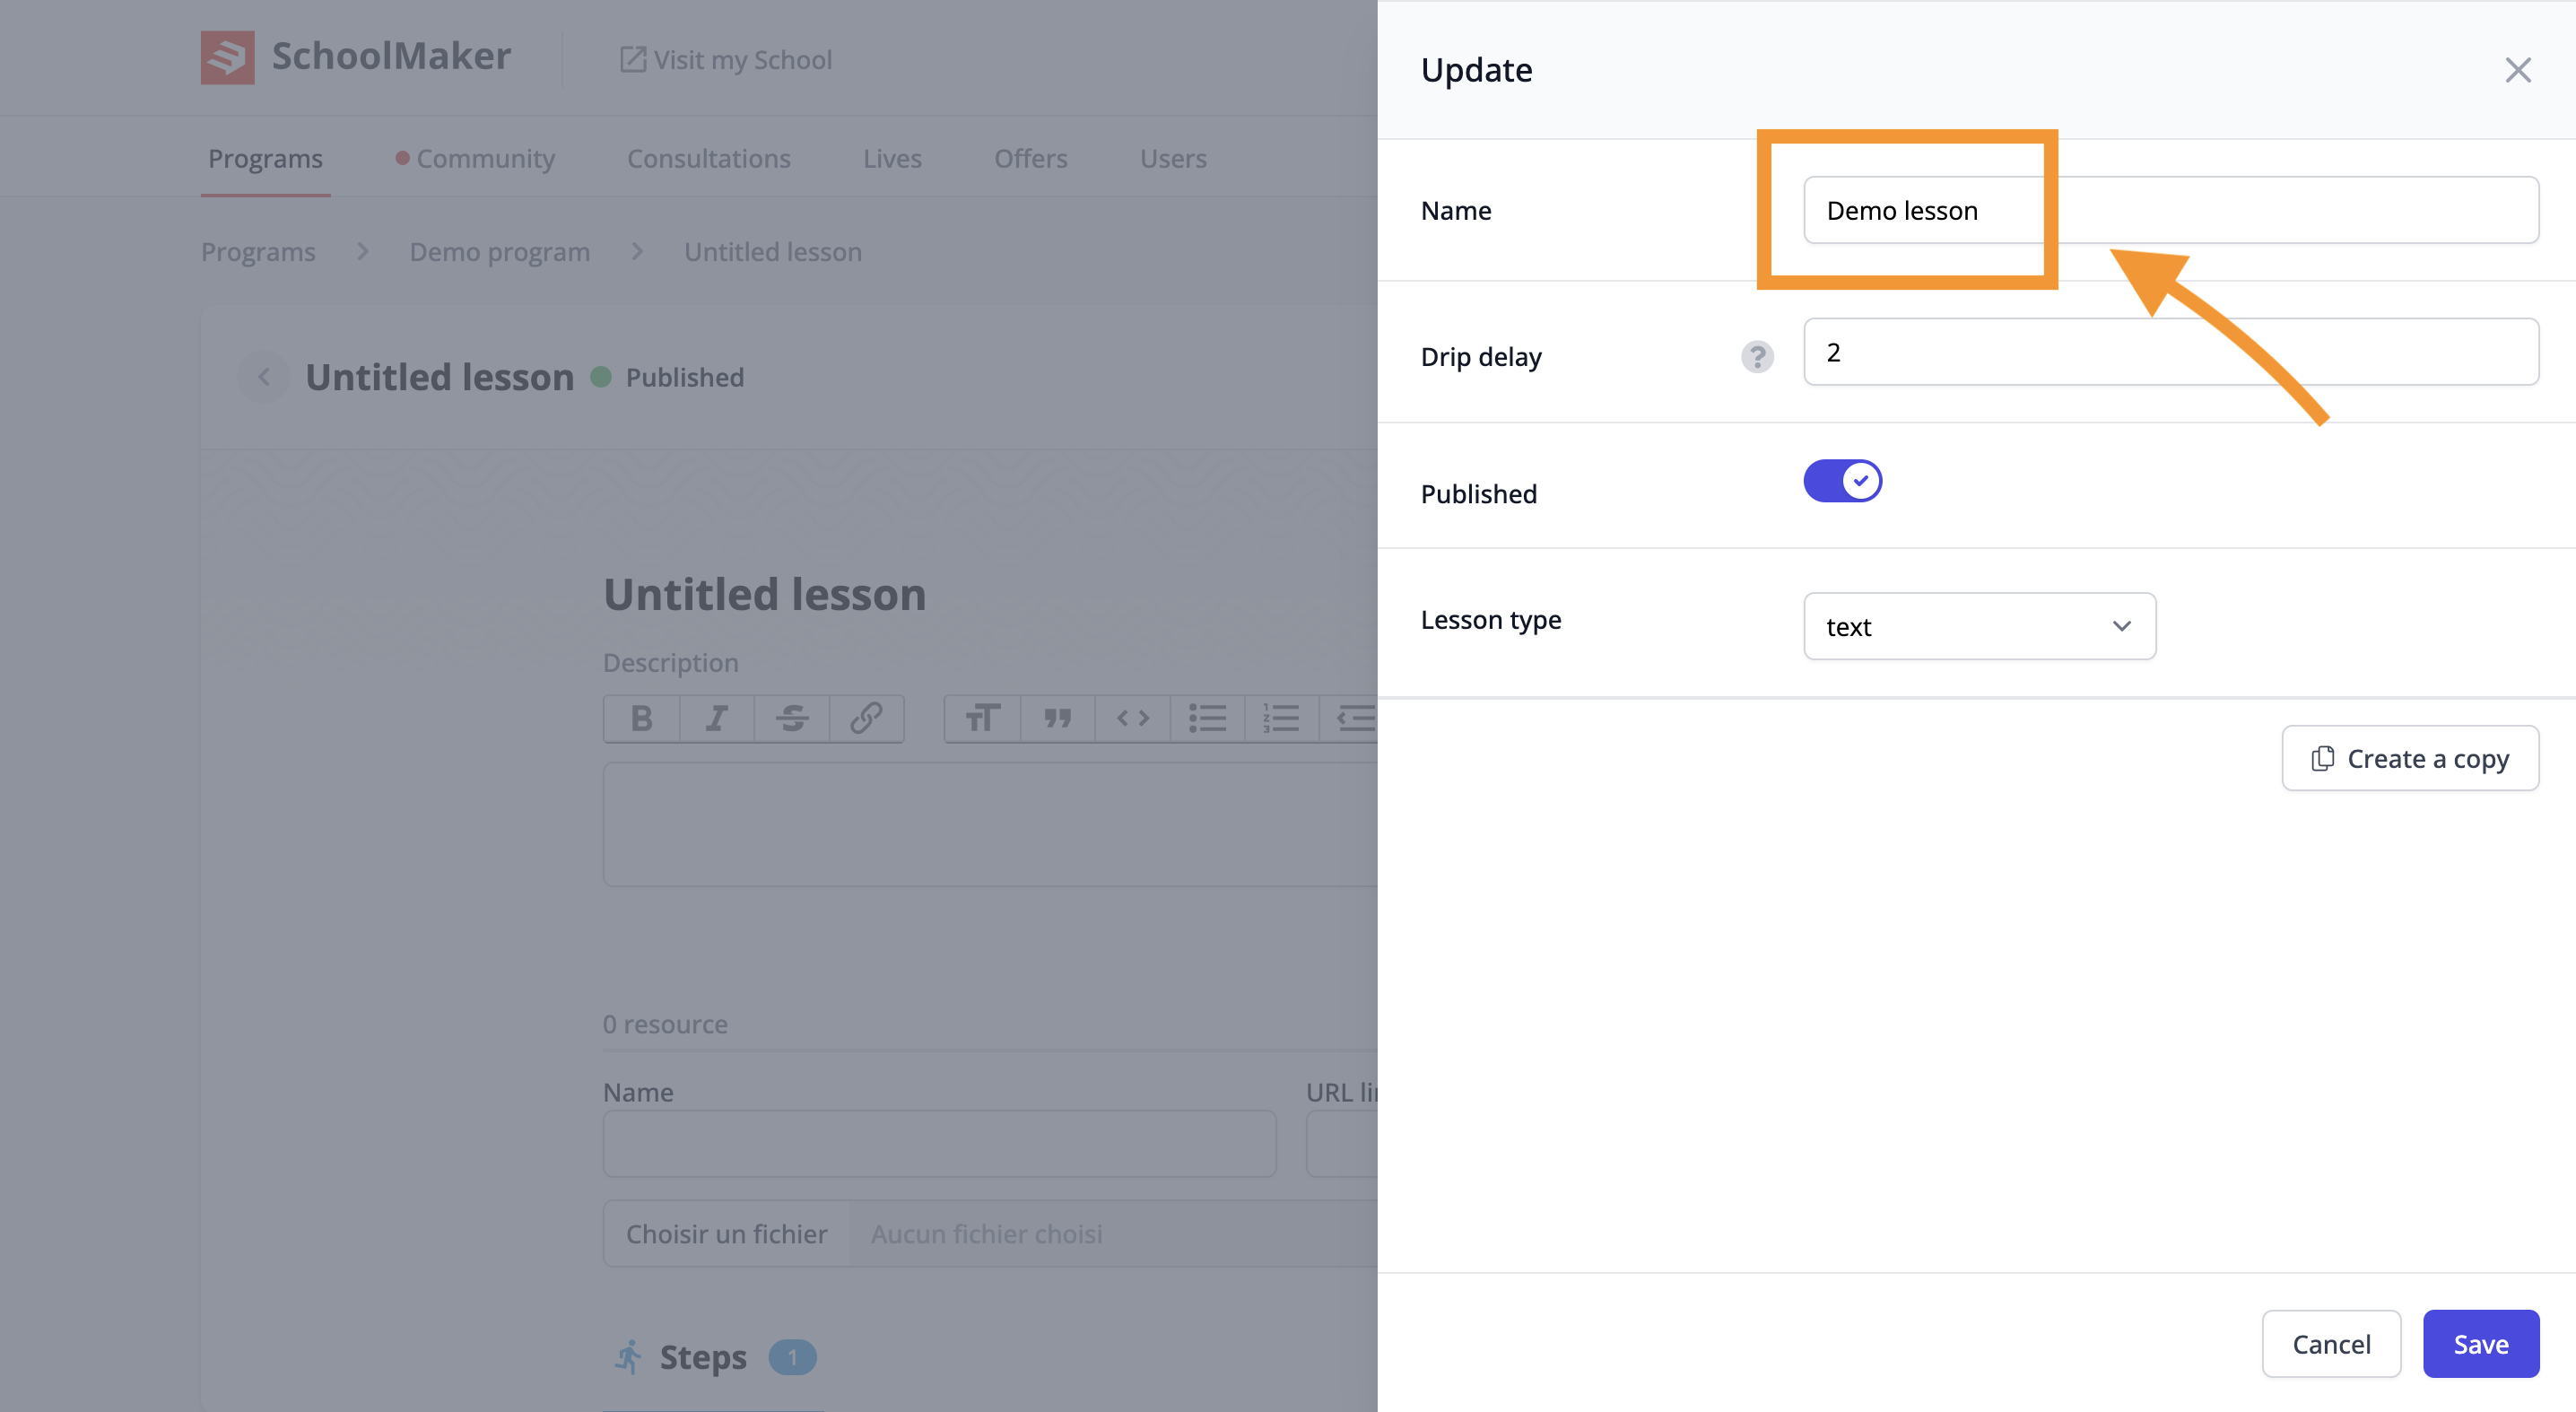
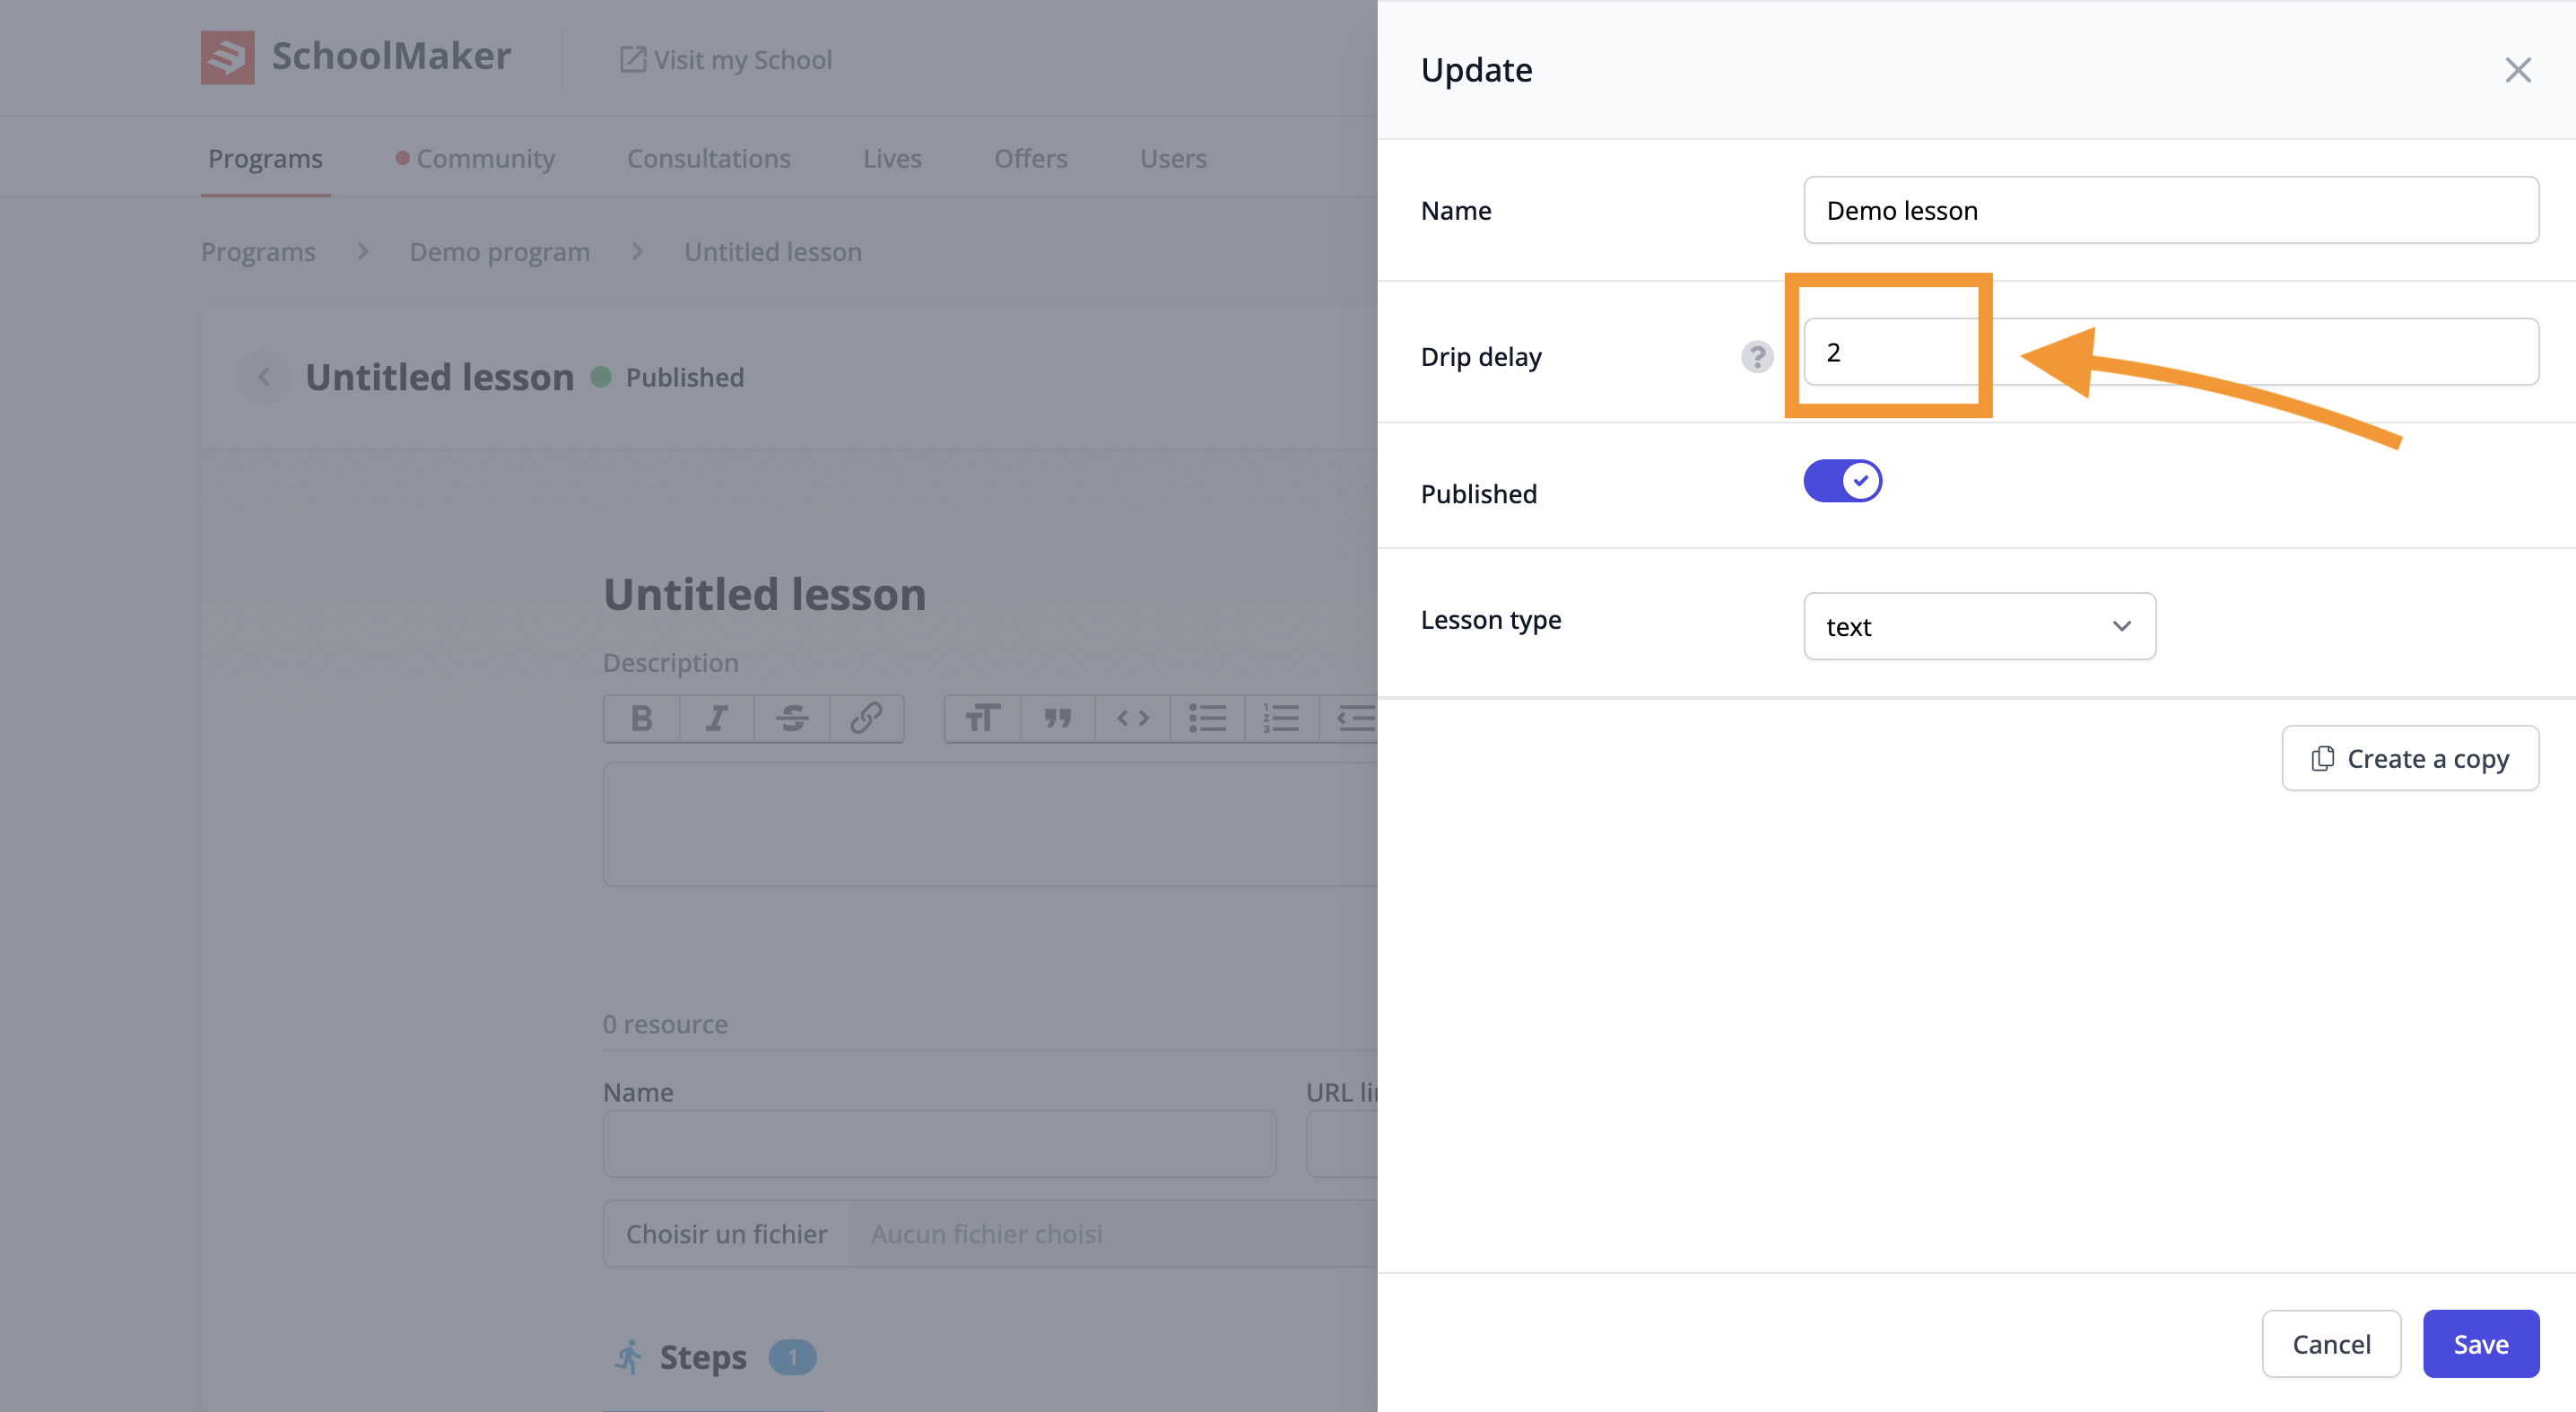
Step 4: Add drip to the lesson
As on the sections, you have the possibility of making lessons accessible after a predetermined amount of days after joining the program by entering a certain number of days in the text field called "drip delay".
For example, if you indicate a drip delay of 3, the lesson will be unlocked 3 days after the member joins the program.
⚠️ Lesson and section drip delay add up. If a section's drip is 4 days and the lesson drip is 3 days, the actual drip on the lesson will be 7 days.
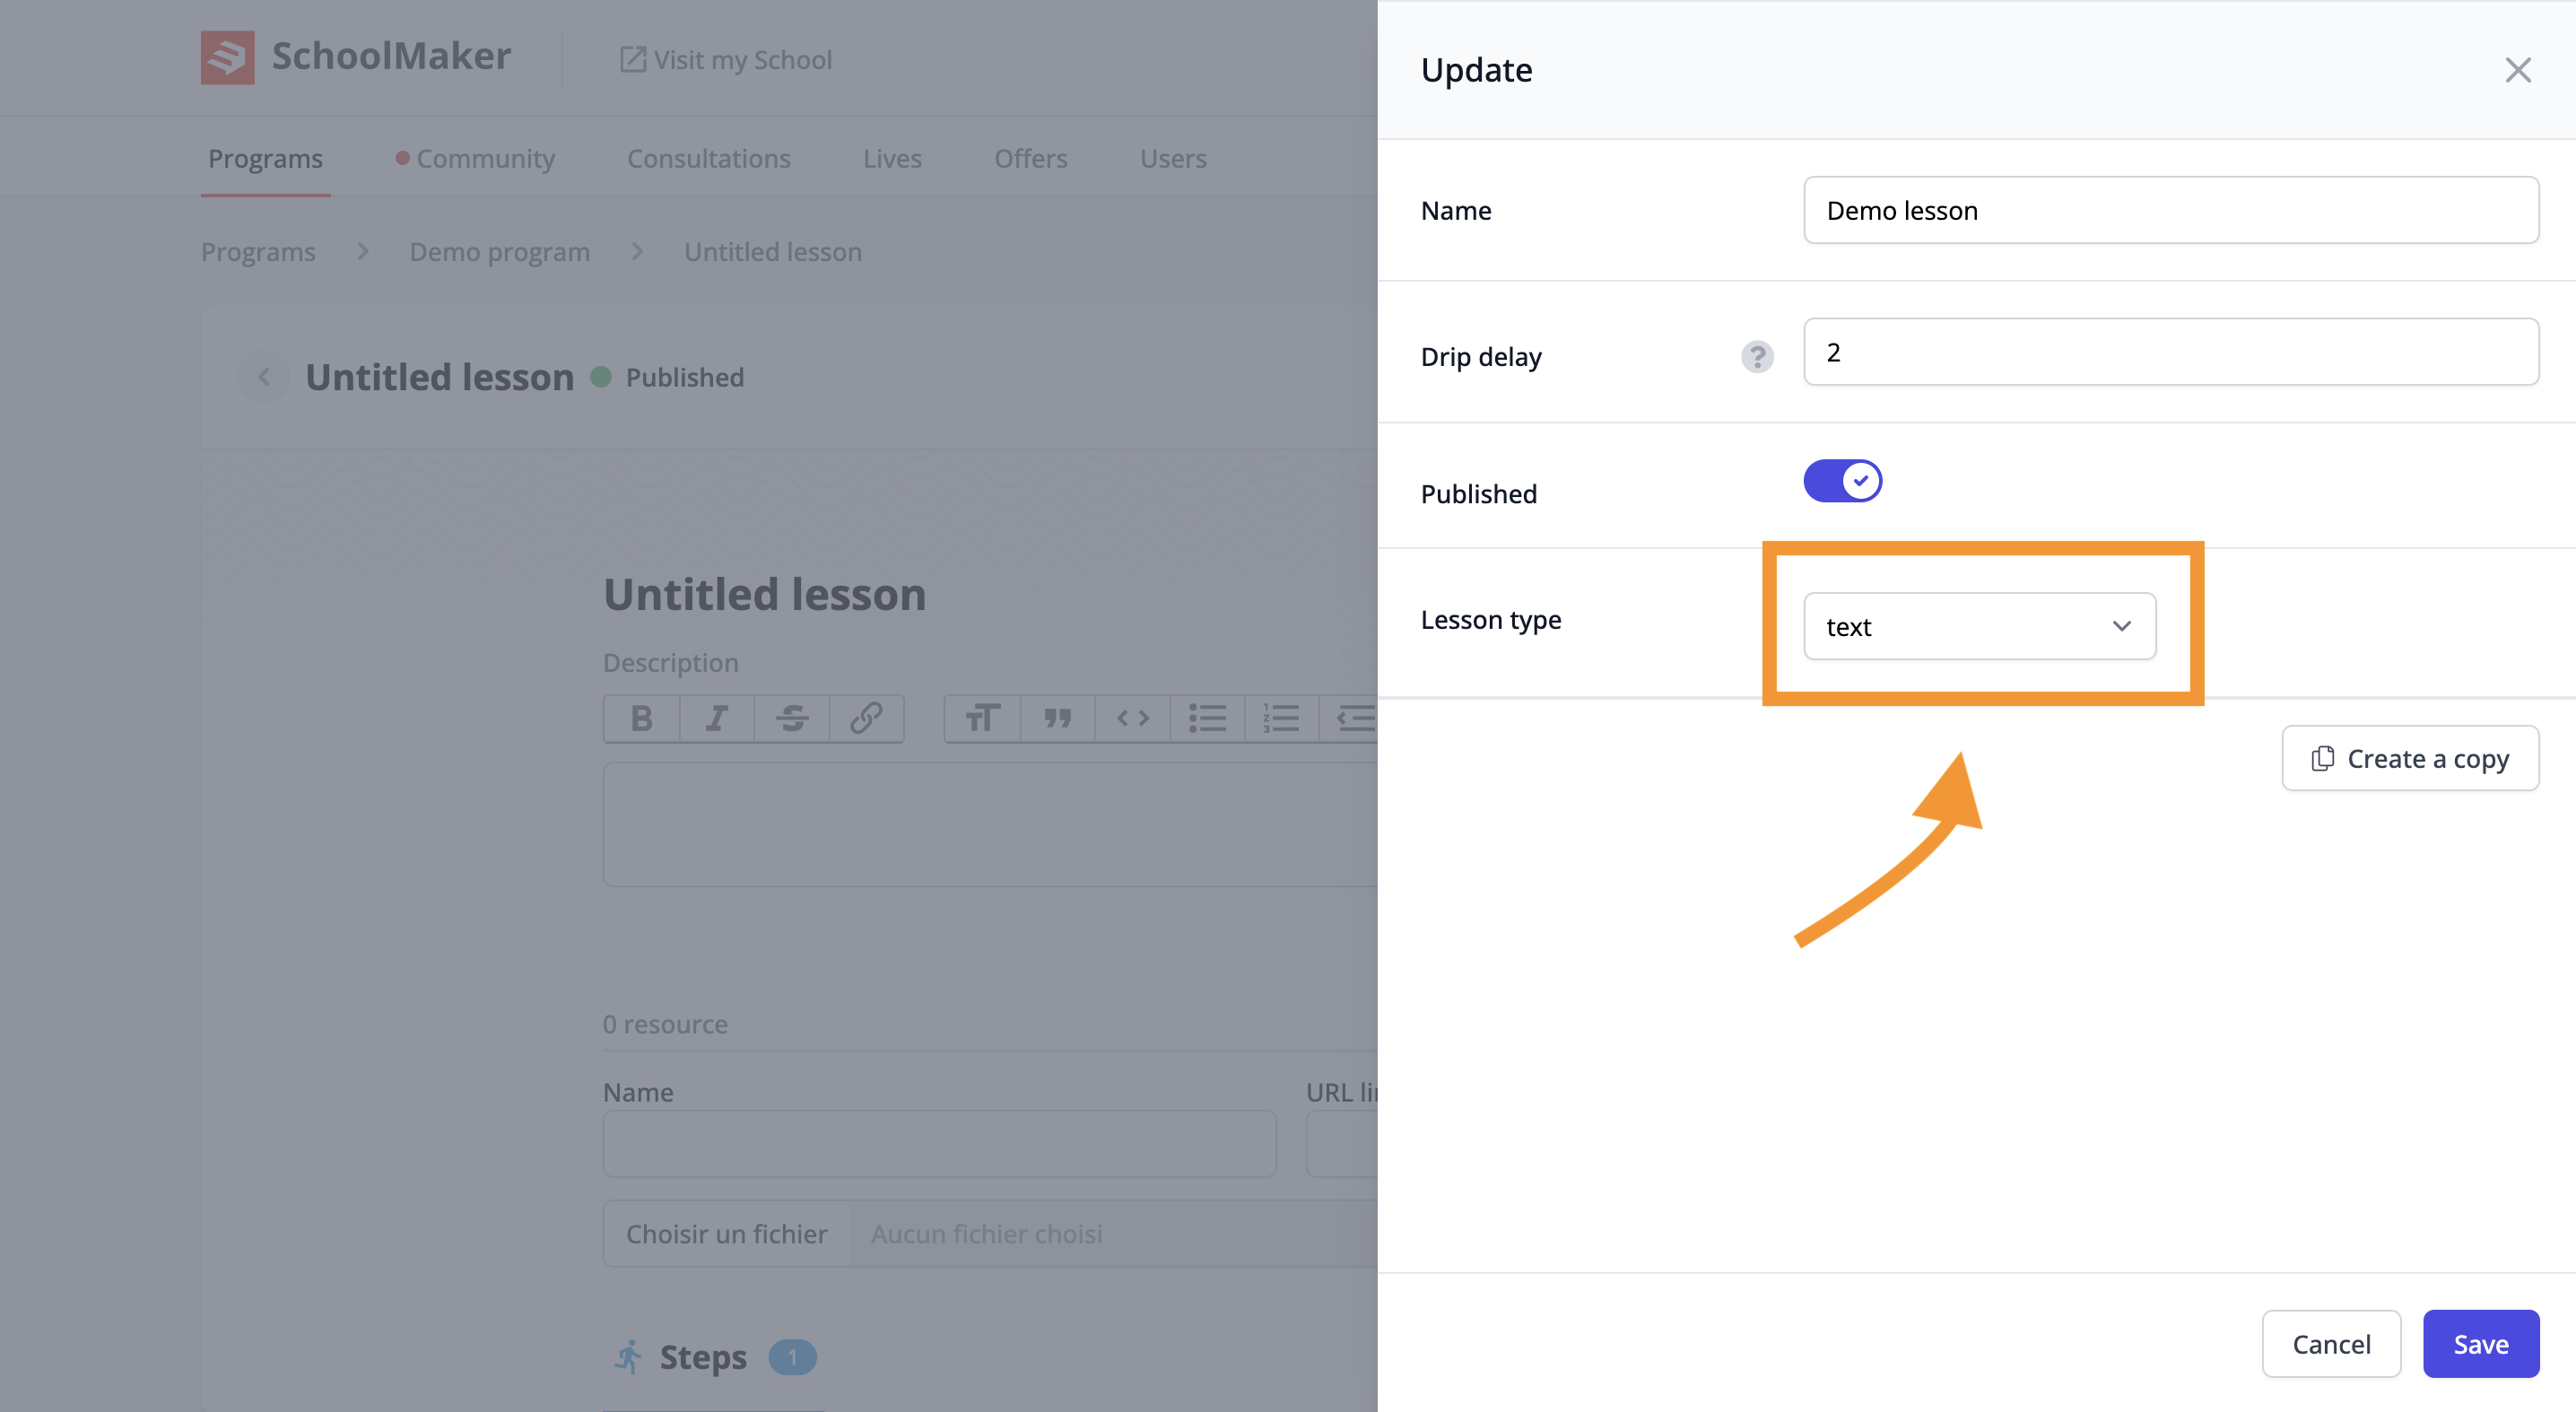
Step 5: Add content to the lesson
We will now add the lesson content. You can choose between 5 different types of content.
Step 5.1: Add "text" type content
Text: you will be able to write the course content in the "description" field once the lesson configuration is saved.
Step 5.2: Add "video" type content
Video: add the video of your choice. You have the option of uploading a video from your computer directly to schoolmaker or integrating a video hosted on another platform (YouTube, Vimeo, Wistia).

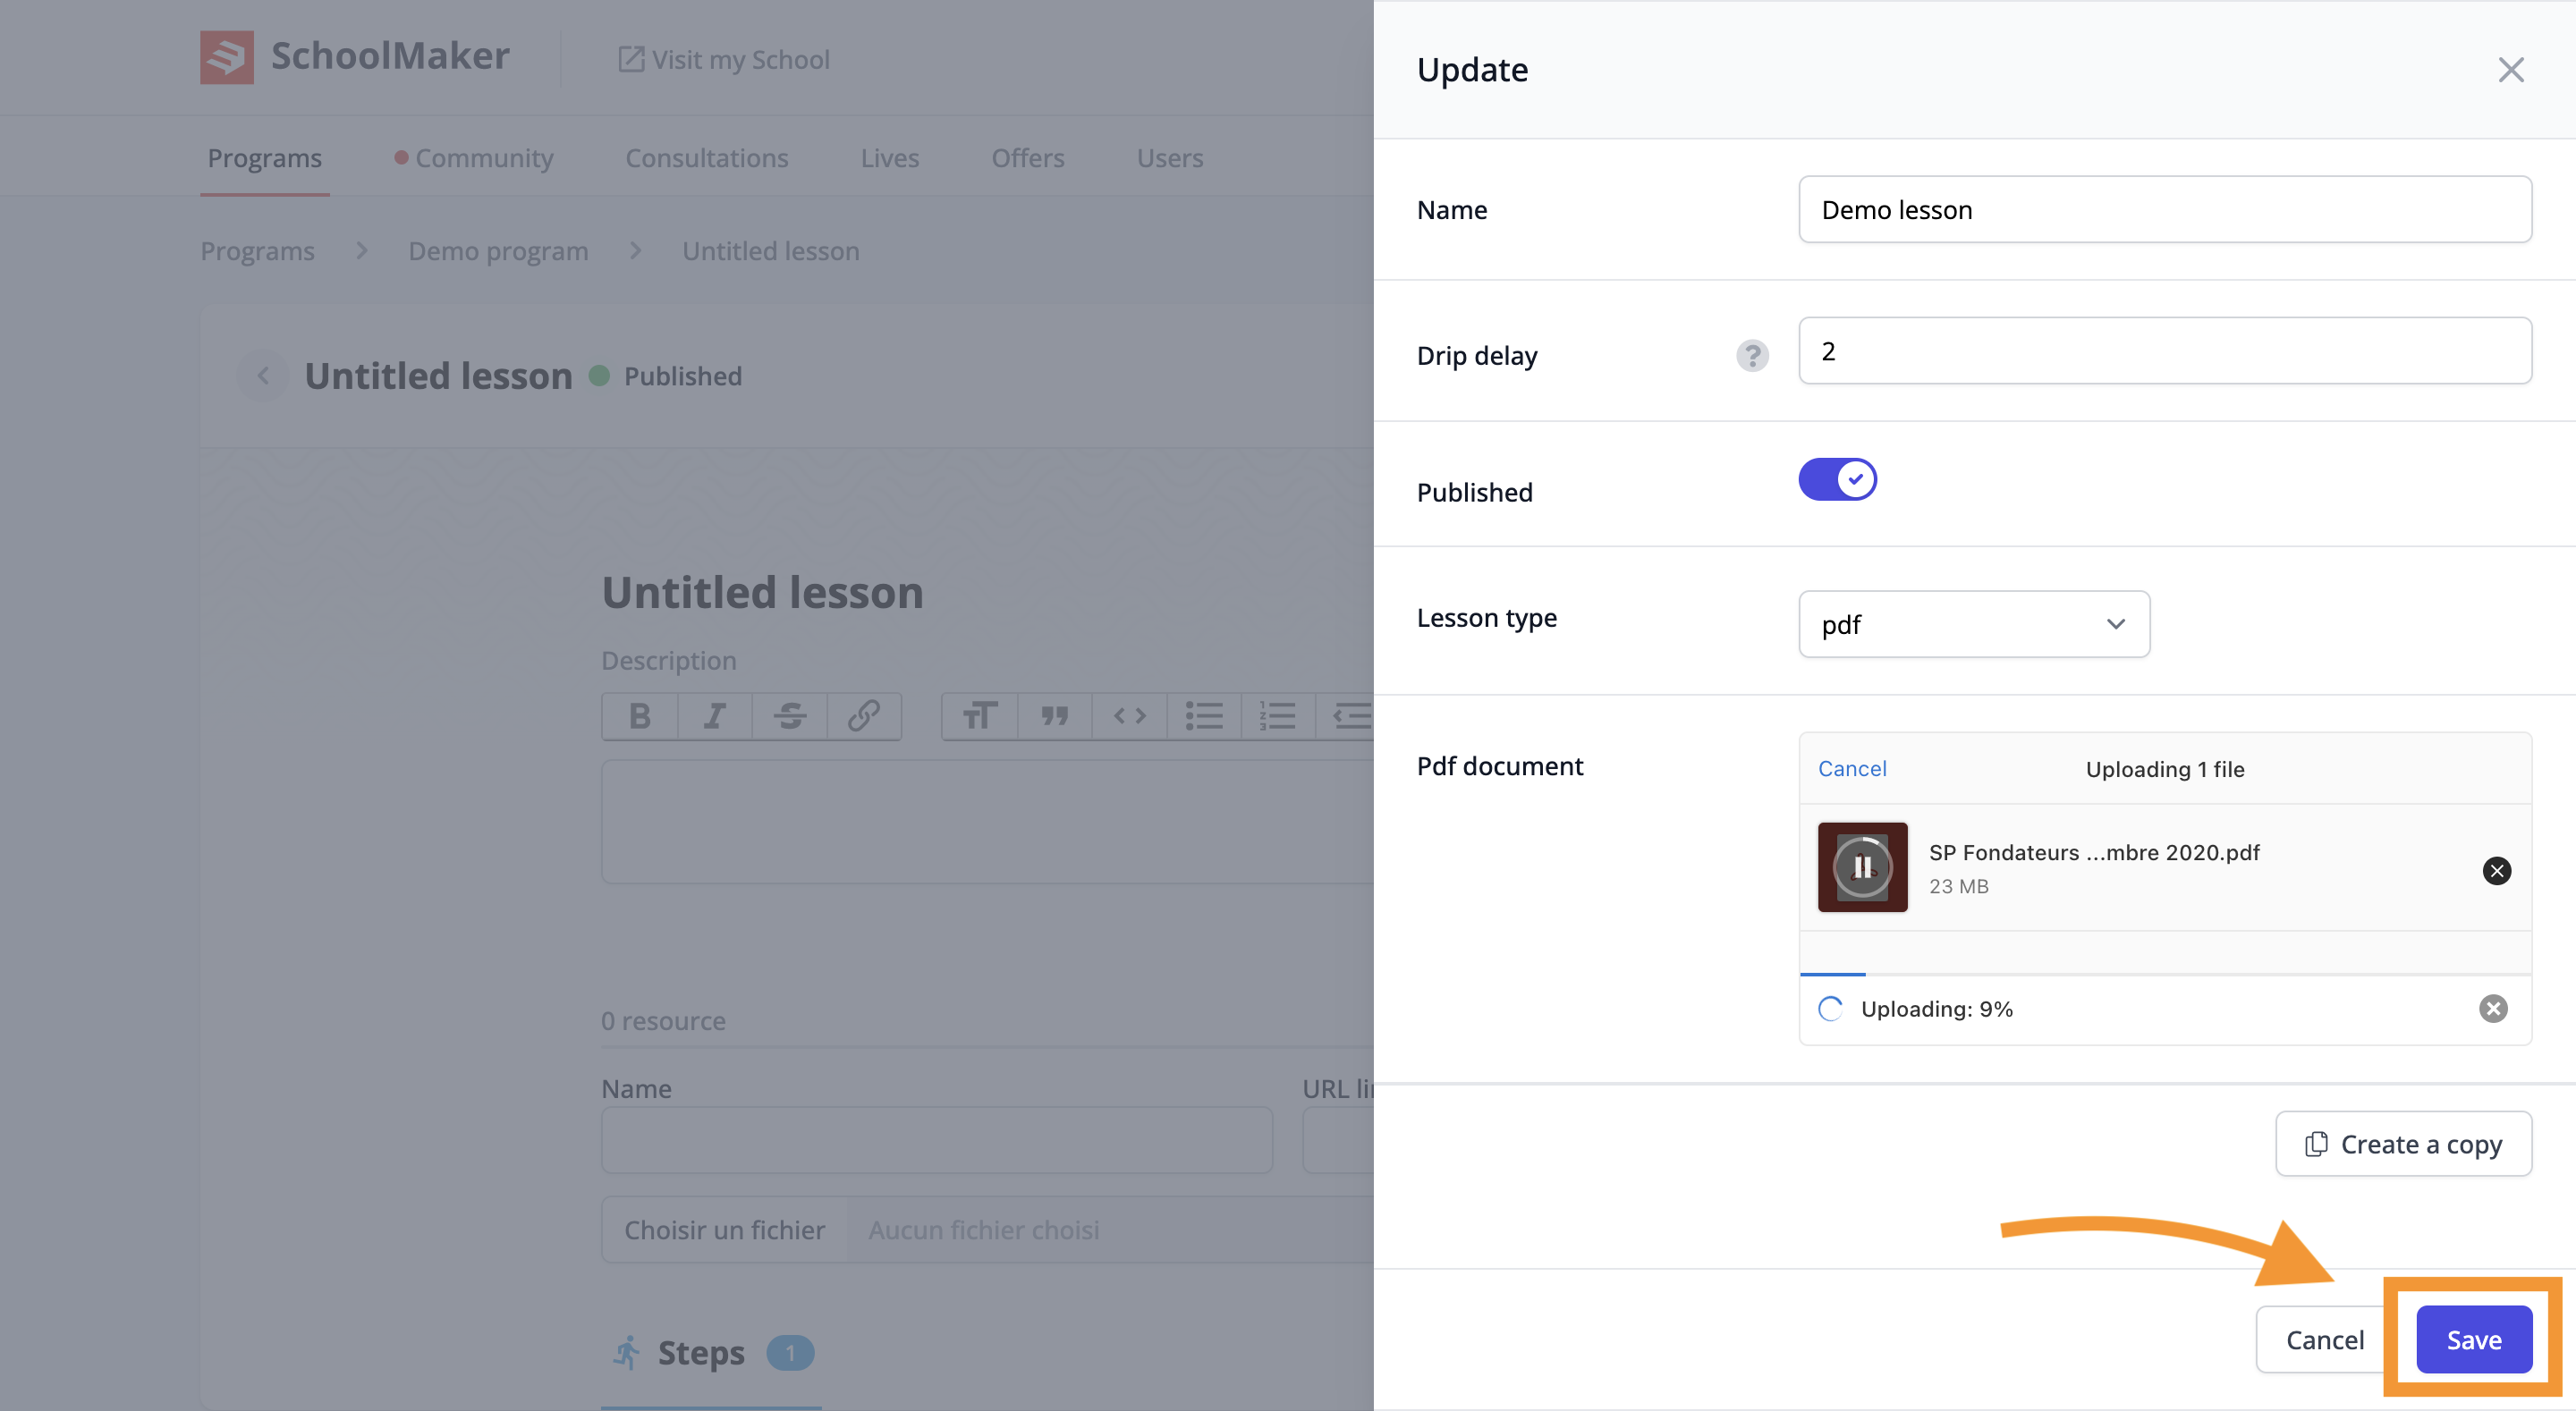
Step 5.3: Add "PDF" type content
PDF: click on "browse files" to open the window that will allow you to select the PDF of your choice from the documents on your computer.

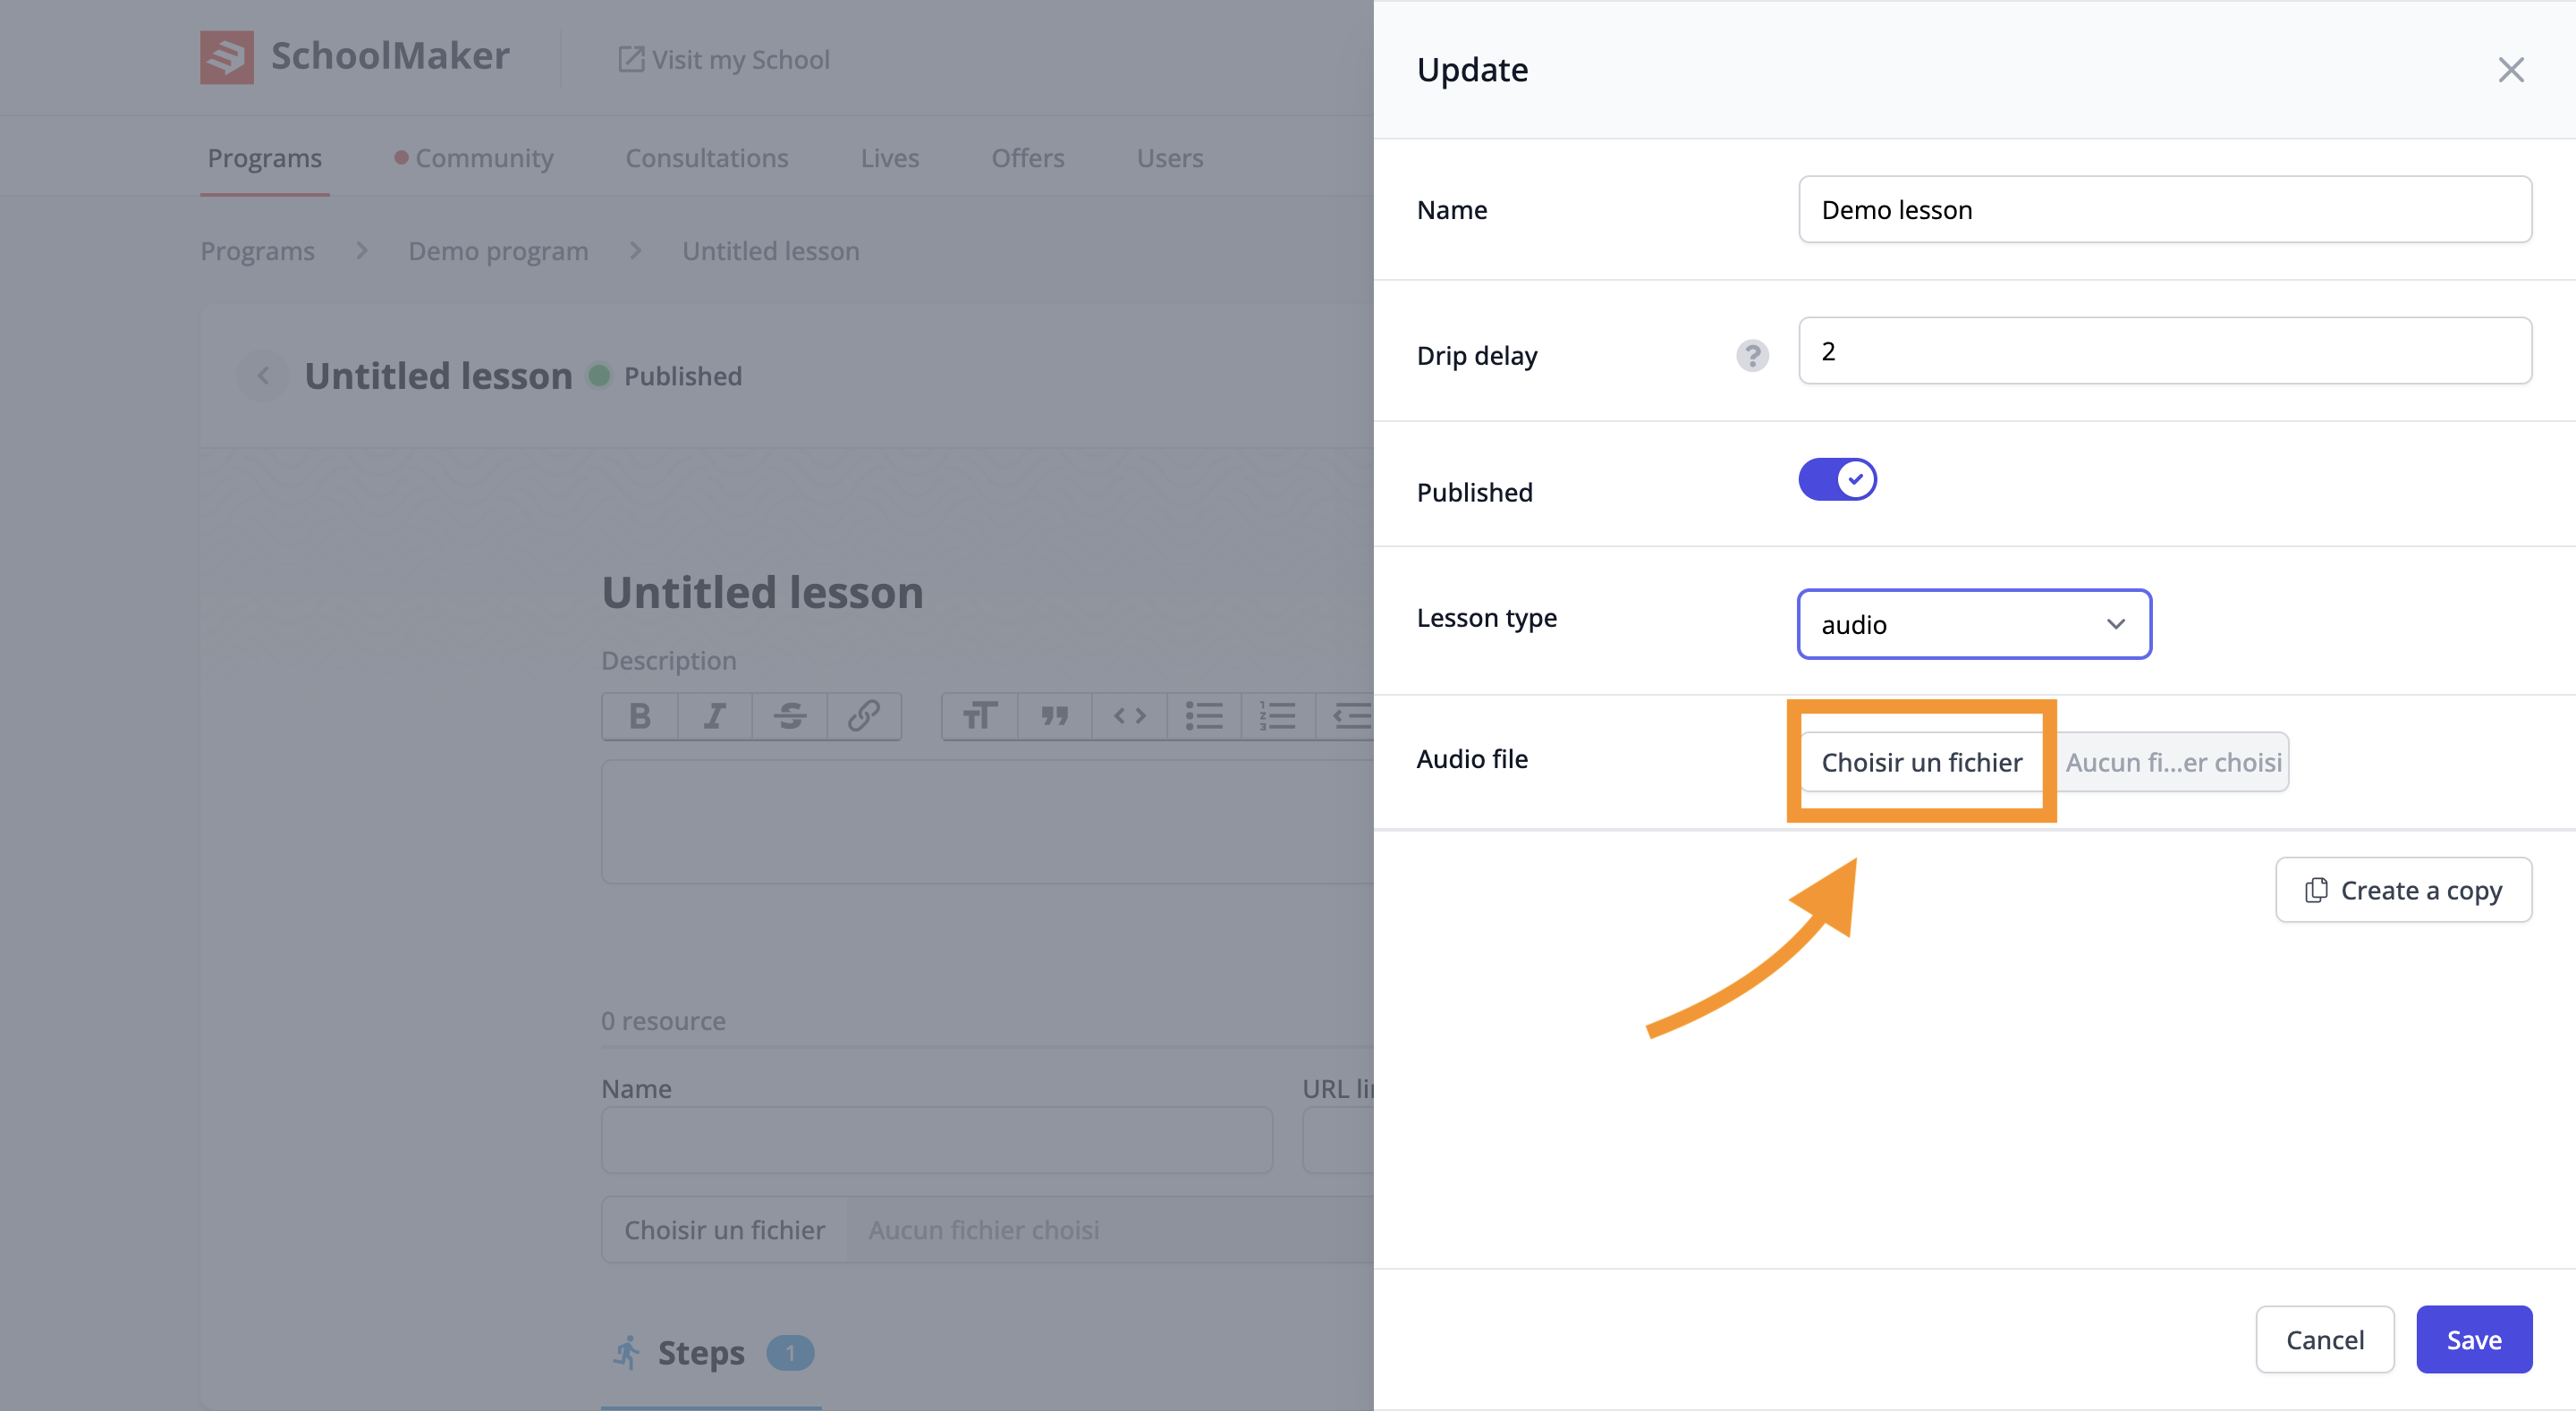
Step 5.4: Add "audio" type content
Audio: click on "choose a file" to open the window that will allow you to select the audio of your choice from the documents on your computer.
Step 5.5: Add "code" type content
Embed: in the "embed code" field, insert the code of your choice.
For example, you can integrate a Google Form, a Google Sheet spreadsheet or Genial.ly code.

Step 6: Save lesson
To save the configuration of your lesson, click on the "save" button.
Step 7: Add a description to this lesson
You can add a description to this lesson by filling in the "description" text field.
For example: "In this lesson, we will learn how to decorate a living room in 3 steps".

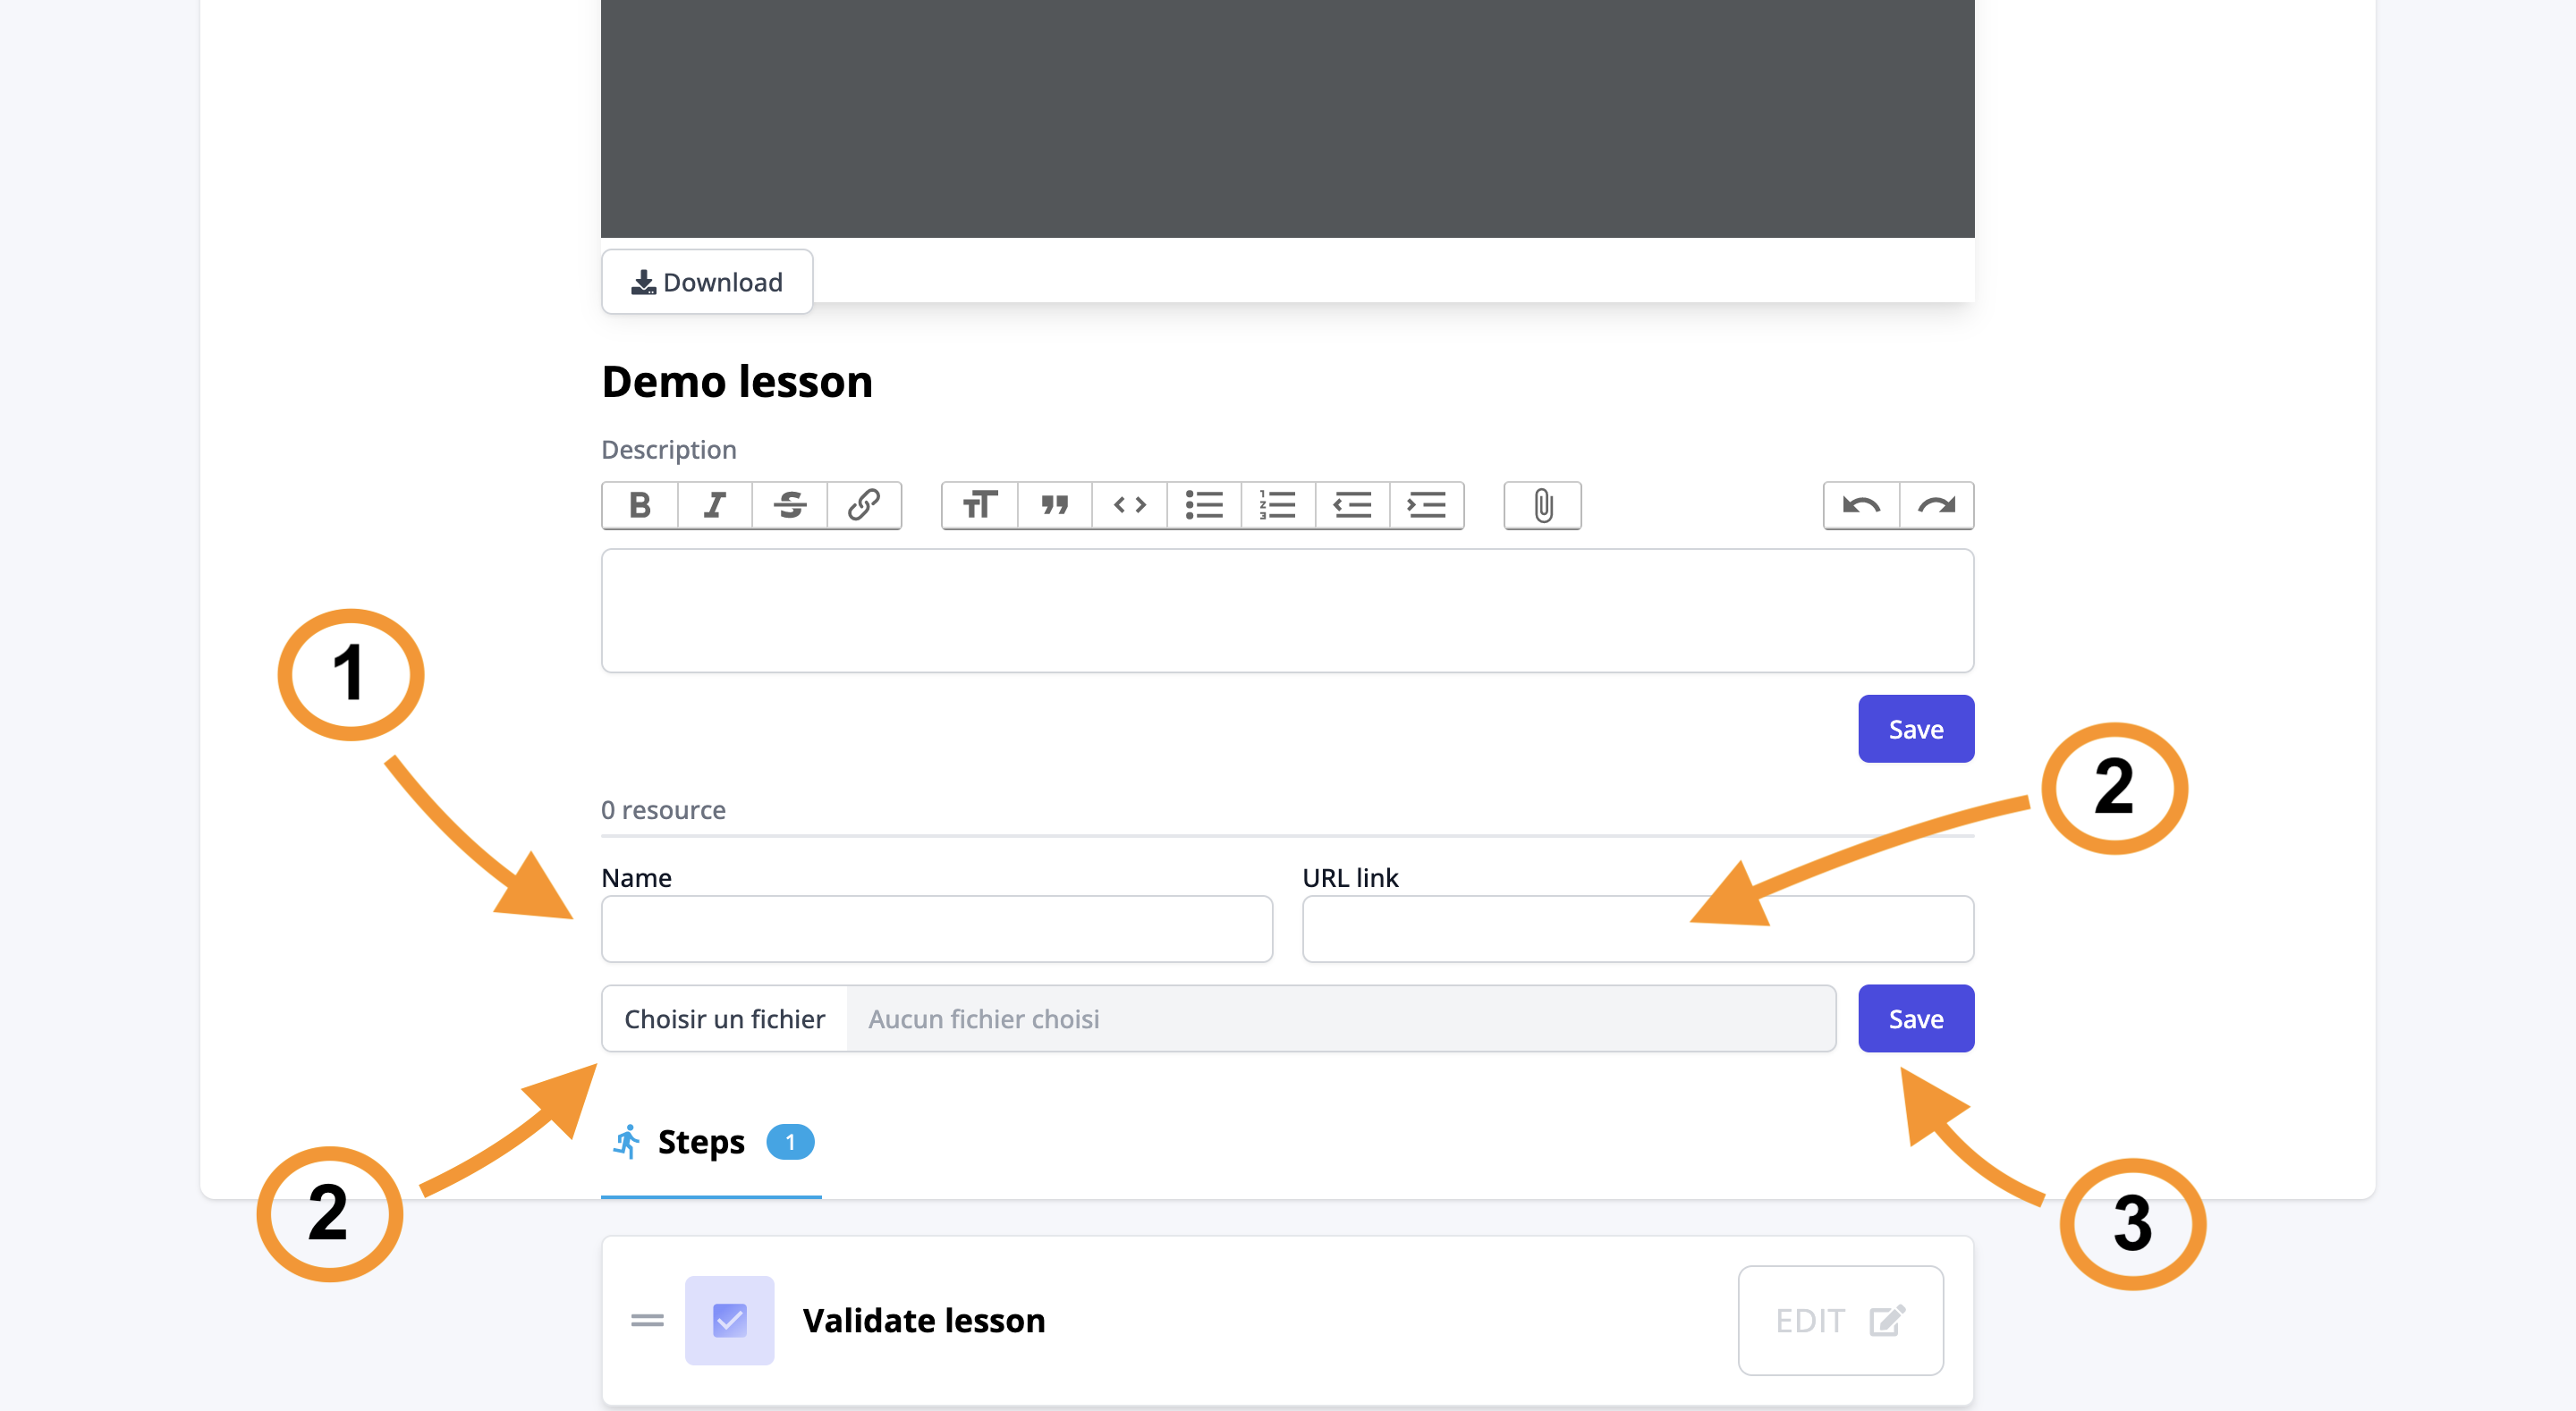
Step 8: Add resources to the lesson (optional)
1. Add the name of the resource in the "name" field.
2.1 If you want to send your member to a web page, paste the link in the field: "URL link".
2.2 If you want your members to download the resource on their computer, click on the button "choose a file" and add it from your computer.
3. To save the resource click on the "save" button.
Part 4: Create Steps
Step 1: Add a step
To create a step in your lesson, click on "add a step".

Step 2: Name the step
Add the step title in the "Title" field.
For example: "Go and buy a ton of cement".

Step 3: Add a step description
Add a description to the step in the "Description" field.
For example:
- Call a stonemason and make an appointment
- Meet the specialist on site
- Place an order

Step 4: Select a step type
Choose the type of step you want to create.
Click here to learn more about the different step types and how to configure them.

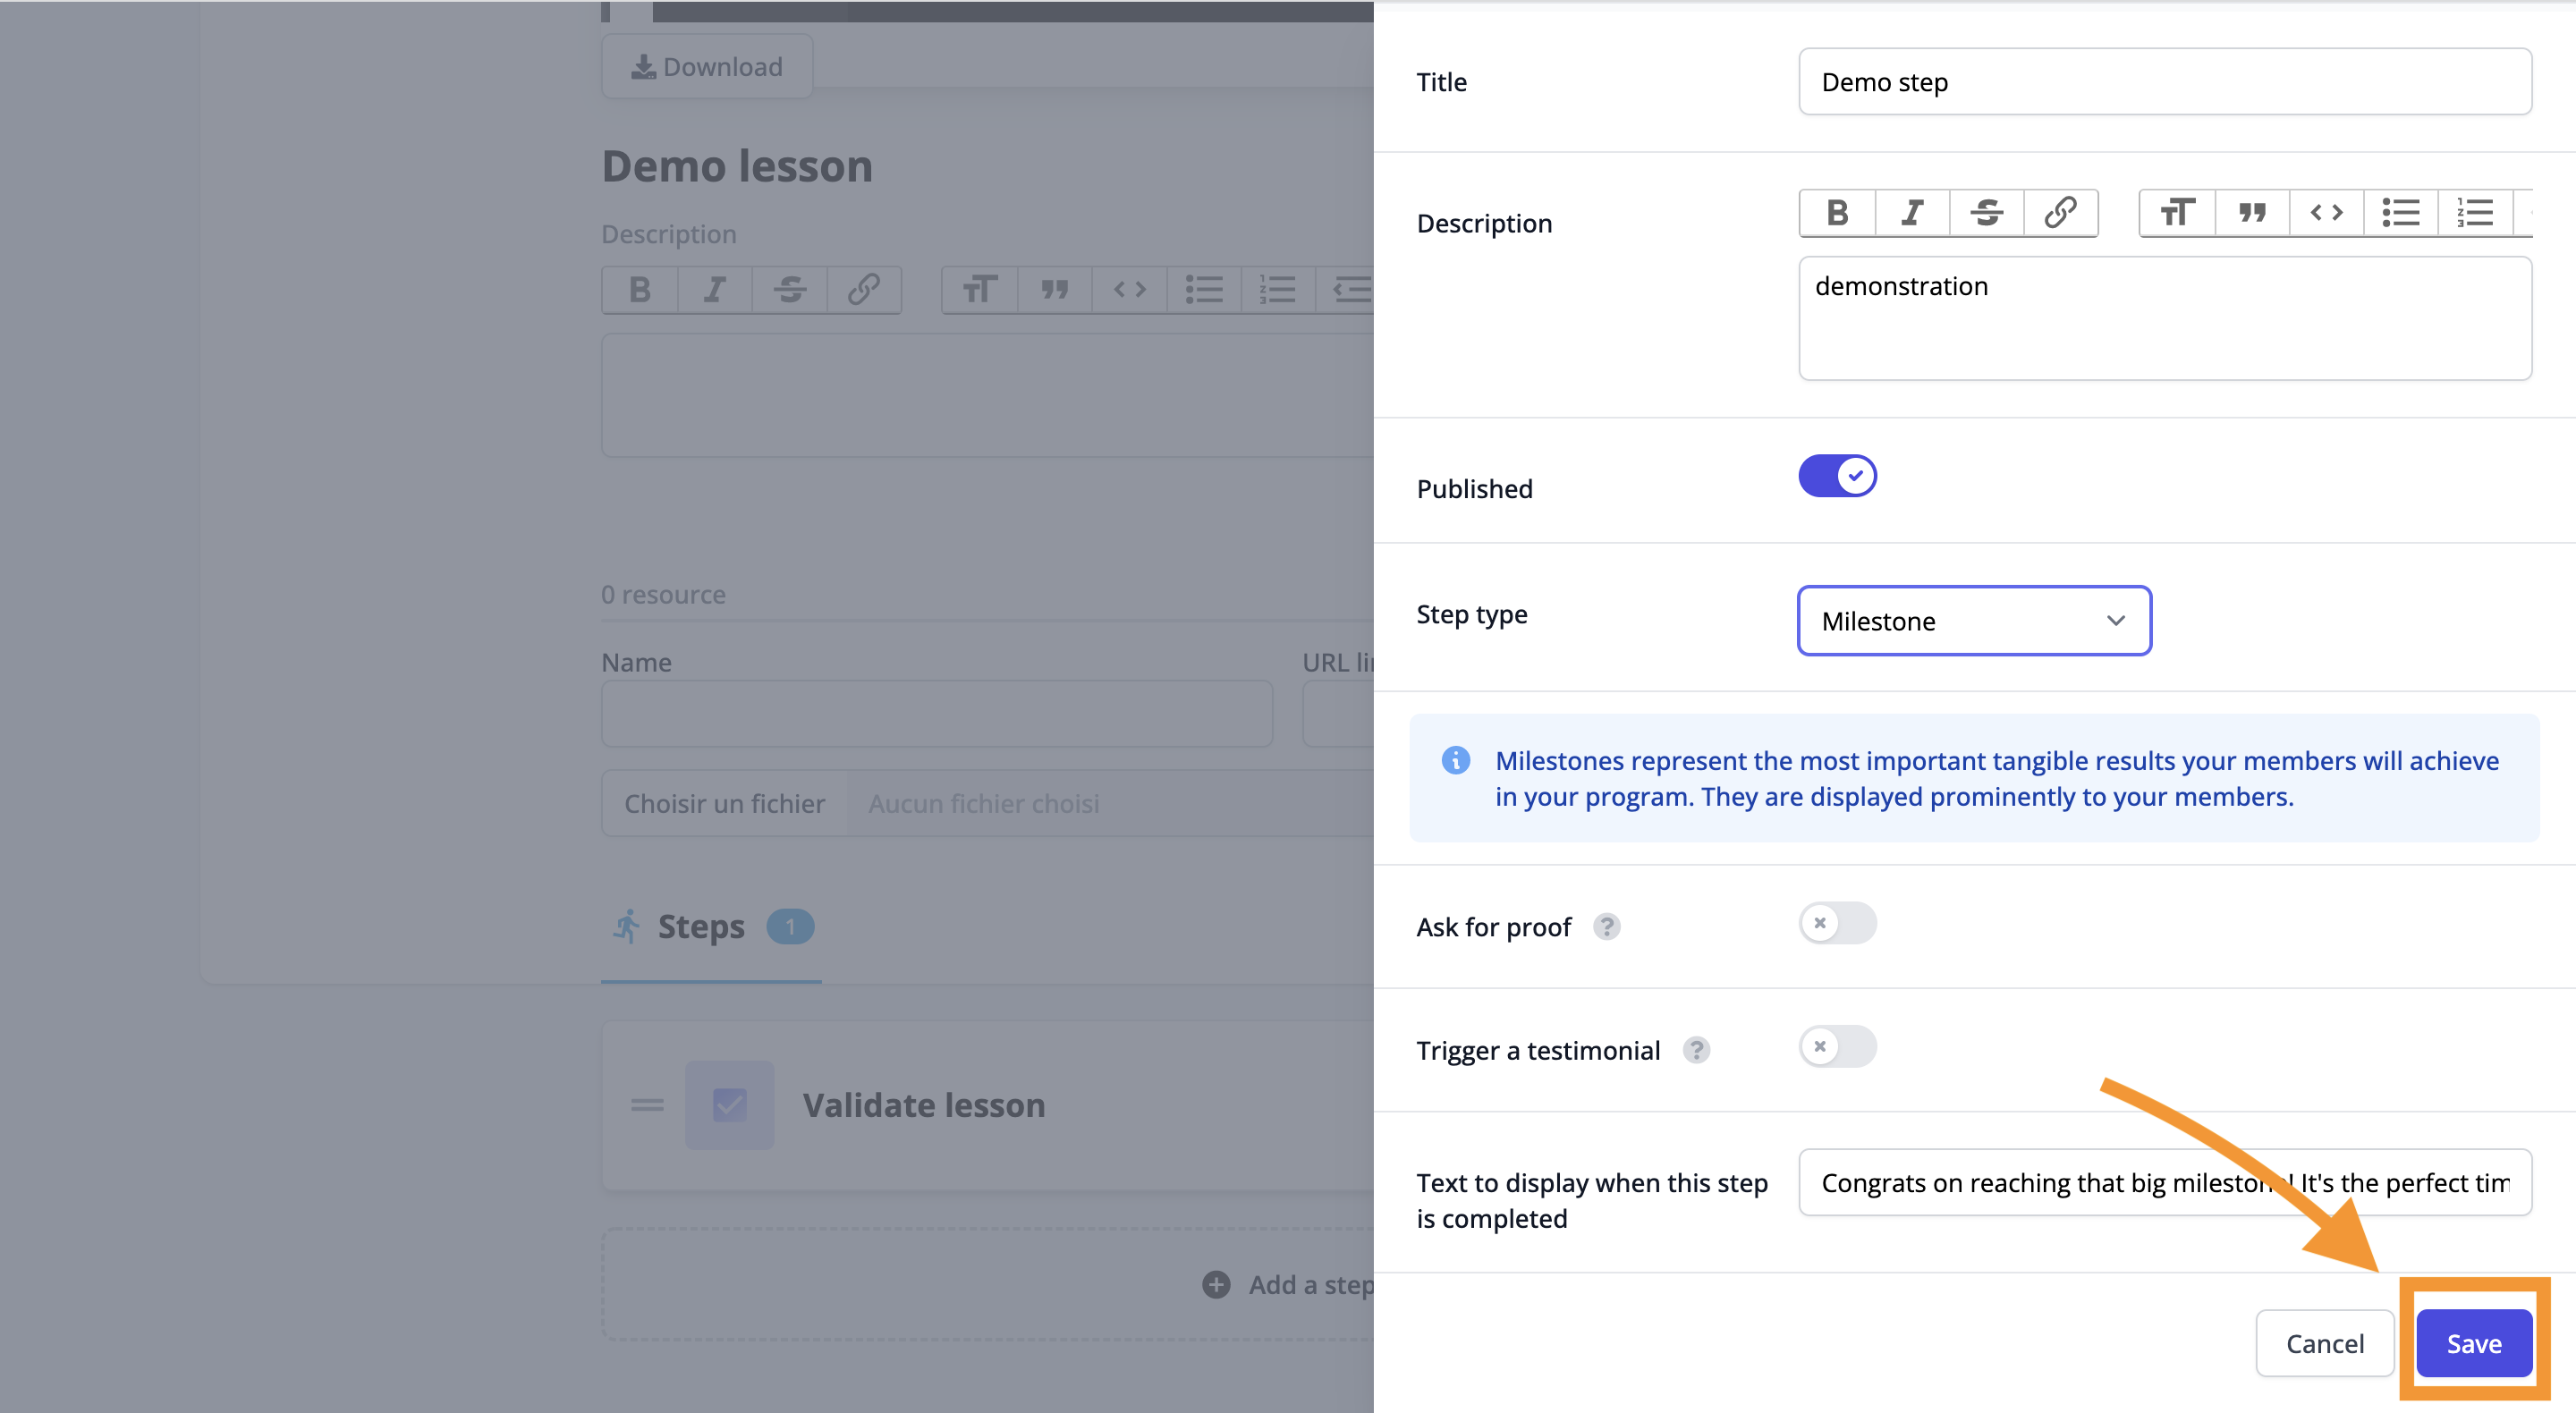
Step 5: Configure the step according to its type
Configure the step according to the type of step you have chosen.
For example, if you have chosen the "Milestone" type, you have the possibility of modifying the text to be displayed to request a testimonial.
Click here to learn more about milestone configuration.

Step 6: Save step
Click on the "save" button to save this step.
You now know how to configure courses on SchoolMaker!
It's now time to add all of lessons and steps to your section(s).
You can come back to this chapter as you are uploading your next sections if you need reminders.
How to create and configure offers
Now that your community, and program is configured, it's time to put them all together in an Offer your audience will be able to buy from you.
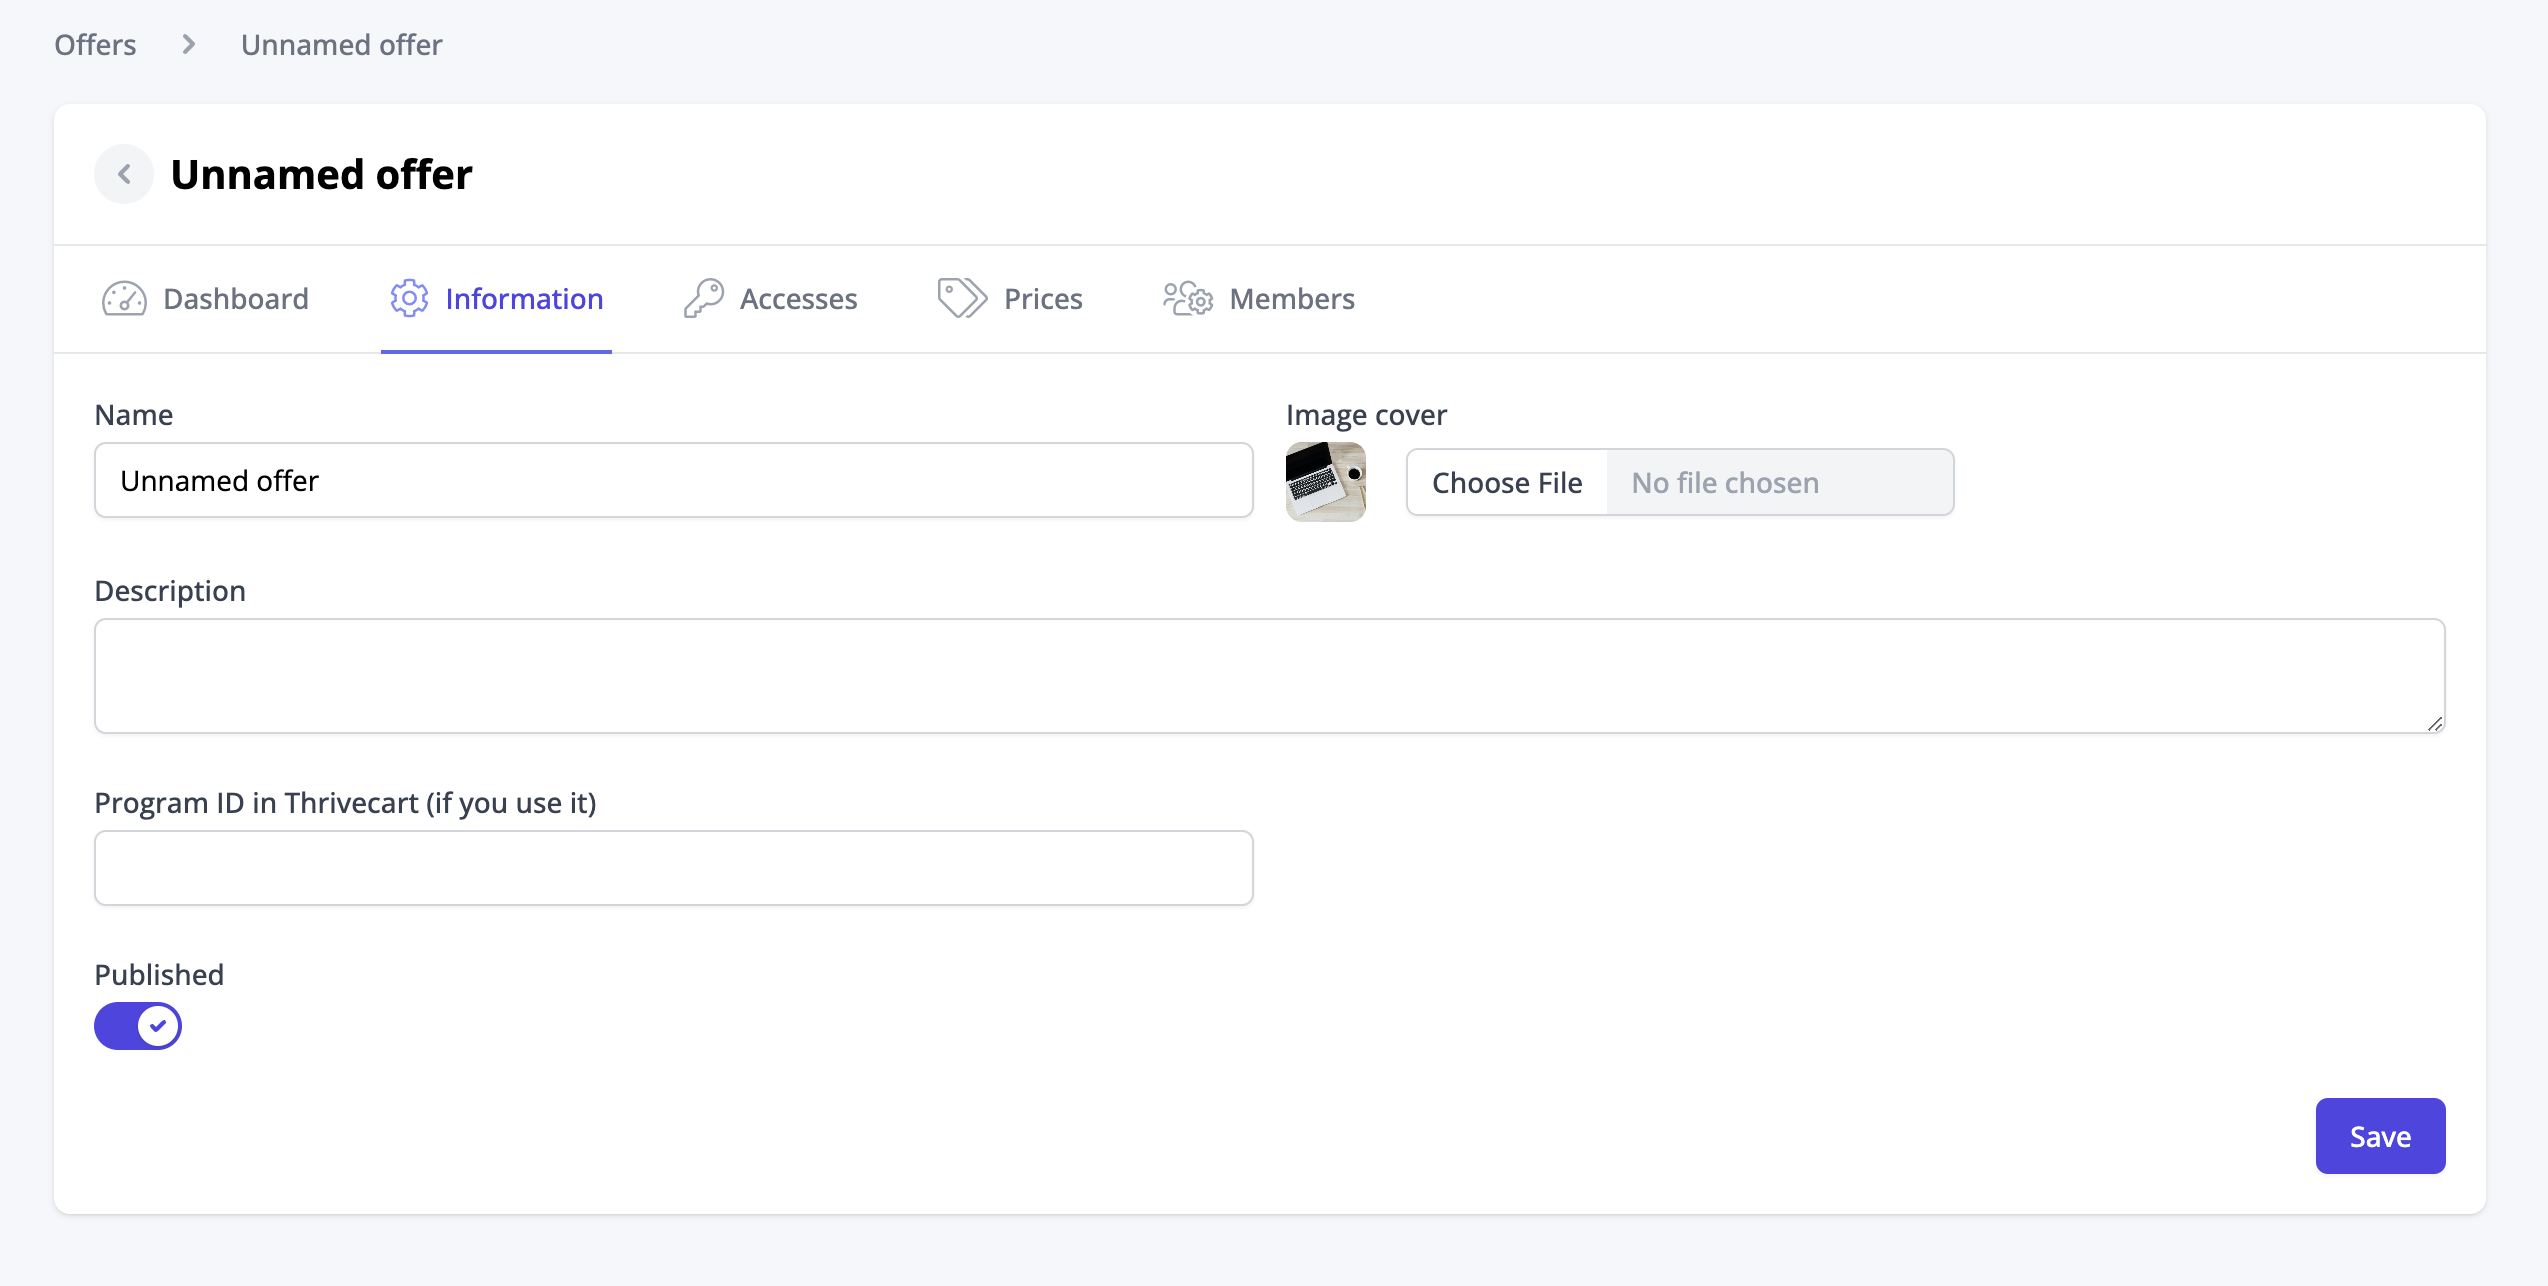
To do so, go to the "Offers" tab and click "New offer".

Then, complete your offer information with:
- The name of your course
- A summary of what a customer gets by buying your offer (for example, your course section + a lifetime access to the community)
- Your offer image (use a square image)
- Add your Thrivecart Program ID if you use it for checkout
Then click on "Save"
Go to the "Accesses" tab and add your course program, space, and choose access durations (I recommend leaving Lifetime for both).
We don't need to overcomplicate things with consultations and lives for now.

You can then go to the "Prices" tab to choose your program's pricing with stripe.

Finally, your school is now completely set up, congratulations! ✨
You can contact our support at support@schoolmaker.co if you need any help with the setup of your school, or if you have any questions!
(can change CTA here to "start free trial")


